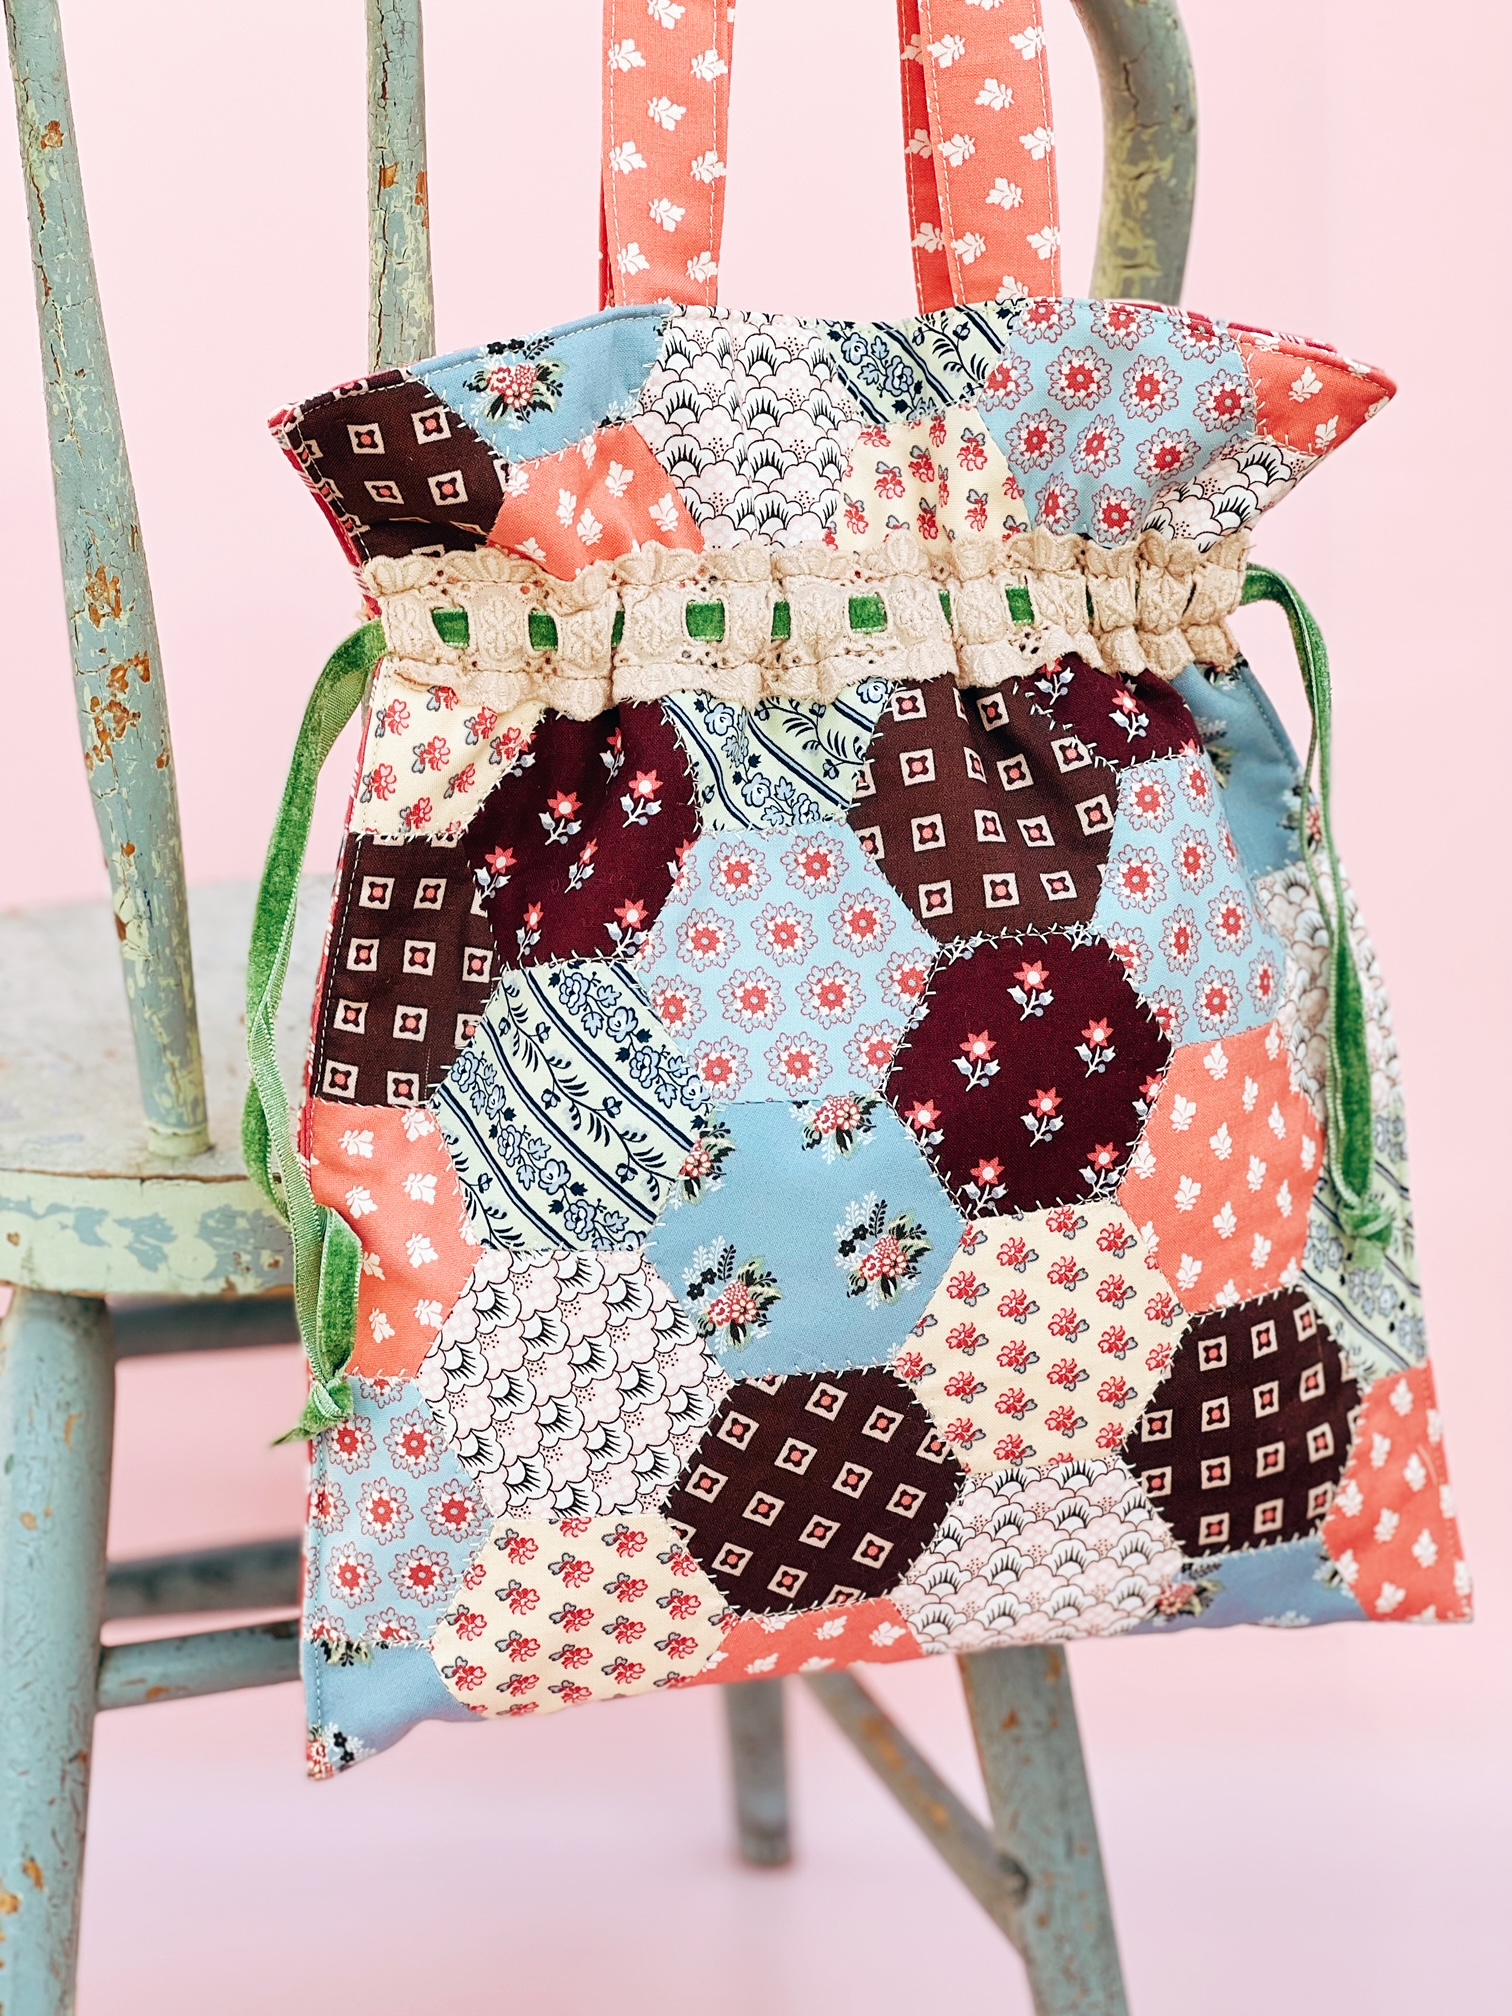
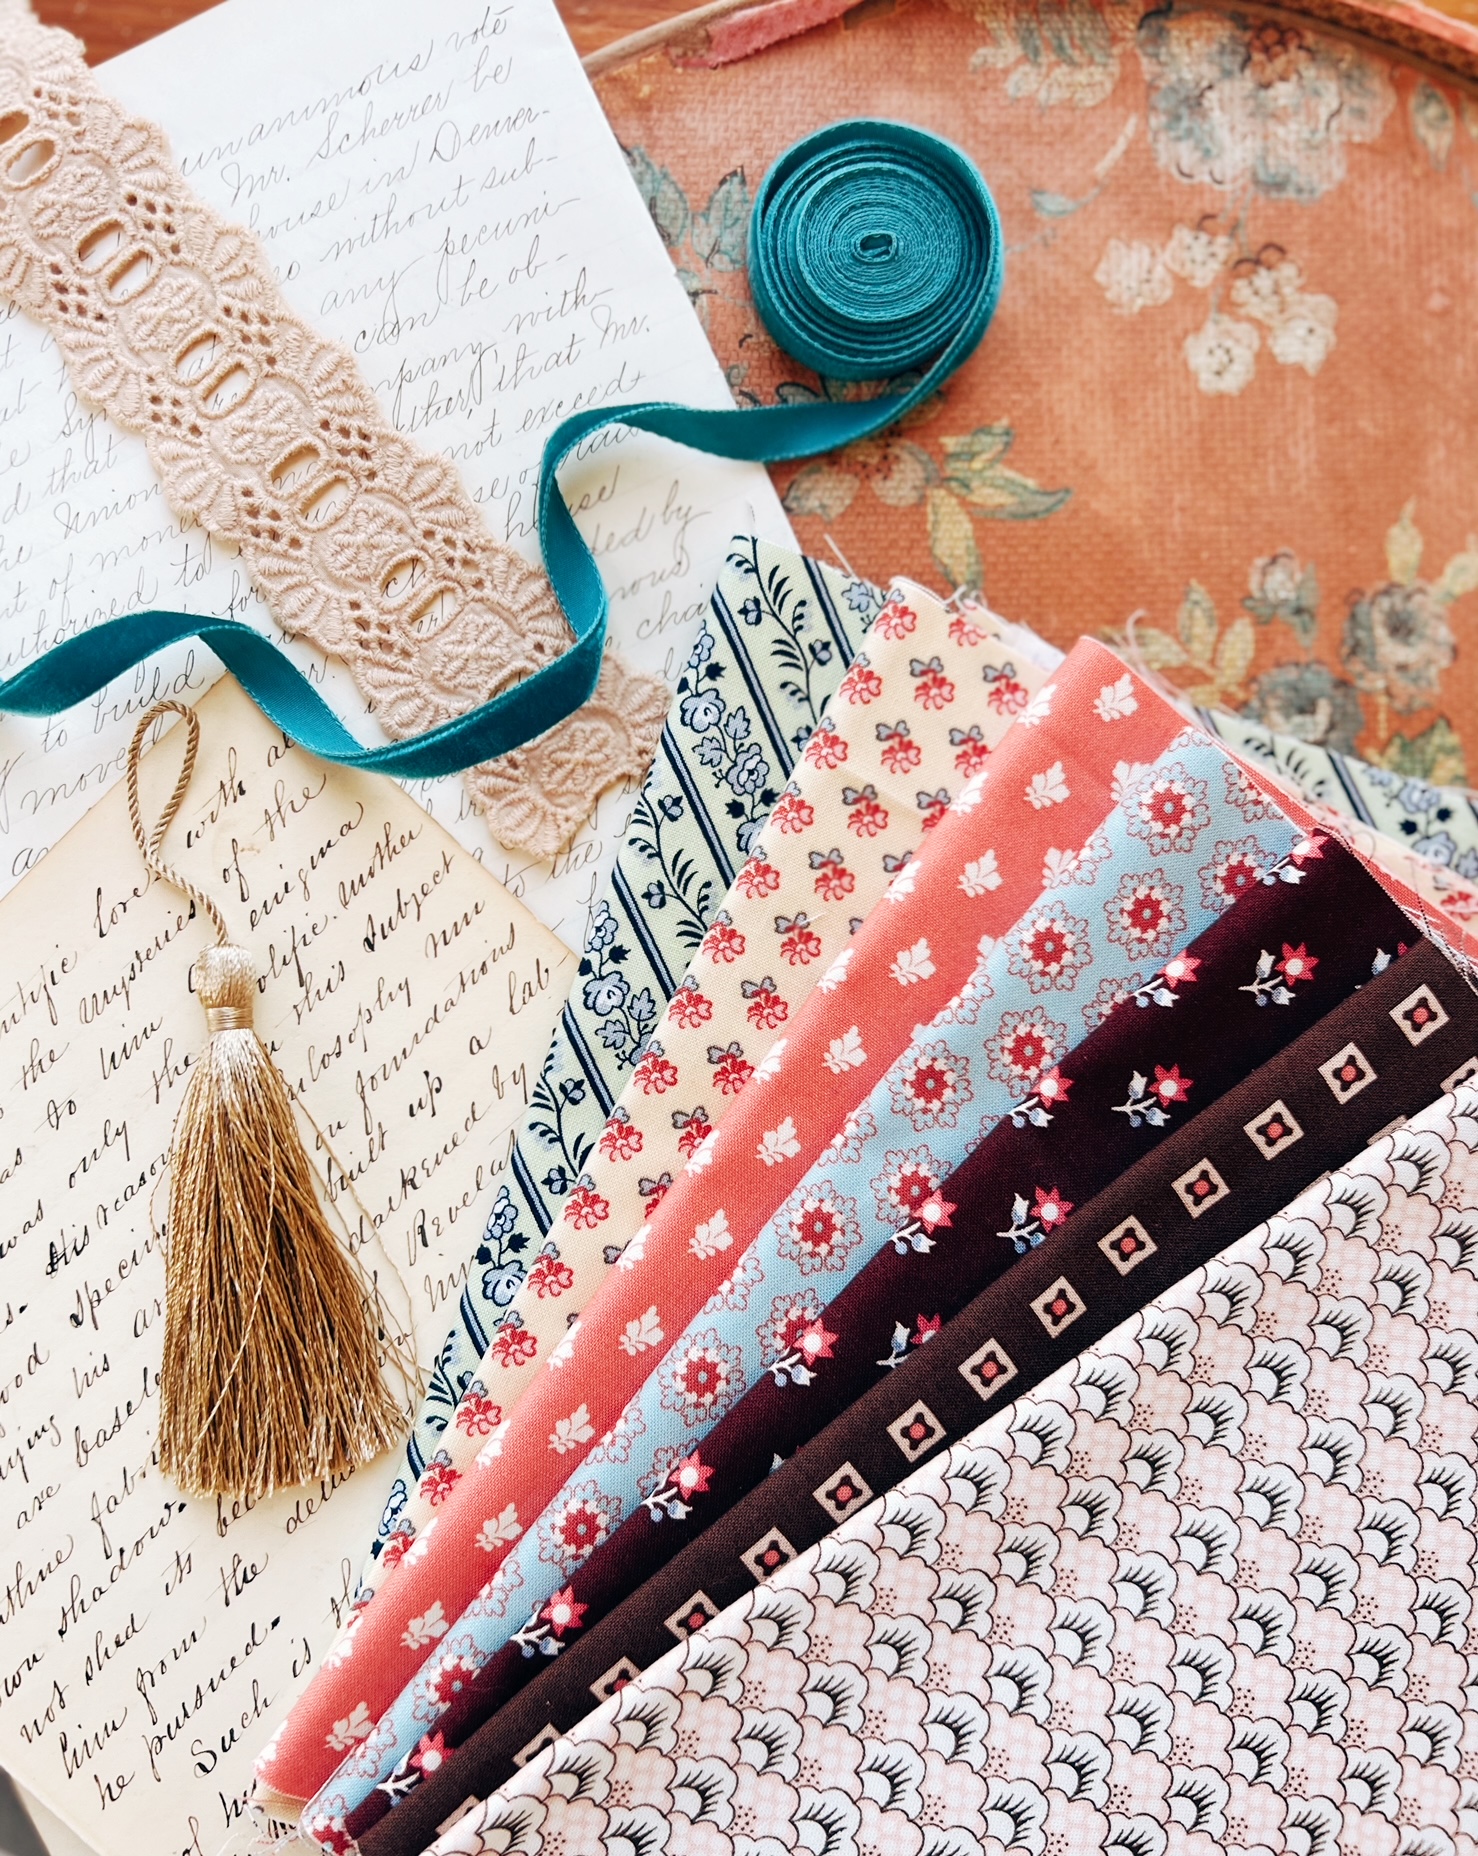
Hi friends! It's Karen from Creamcraft Goods. I'm excited to share my latest project for the latest licensed Jane Austen collection from Riley Blake Designs -Sense and Sensibility. If you are a Jane Austen fan like me, you will love this beautifully curated collection of prints taken directly from the original Jane Austen quilt.
For this project I wanted to create something that I think one of her characters would use or even Jane herself! This Pretty Drawstring Tote can hold your everyday treasures, a book or two, journal, and more!
For the body, I made a large hexagon panel which I stitched together and machine quilted using a decorative stitch. I added tea-dyed eyelet lace (which I dyed myself, to give it an antique look) to hold the velvet ribbon drawstring.
I hope you enjoyed my project and you are inspired to create beautiful things with this lovely collection. Sense and Sensibility will start shipping in October, so check to see if your favorite shop will carry it.
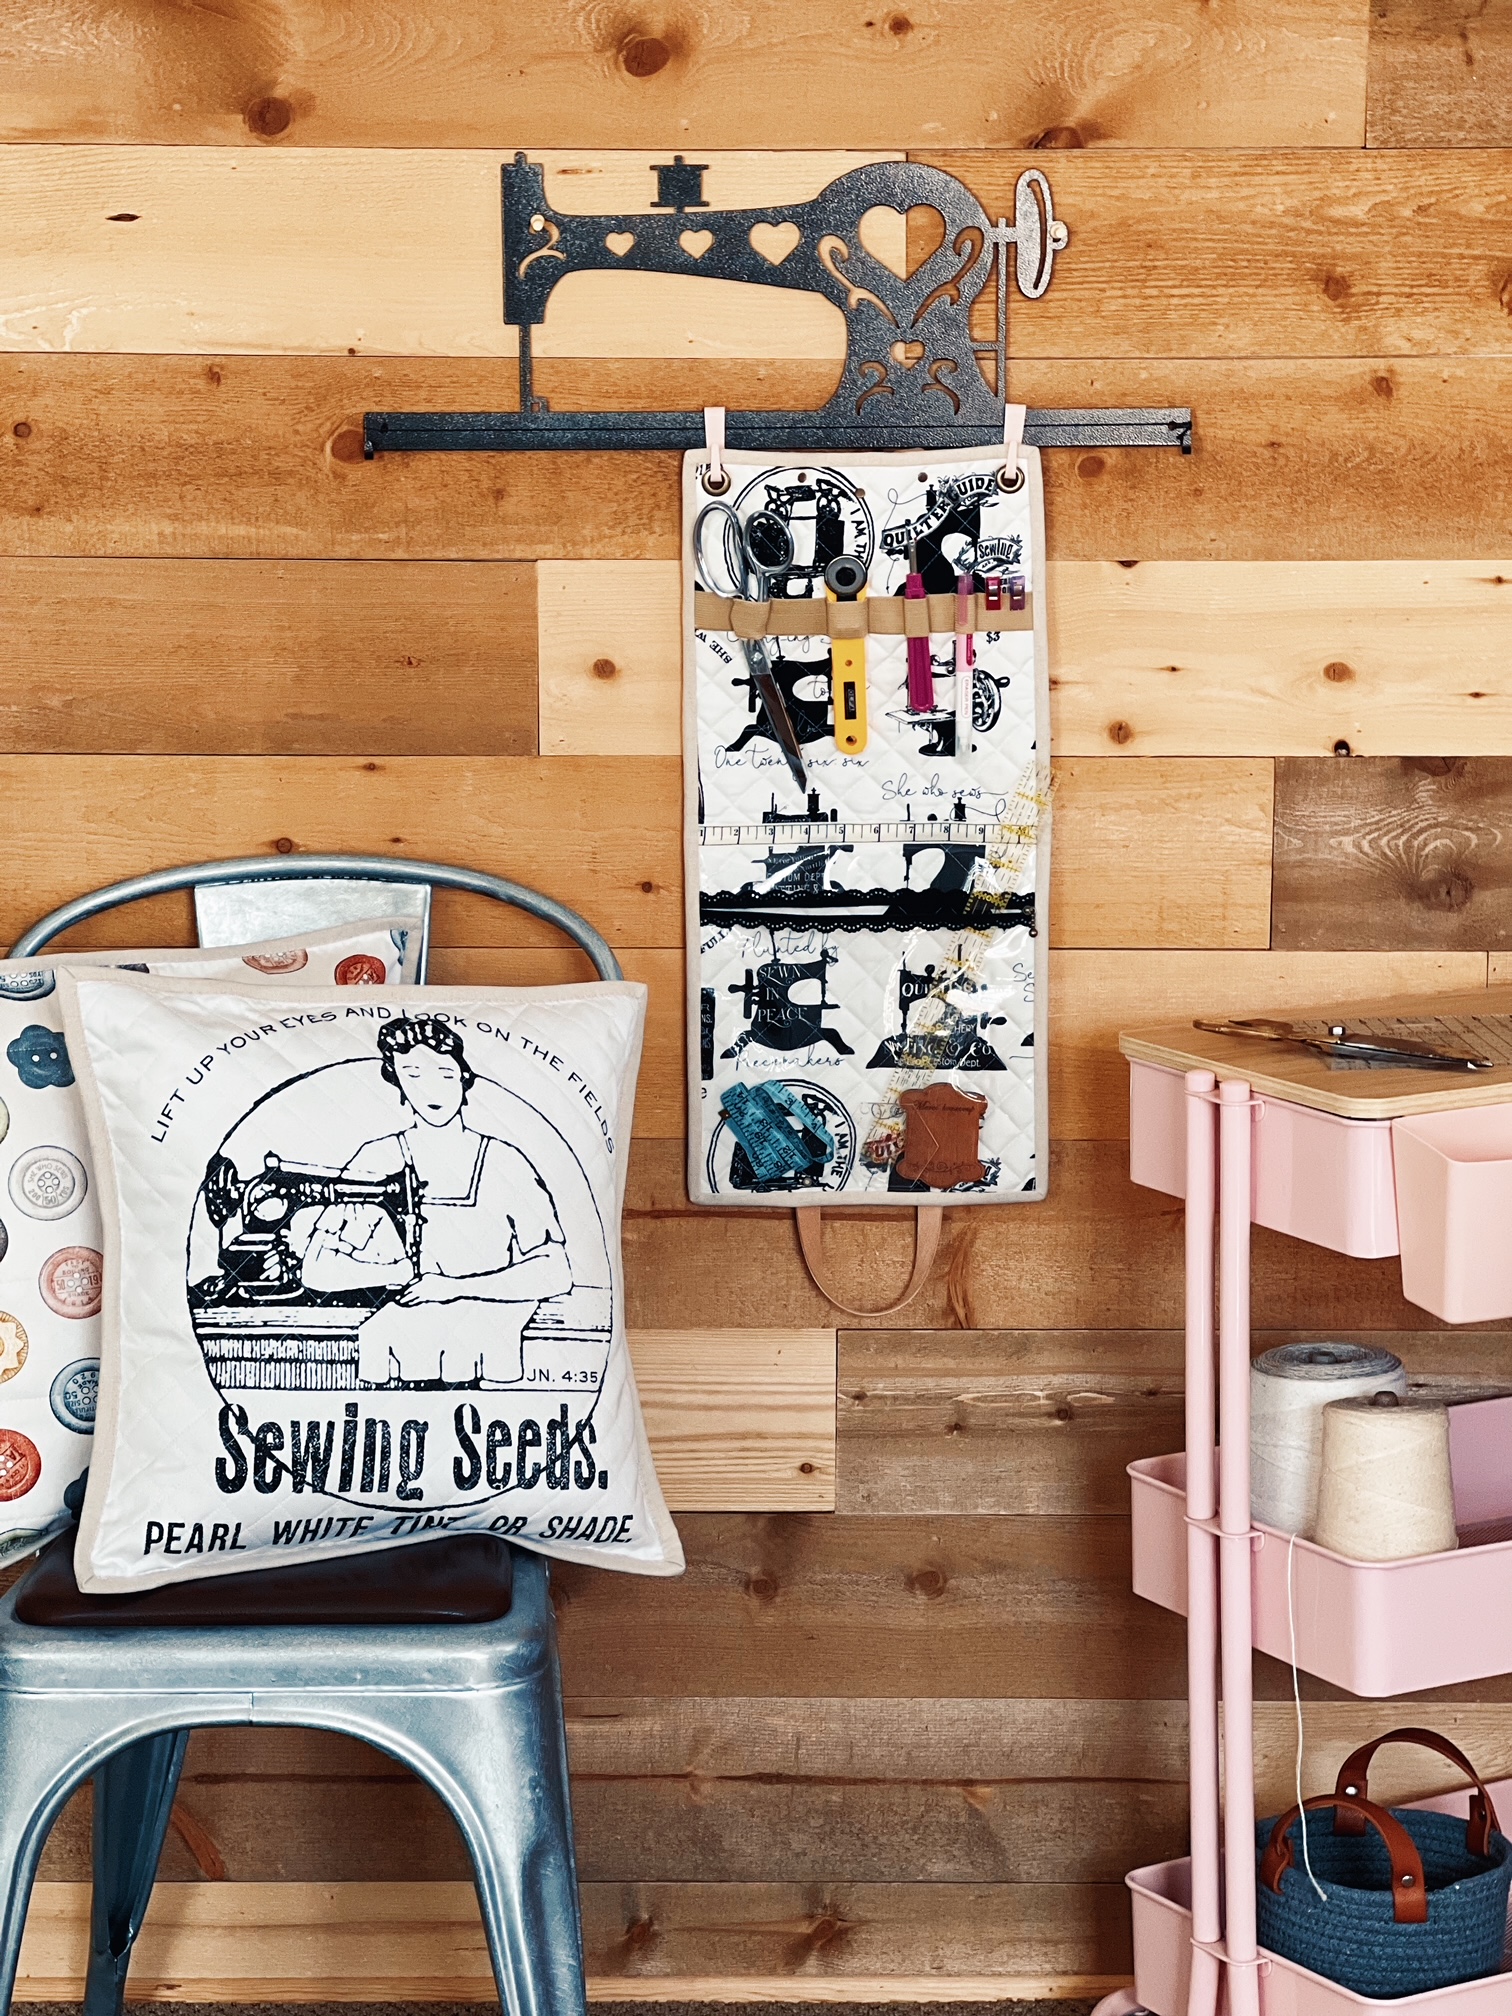
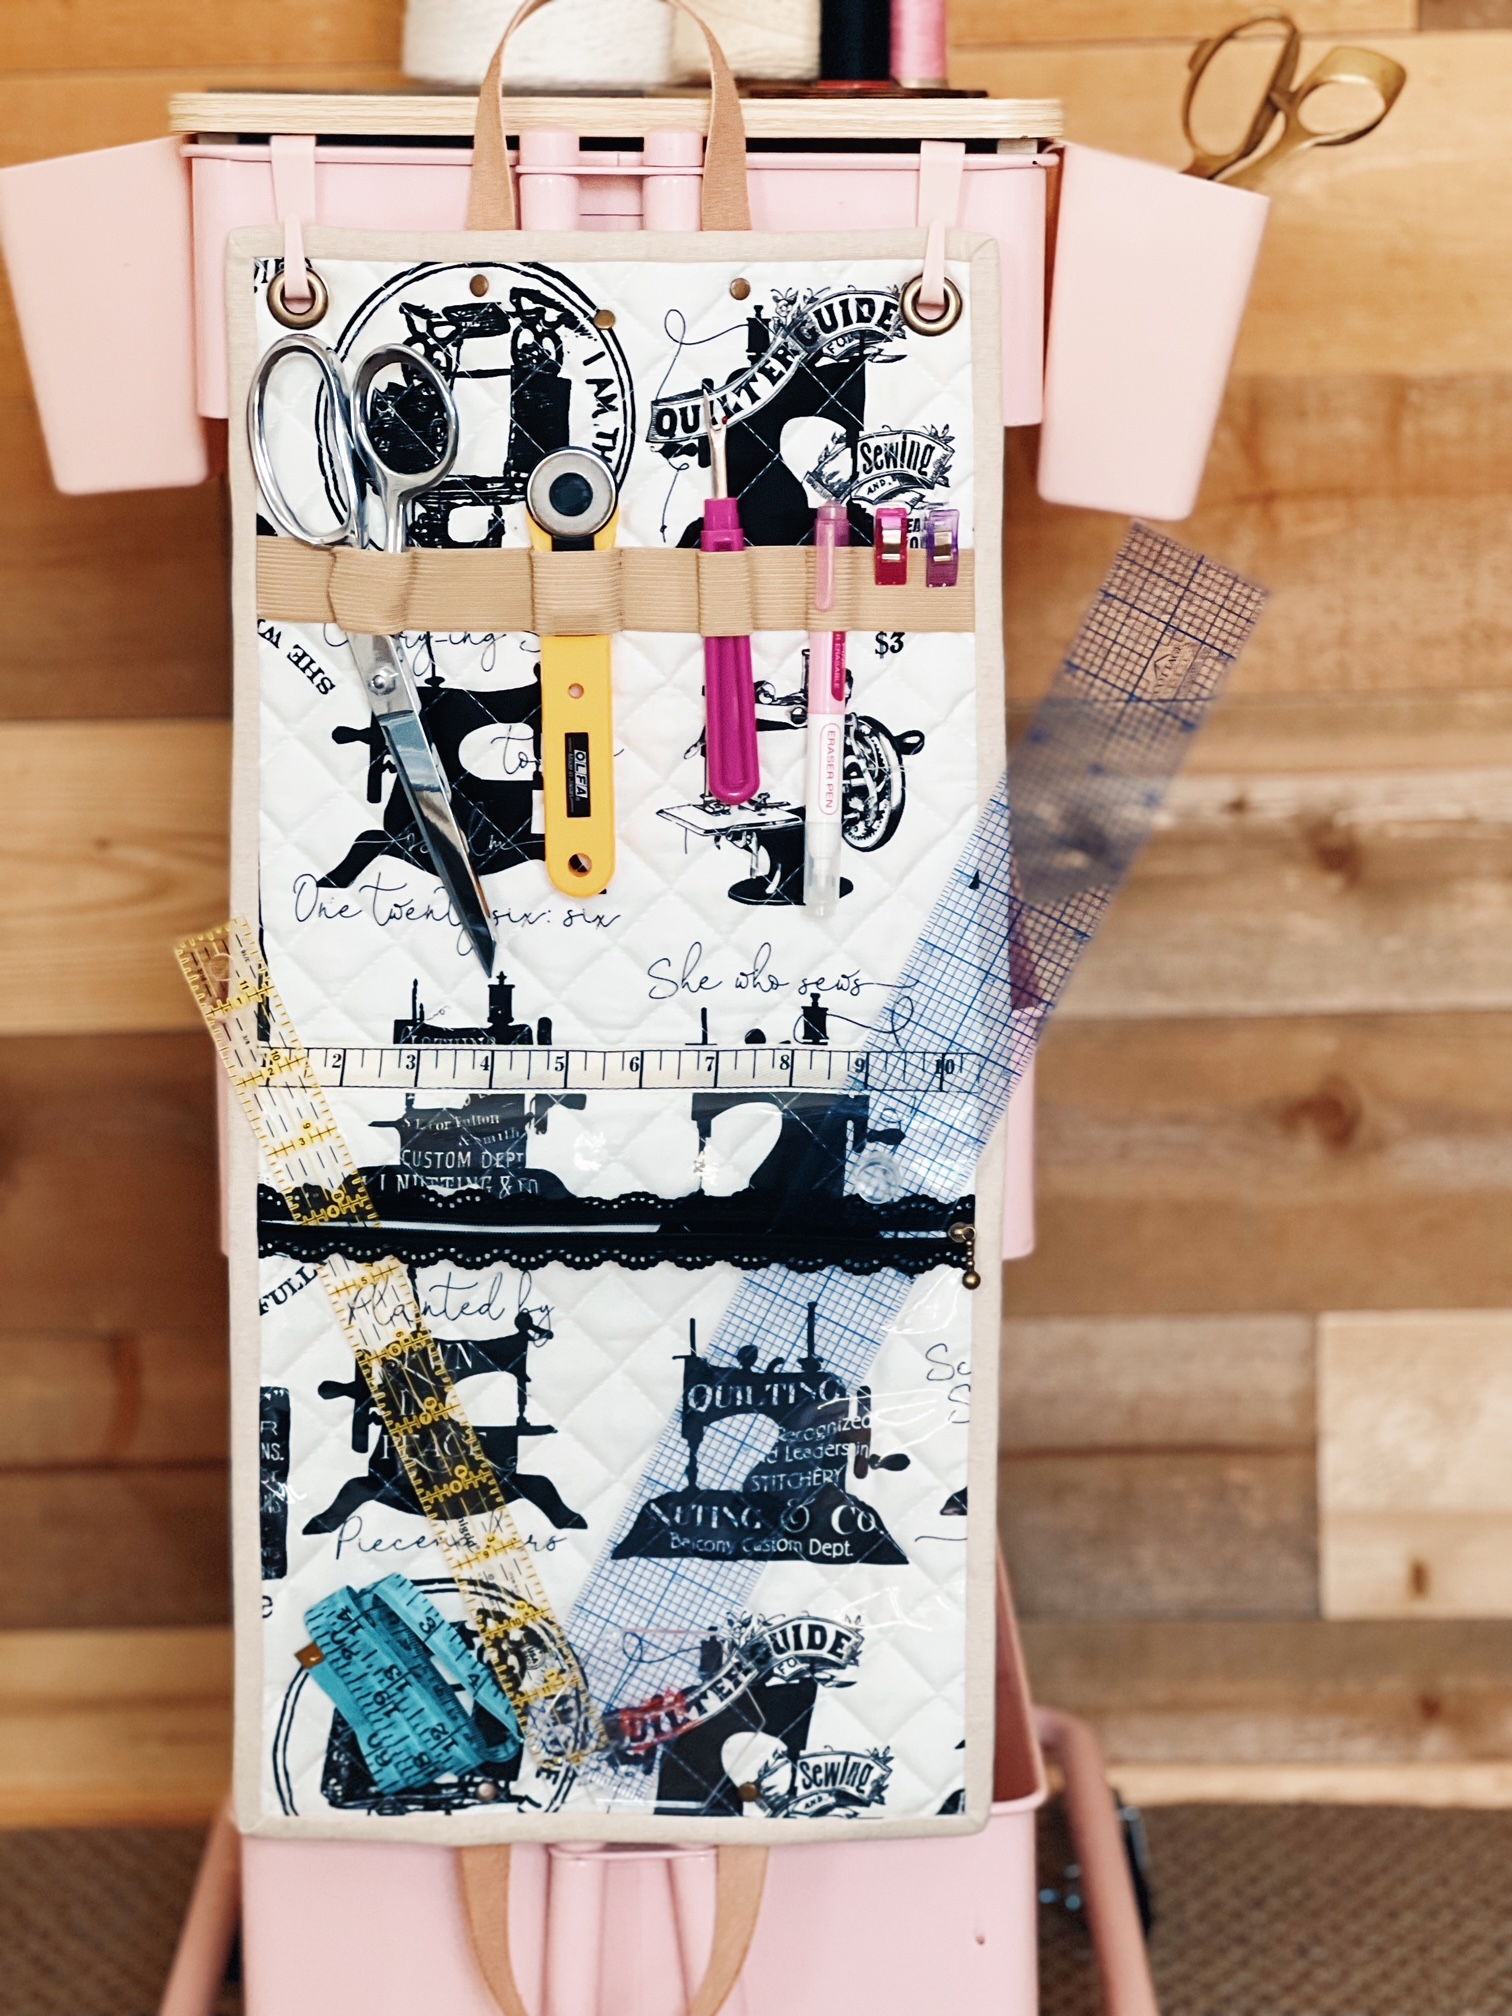
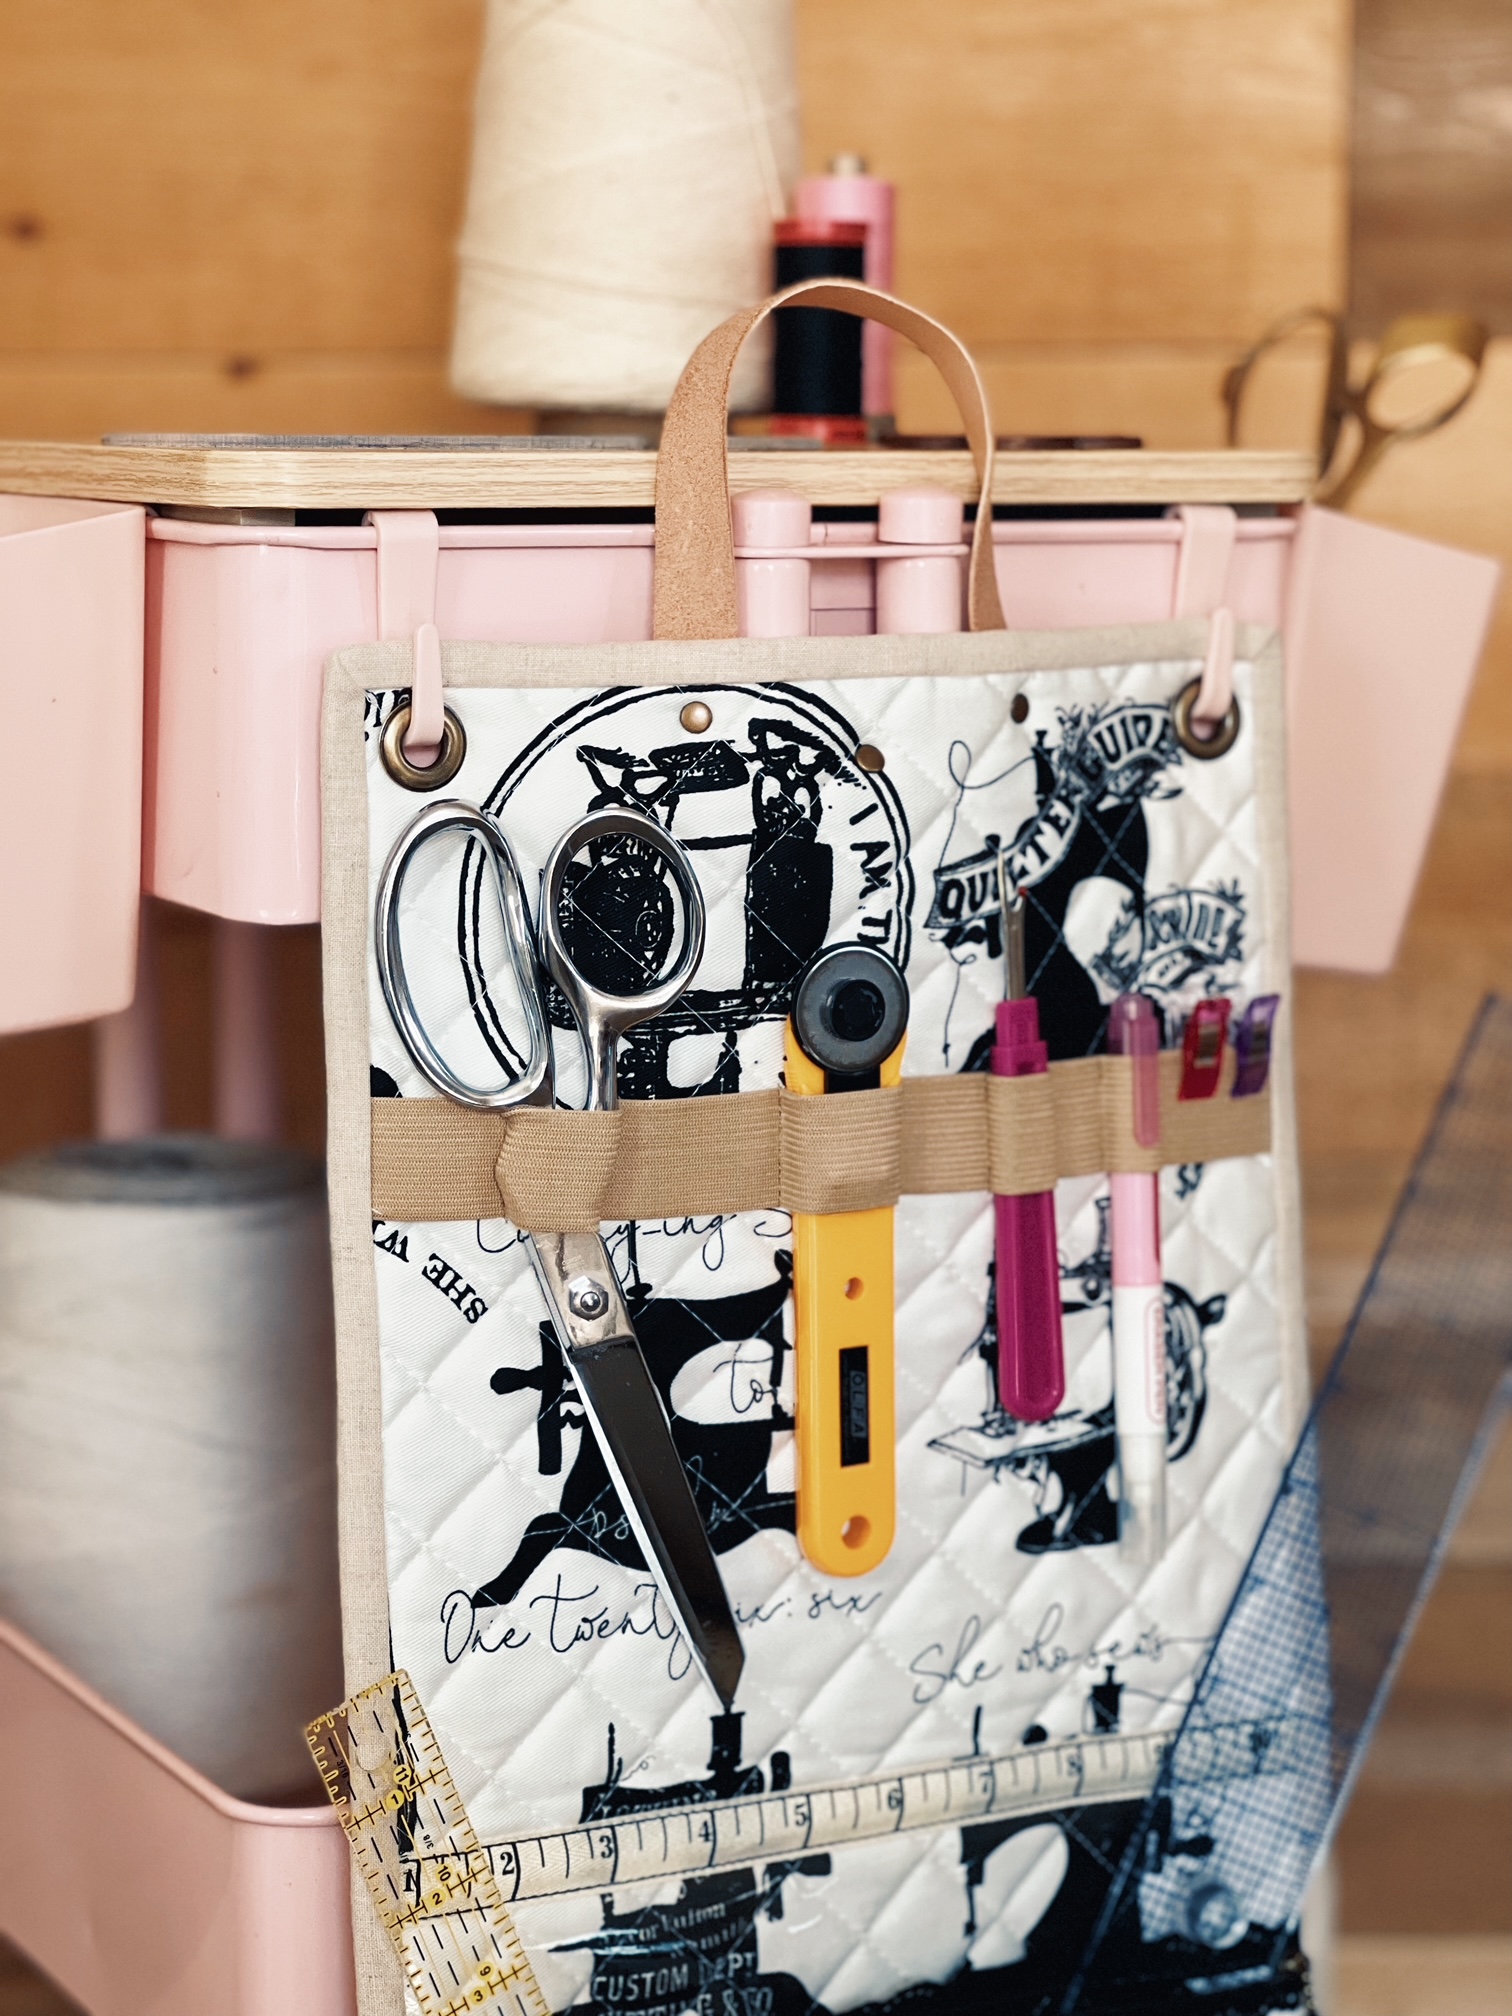
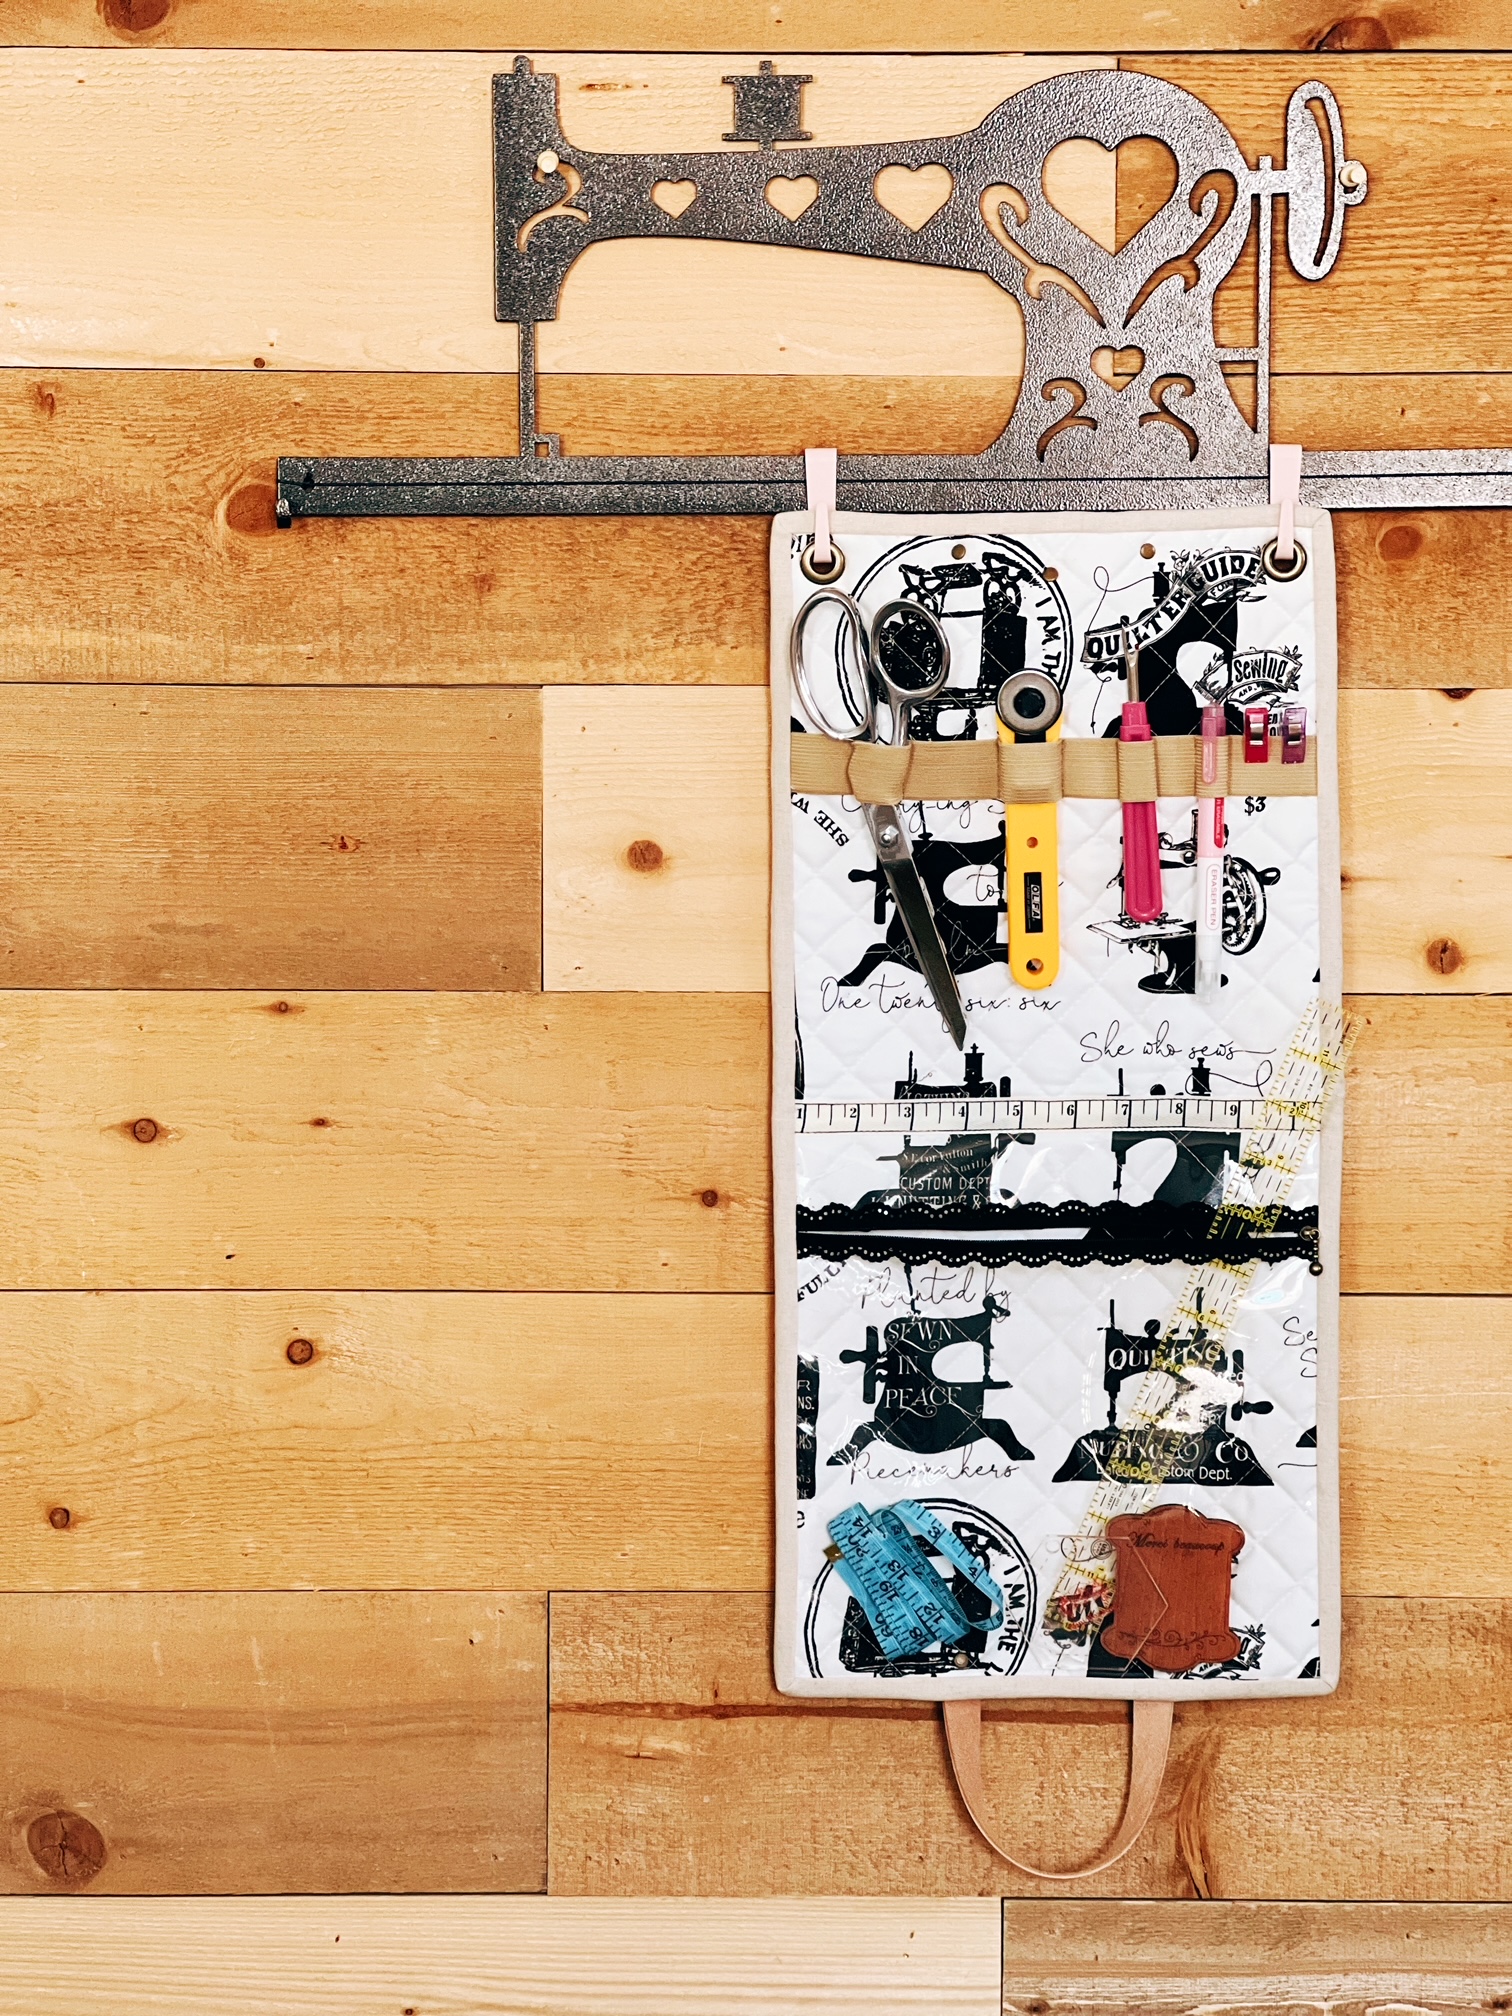
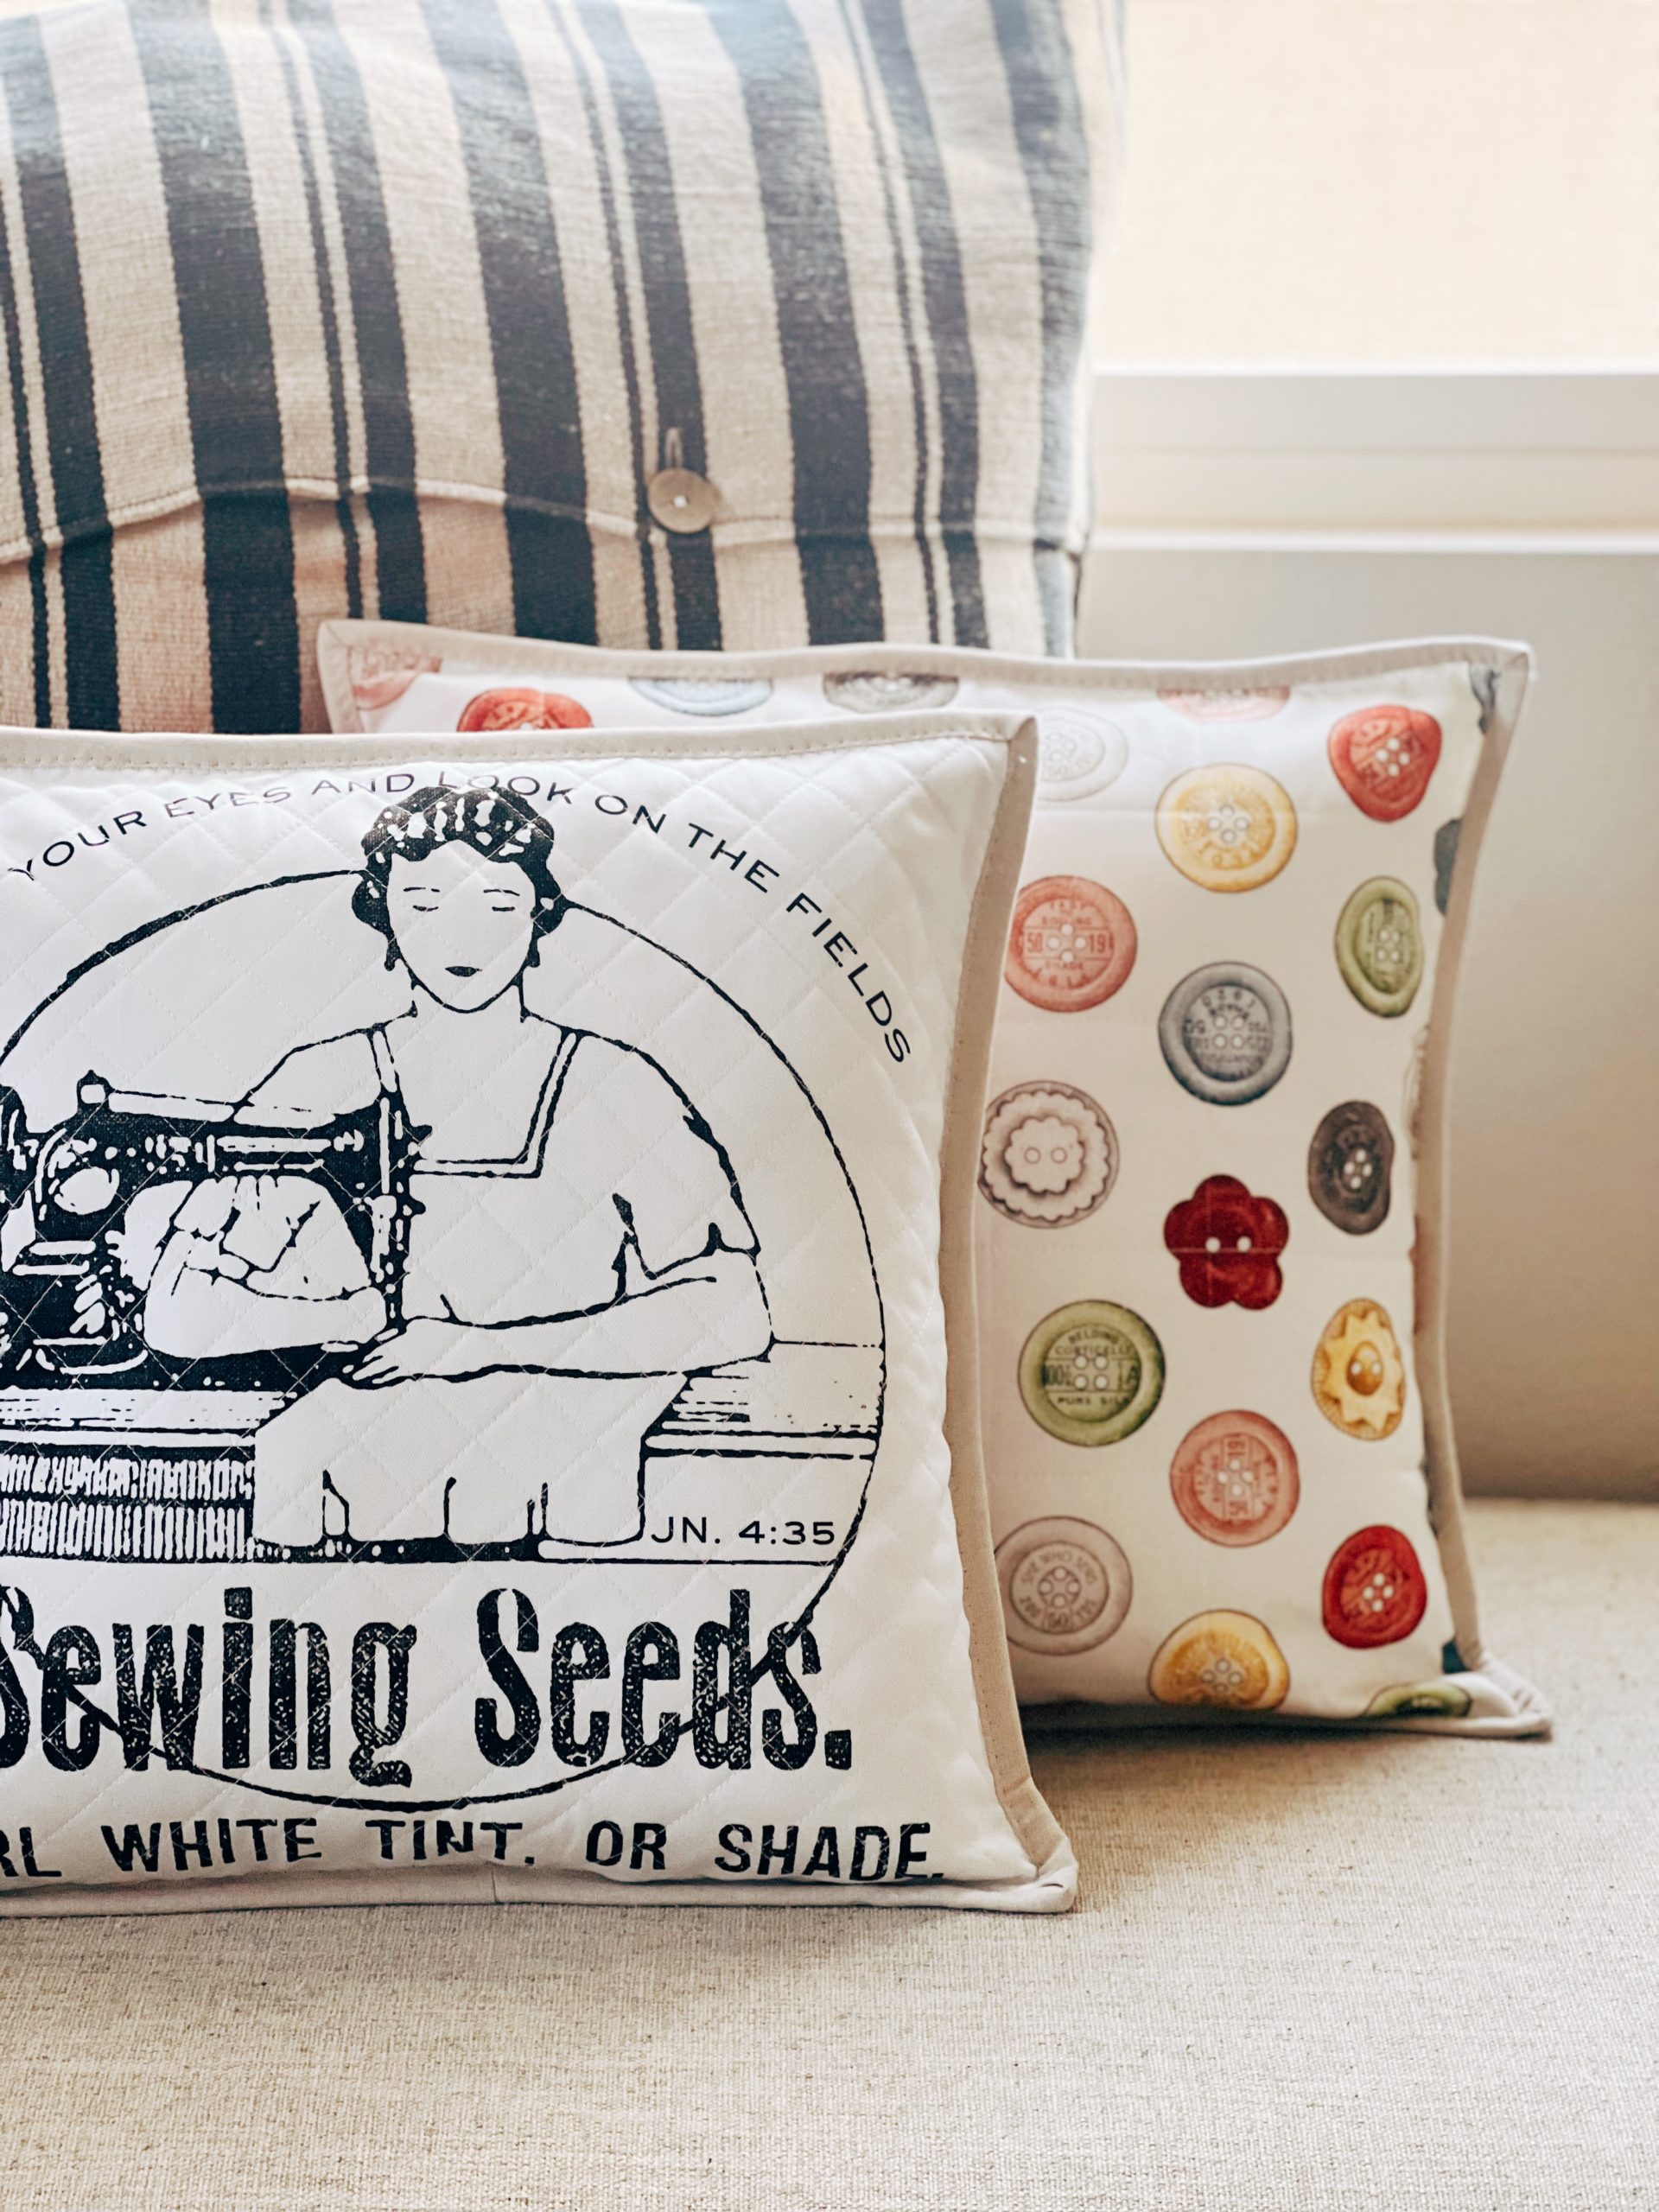
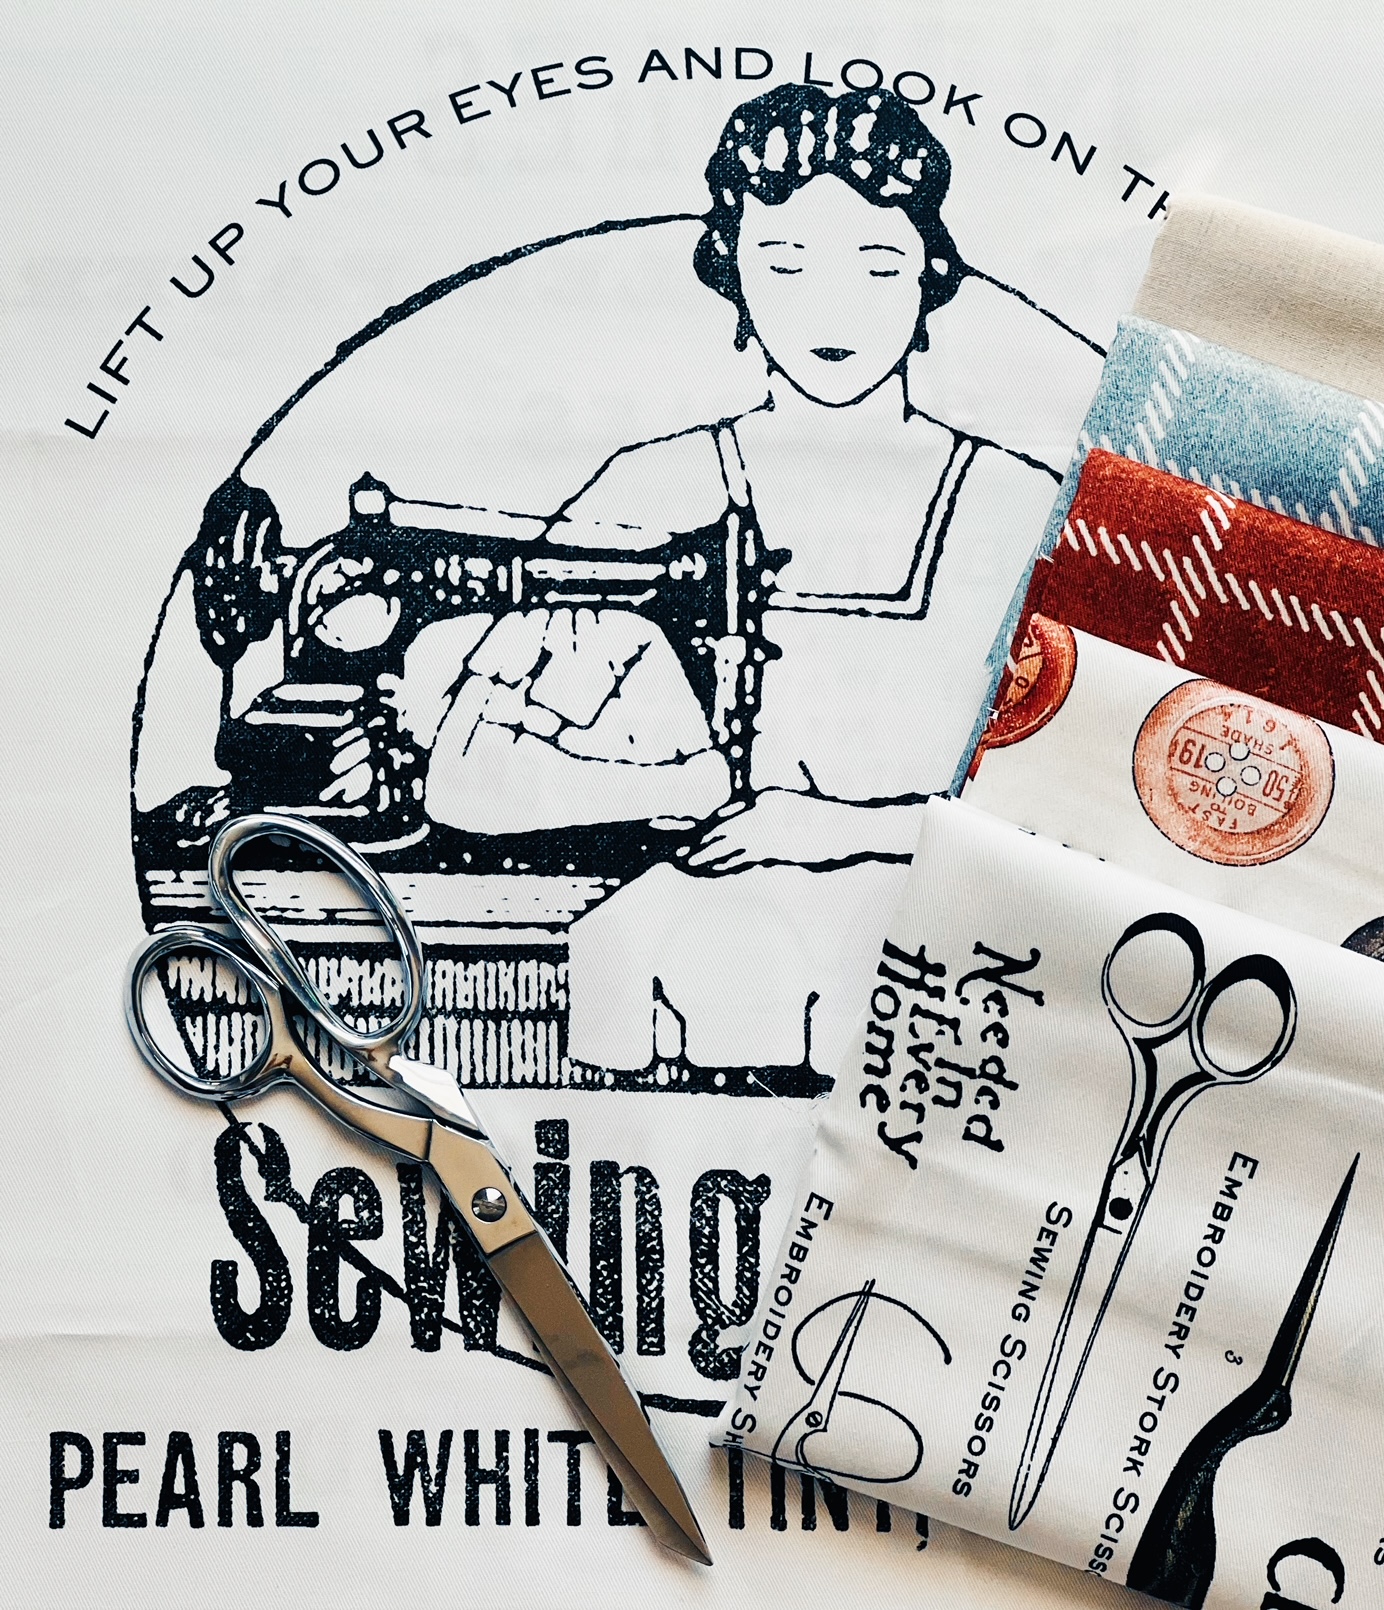
Hello! I'm very excited to share my latest project with you, a Cart Pocket Project Bag! She Who Sews by J. Wecker Frisch’s for Riley Blake Designs is the perfect fabric for this project. Janet's distinctive art of antique sewing is captured in this beautiful capsule collection. It's also in home décor weight fabric, which I find lovely to sew with, especially with bags and pouches. I also made pretty pillows using the Grain Sack Panel from the collection. It's the perfect print to jazz up my sewing space and add the vintage feel that I love!
Here is the Cart Pocket Project Bag and Pillows I made:
I've been looking for accessories for my sewing cart and wanted a side utility pocket that can be cute and useful. I didn't find much out there so I decided to make my own. It also doubles as a project bag too! I added a large elastic tool holder and a large clear pocket with zipper to hold all your tools or small project.
You can add the pocket to your wall too if you don't have a sewing cart. I added large eyelets to the top so you can easily attach the pocket to hooks.
It also doubles as a project bag. Simply take it off the hooks and fold to close. I added a leather snap button tab and leather handles so you can take it wherever you need to take a project.
Here are the pillows I made using the Grain Sack Panel. I used Riley Blake Linen in Natural for the binding in the pillows as well as the cart pocket.
I hope you enjoyed my project! She Who Sews will start shipping this September, so check your favorite quilt shops to see if they will carry it!
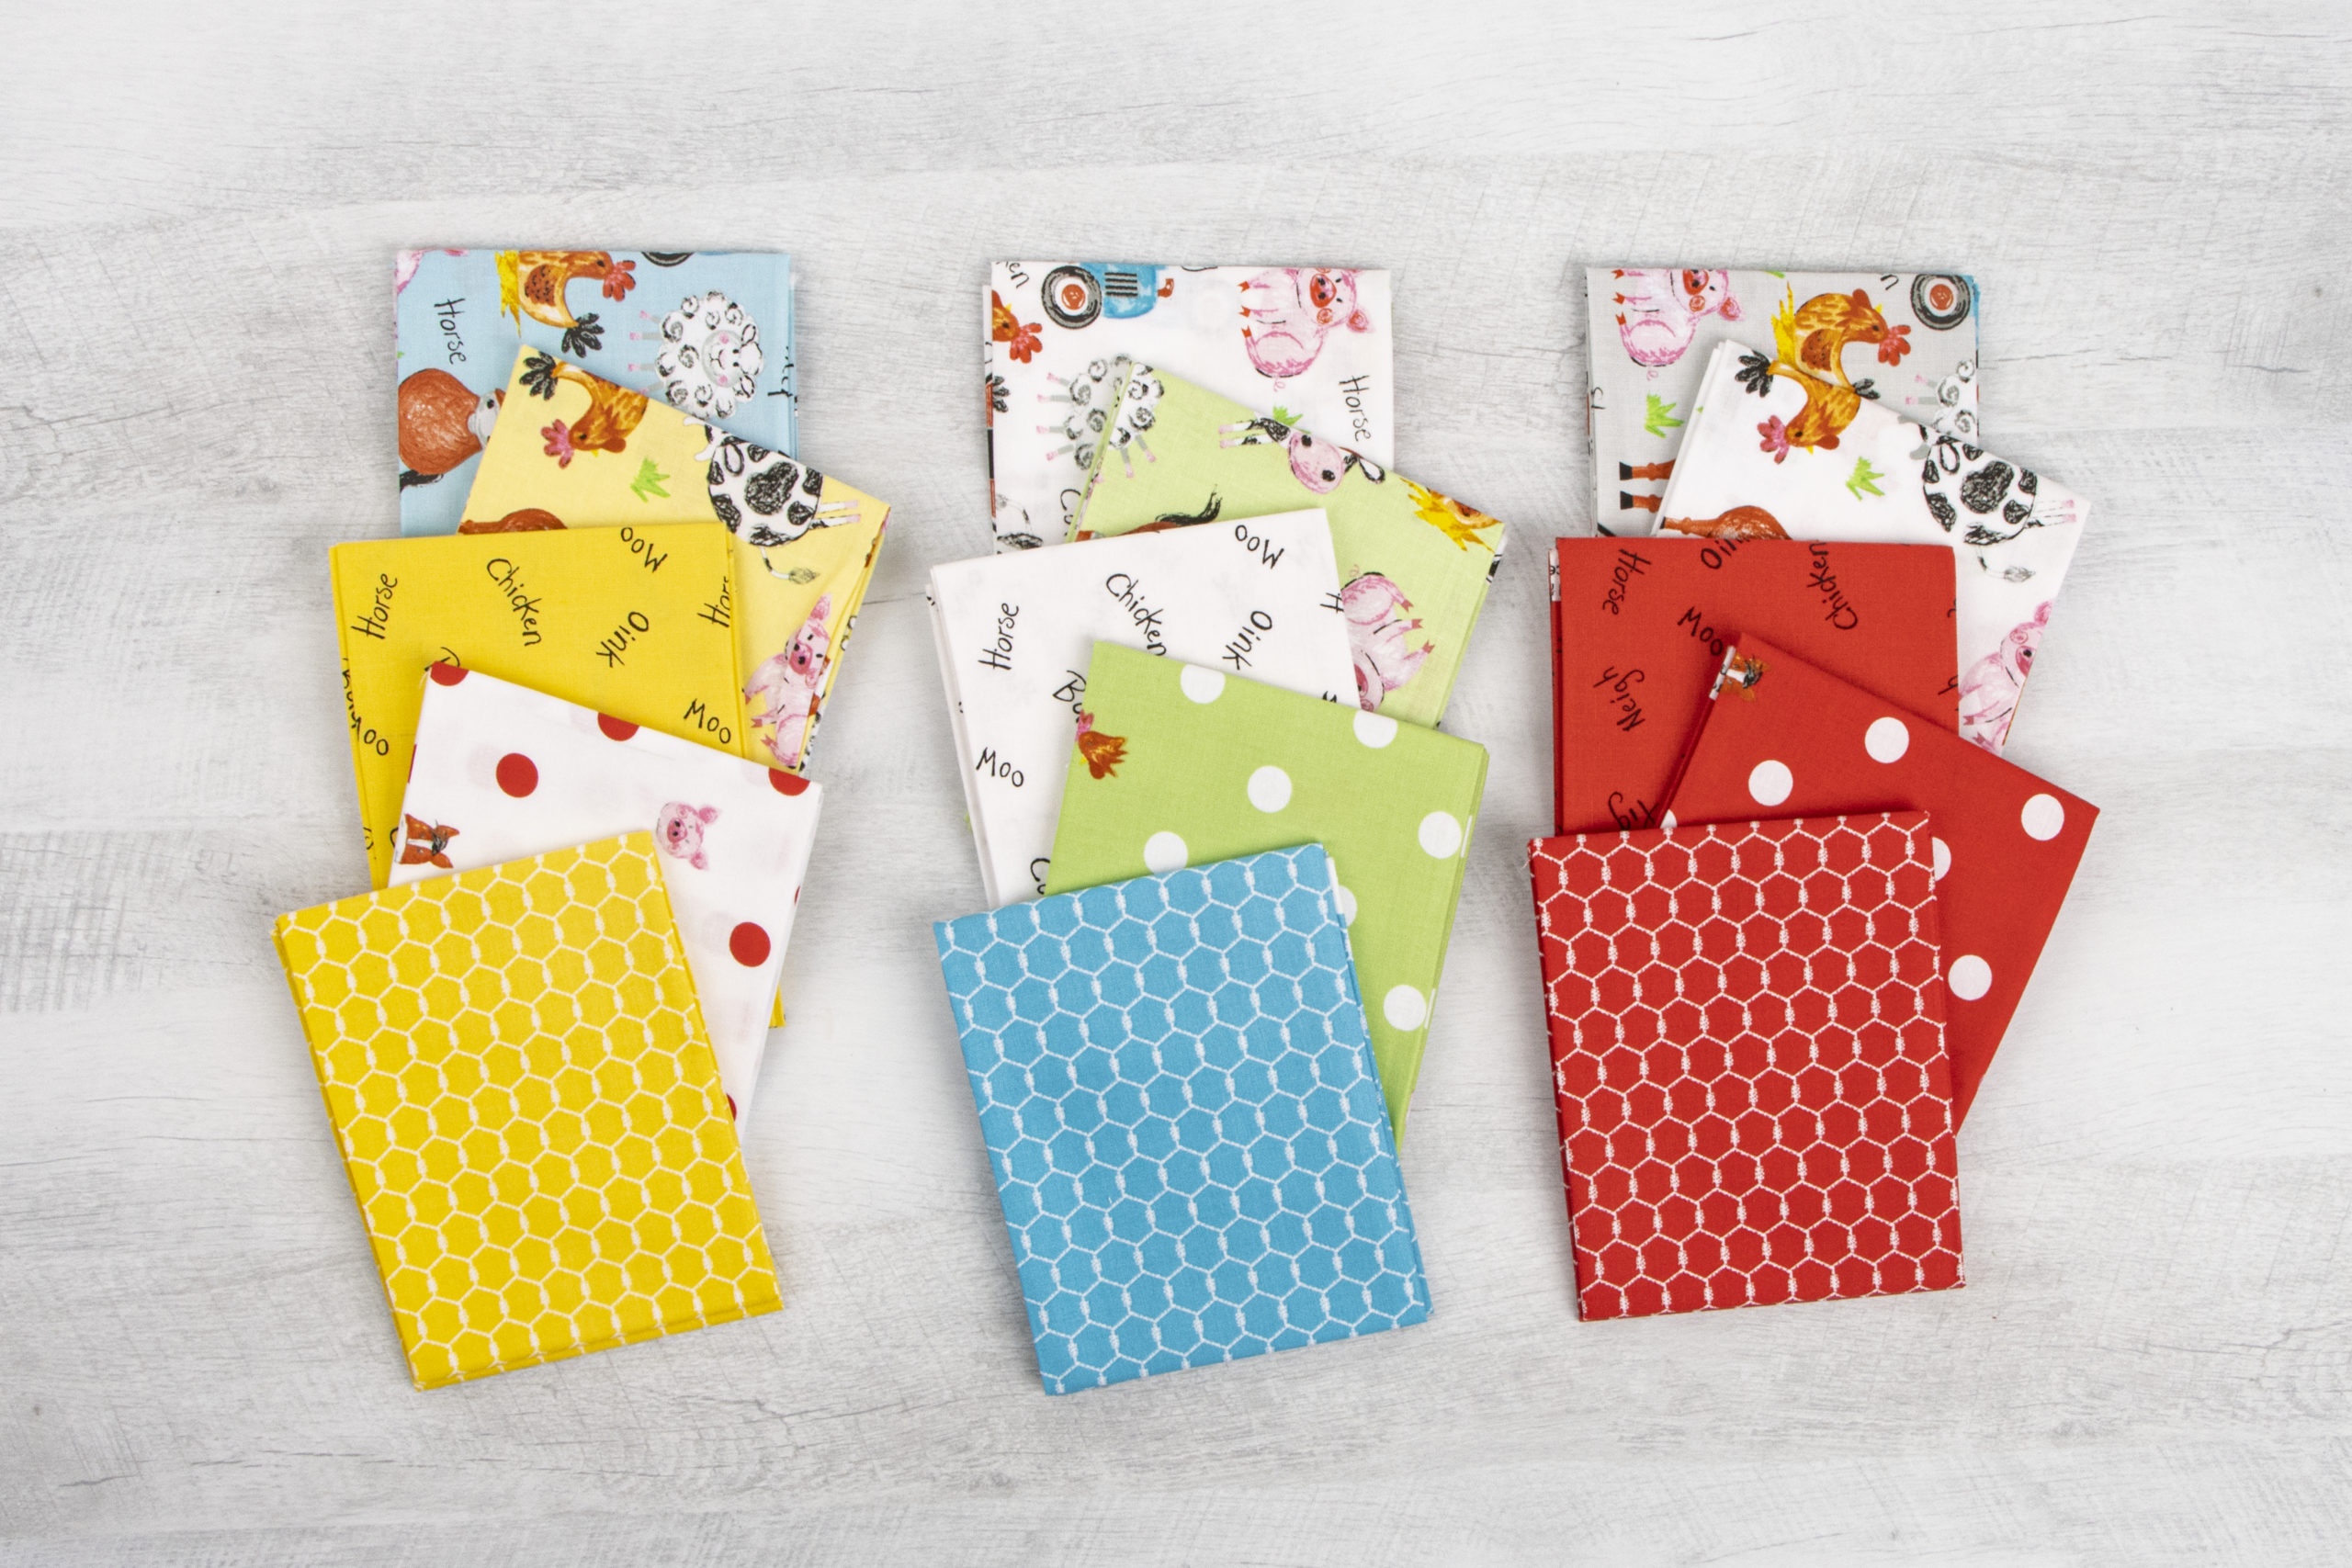
Hello! It’s Karen from Creamcraft Goods! I love cute fabric, but I love cute children’s fabric even more! The newest Crayola licensed collection for Riley Blake Designs - Coloring on the Farm is adorable! It has the sweetest farm animal illustrations, texts and prints in the most colorful Crayola color palette that will excite any child (I know mine are!).
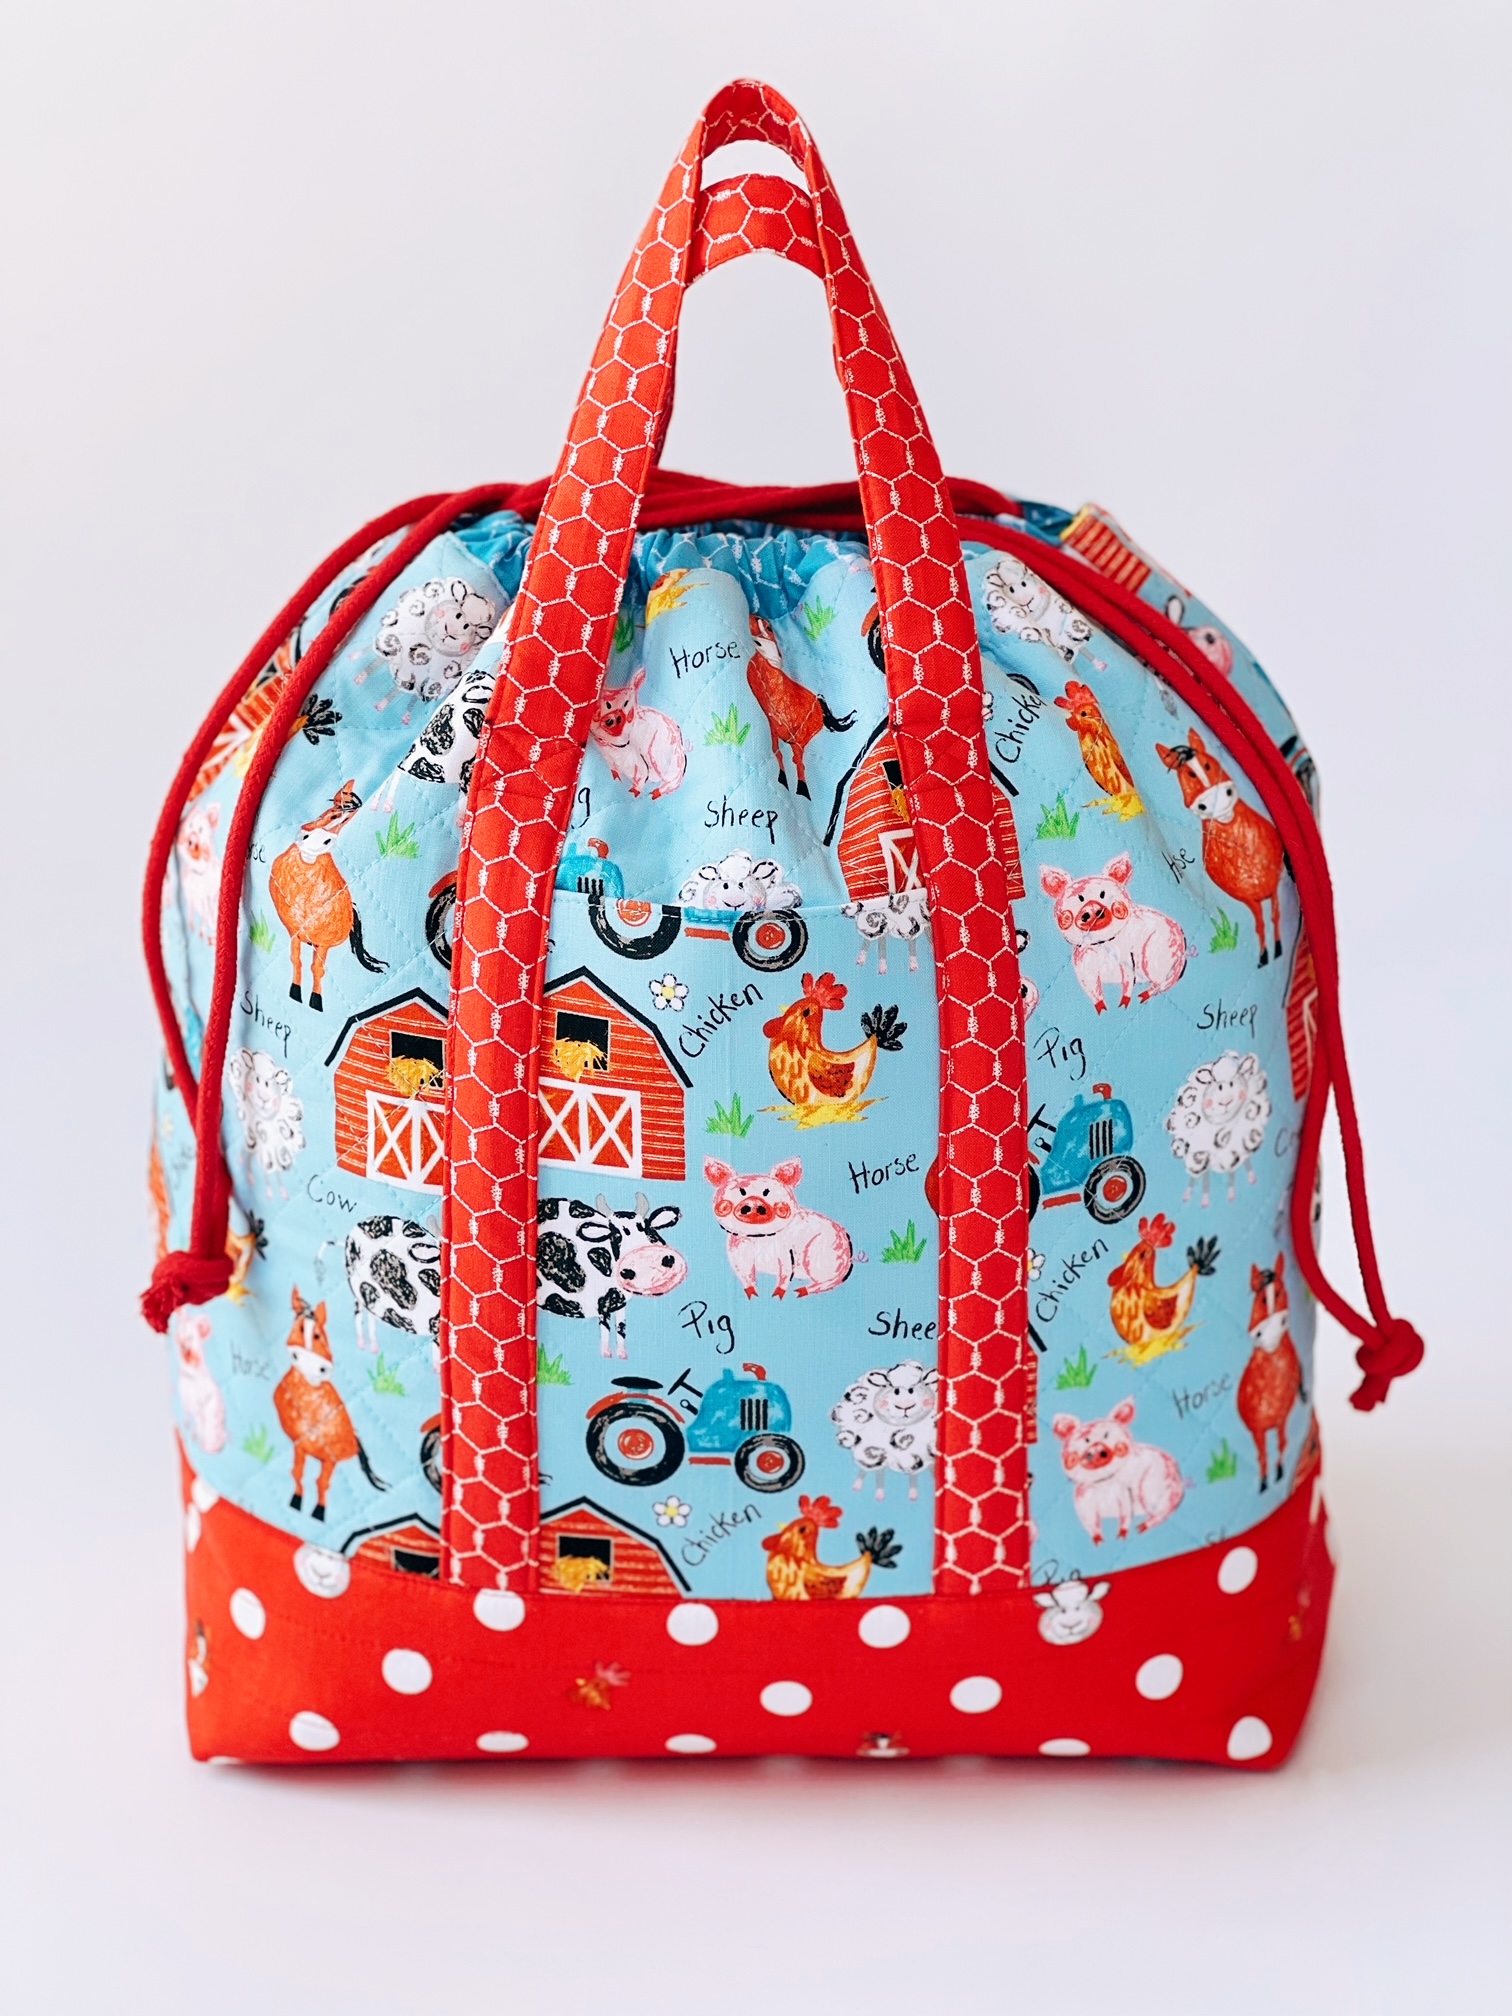
Here’s the Drawstring Tote Bag I made:
For this project, I wanted to create an extra large tote bag so my son can stuff his growing collection of plushies in them. He dislikes fiddling with zippers or buttons, so I chose a drawstring closure to make it easily accessible to his prized plushies! I added pockets on both sides, so he can stuff a few toy cars or farm animals too.
I chose the blue and red prints with a surprise burst of yellow inside, which are my son’s favorite colors. The colors are vibrant and illustrations are sweet. How cute is the text on yellow print for the inner bag? I quilted the outer bag to make it sturdy. I added soft handles in the red chicken wire print and used the blue chicken wire print for the drawstring casing to bring it all together.
I hope you enjoyed my Drawstring Tote Bag and new collection, Coloring on the Farm. Maybe it will inspire your next creative project!
Coloring on the Farm is arriving in stores now, so check your favorite Quilt/Fabric shop to see if they carry it.
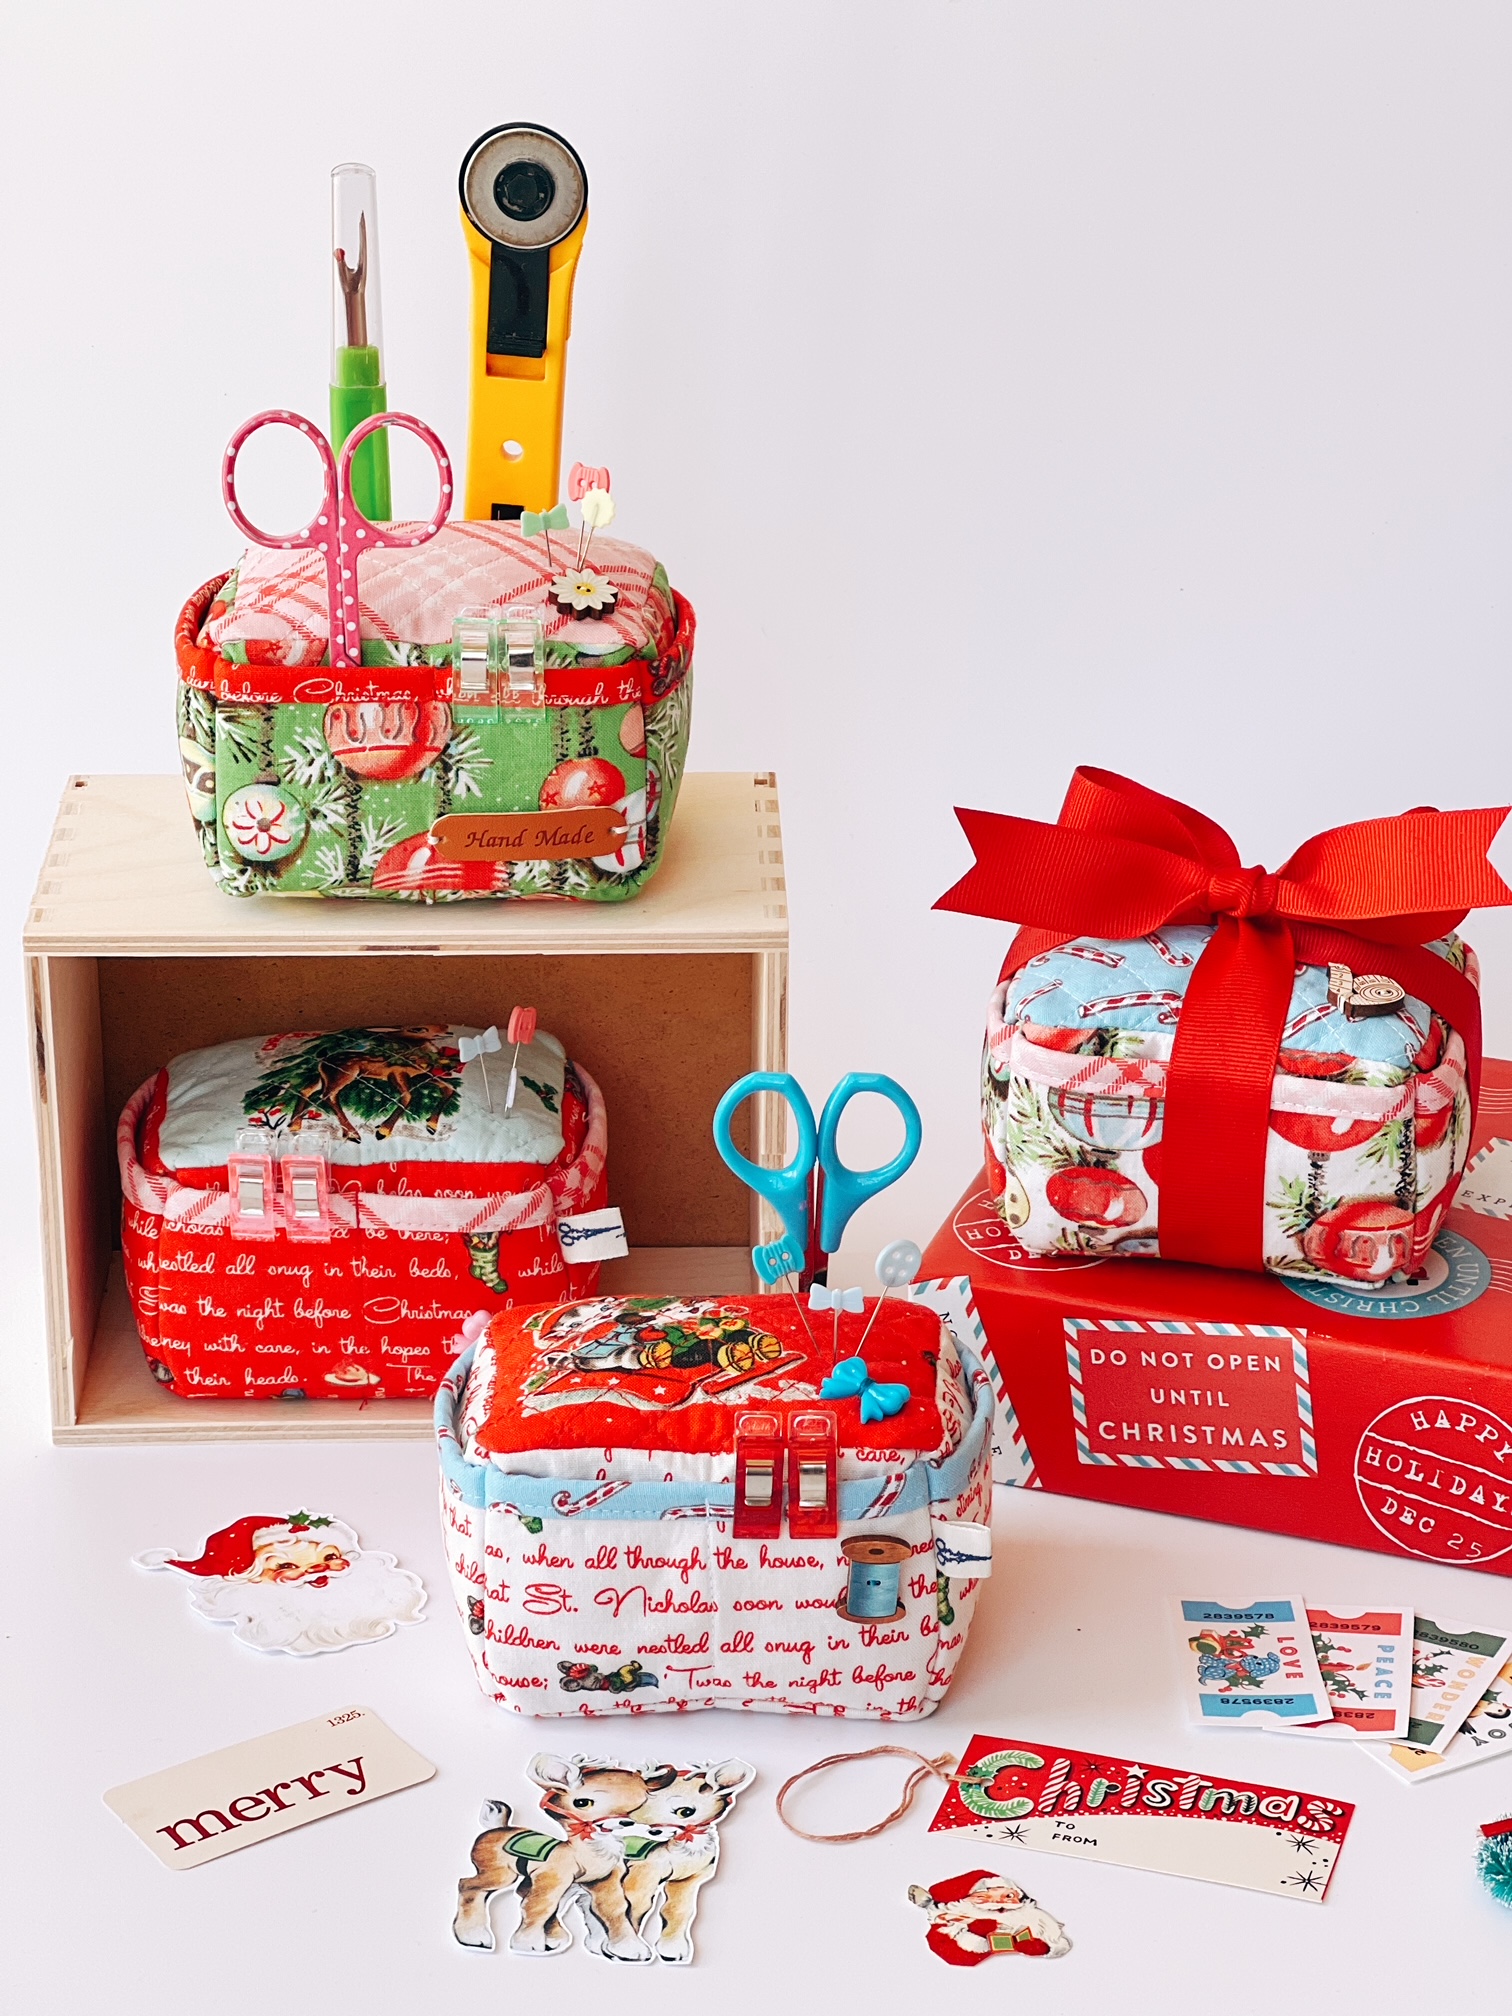
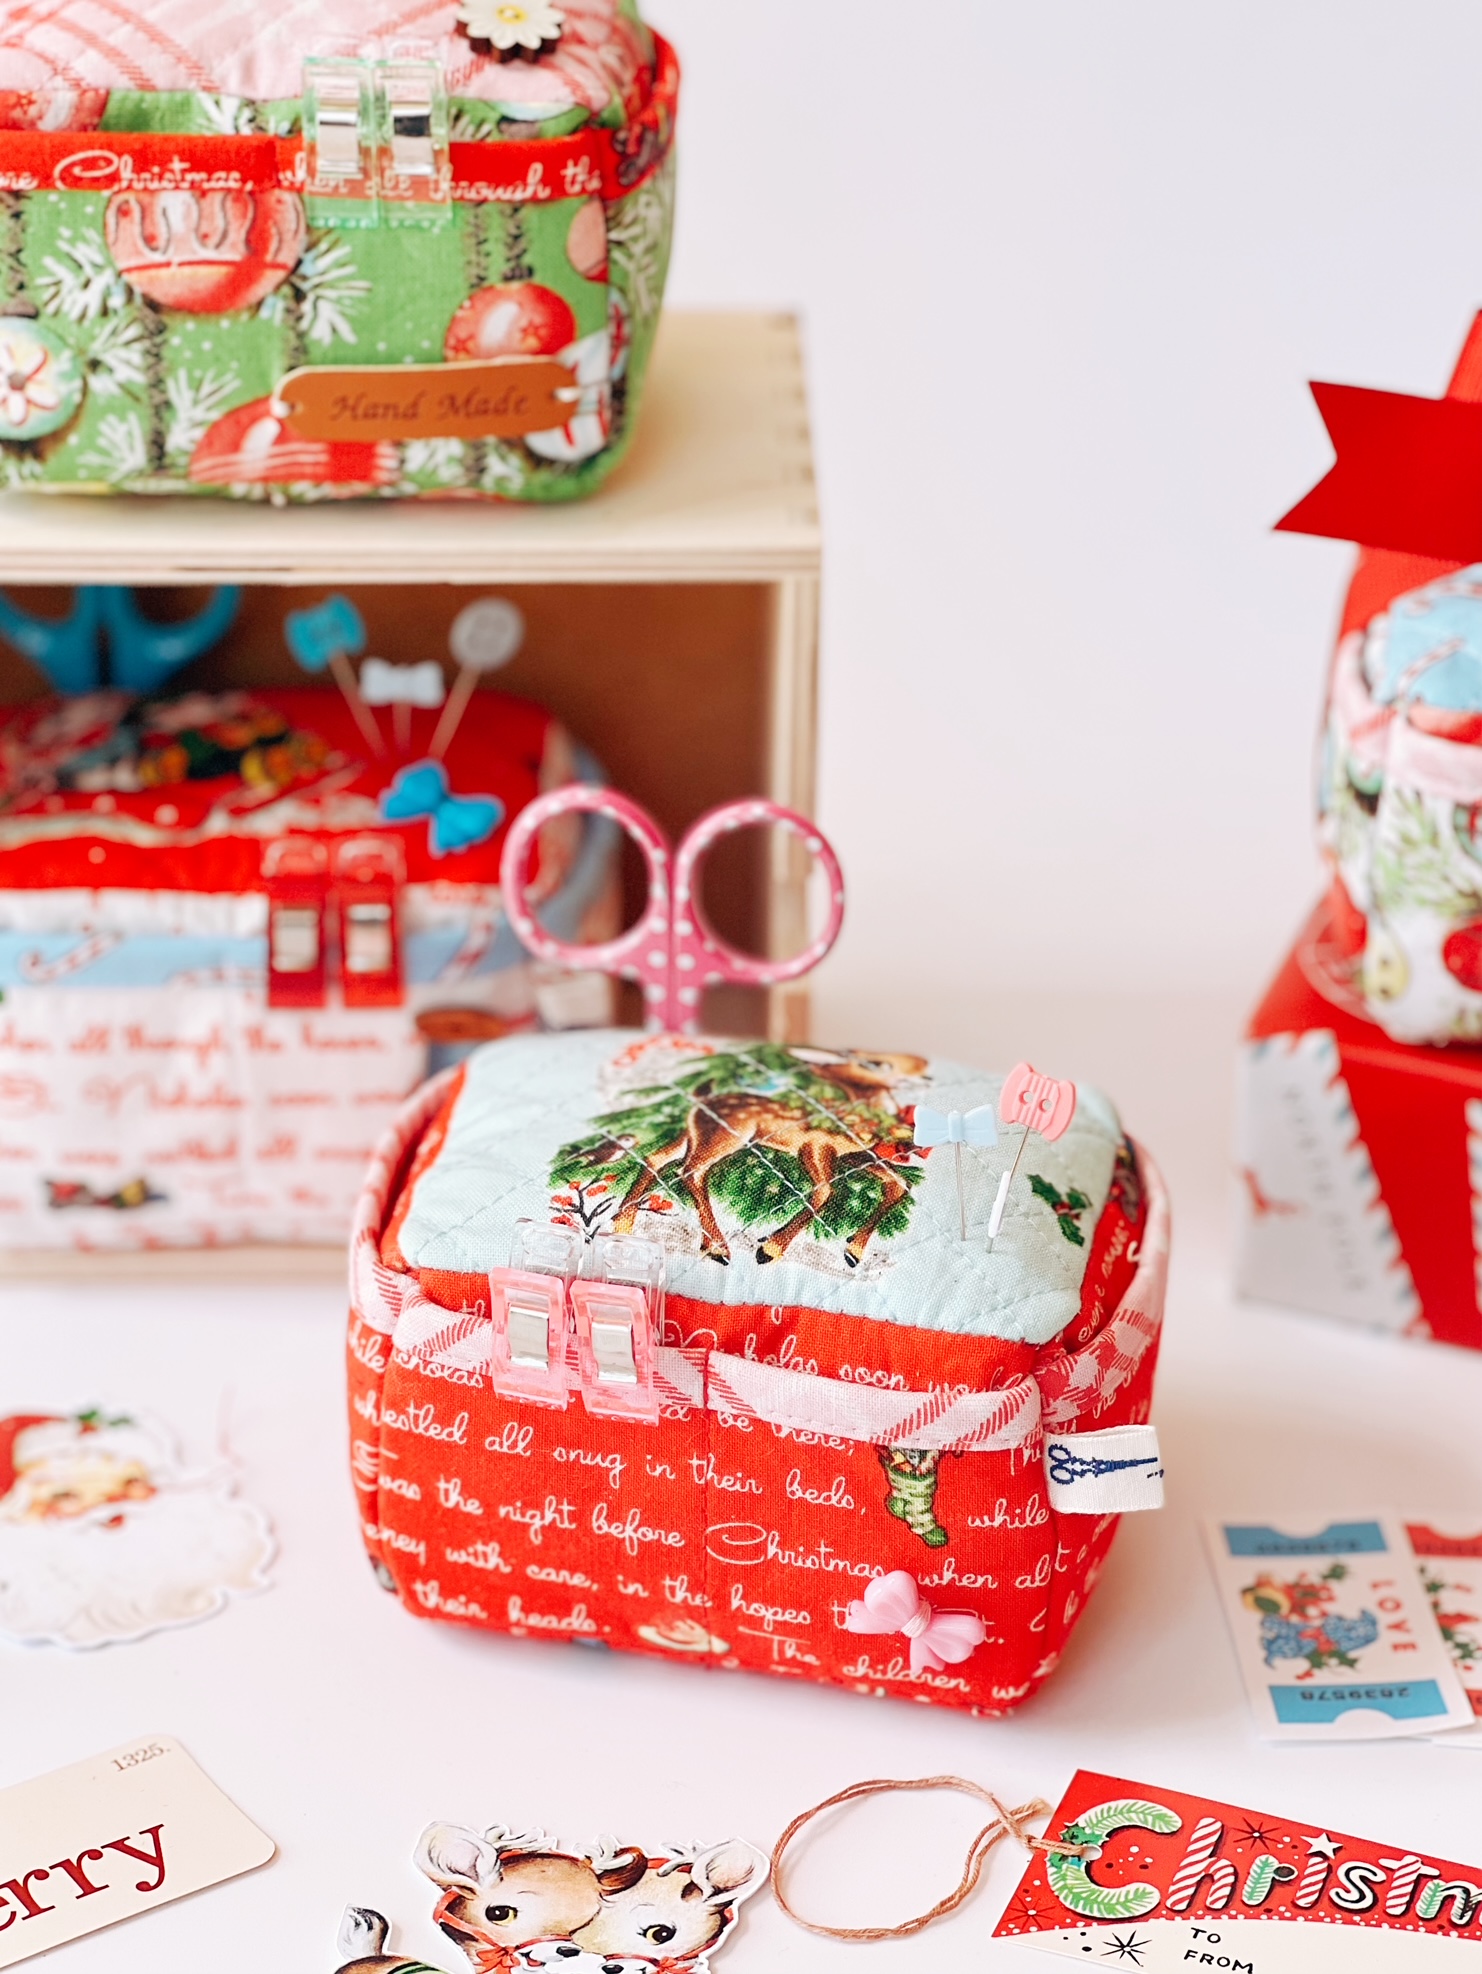
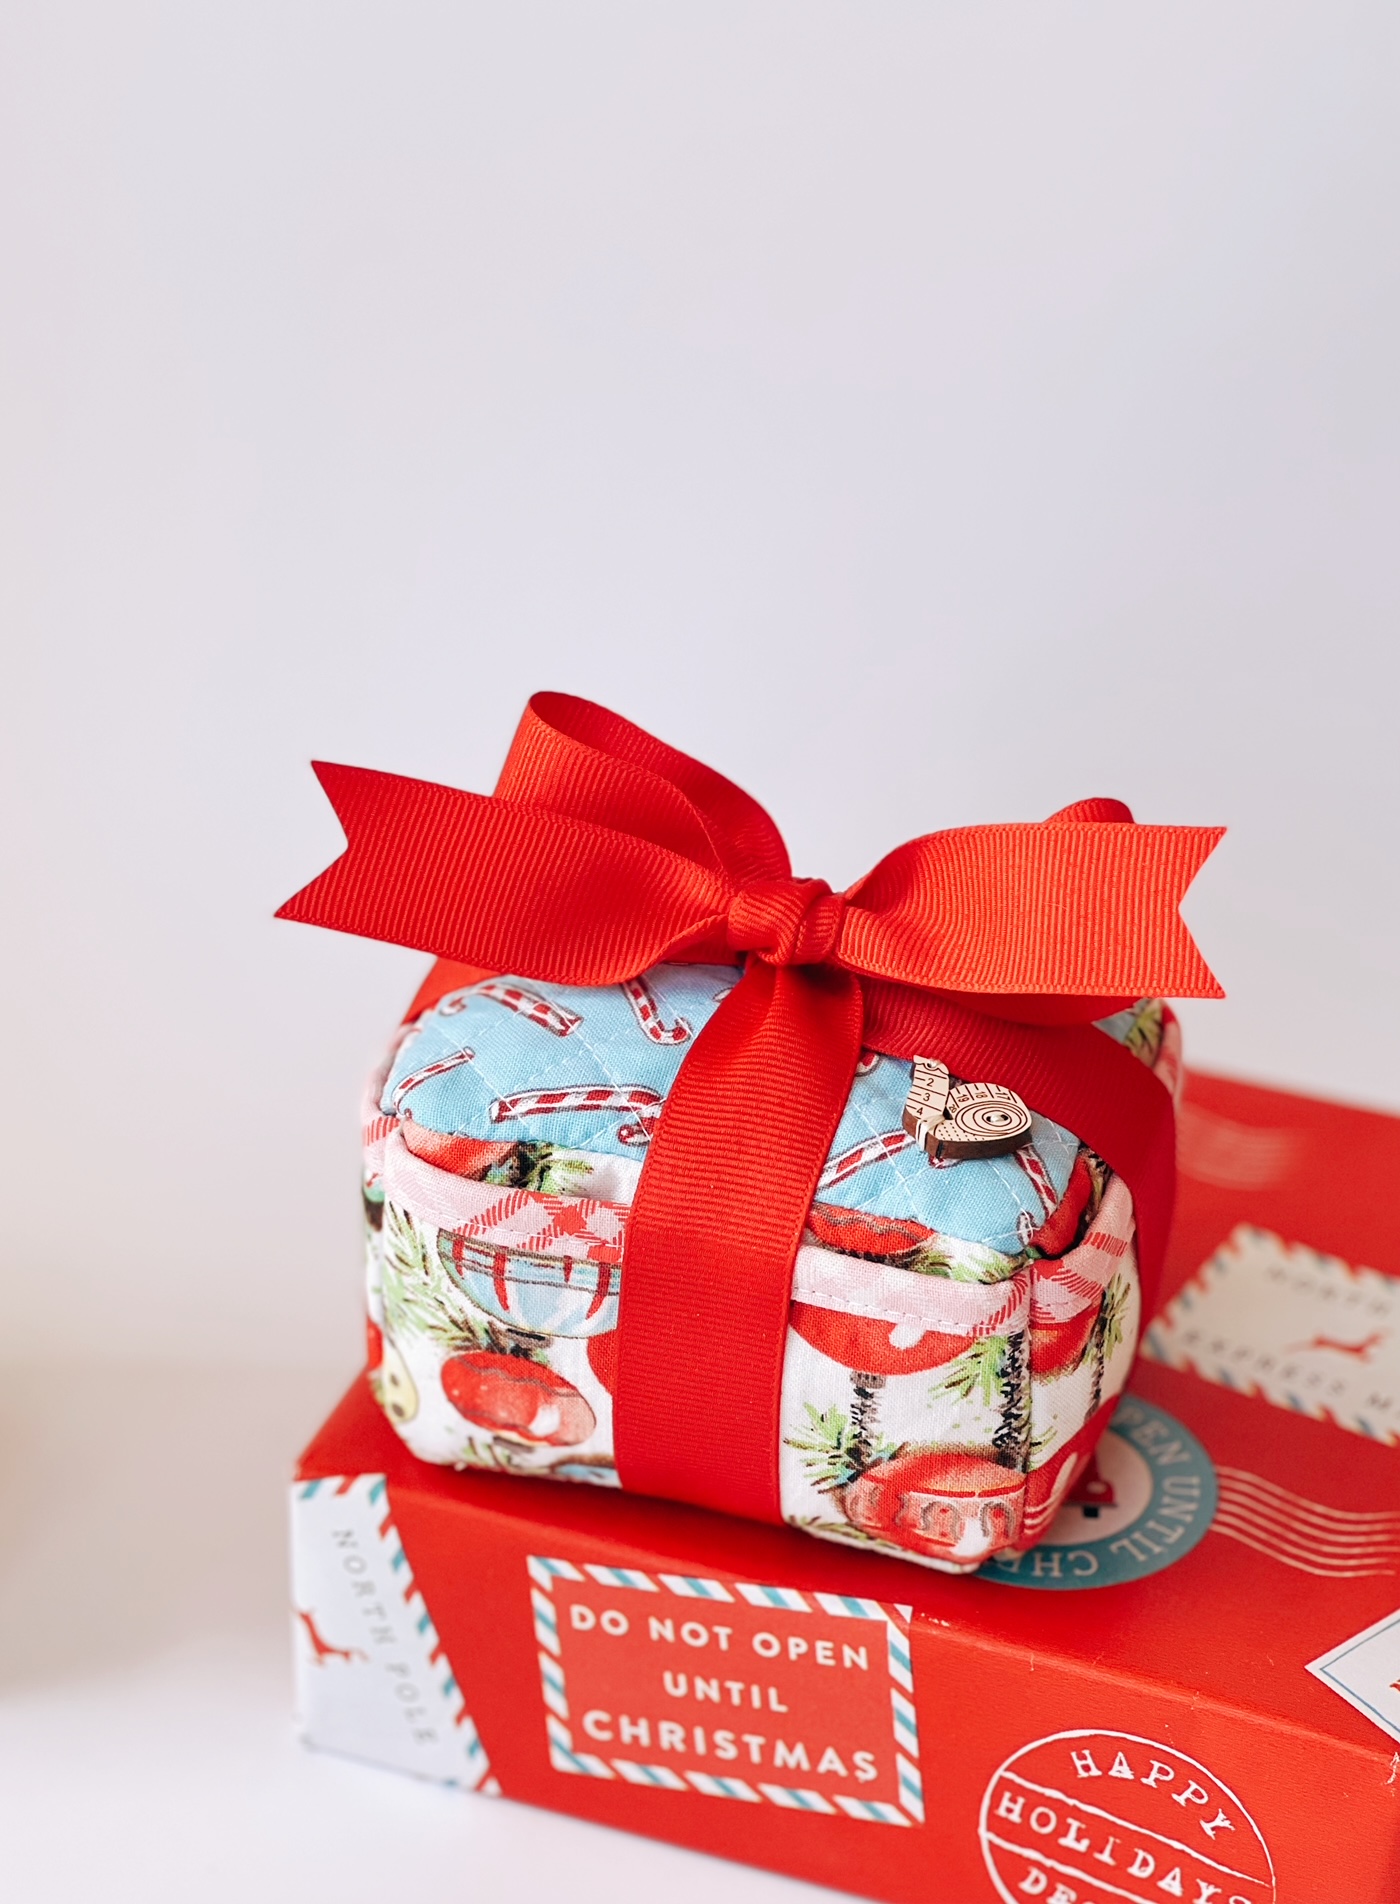
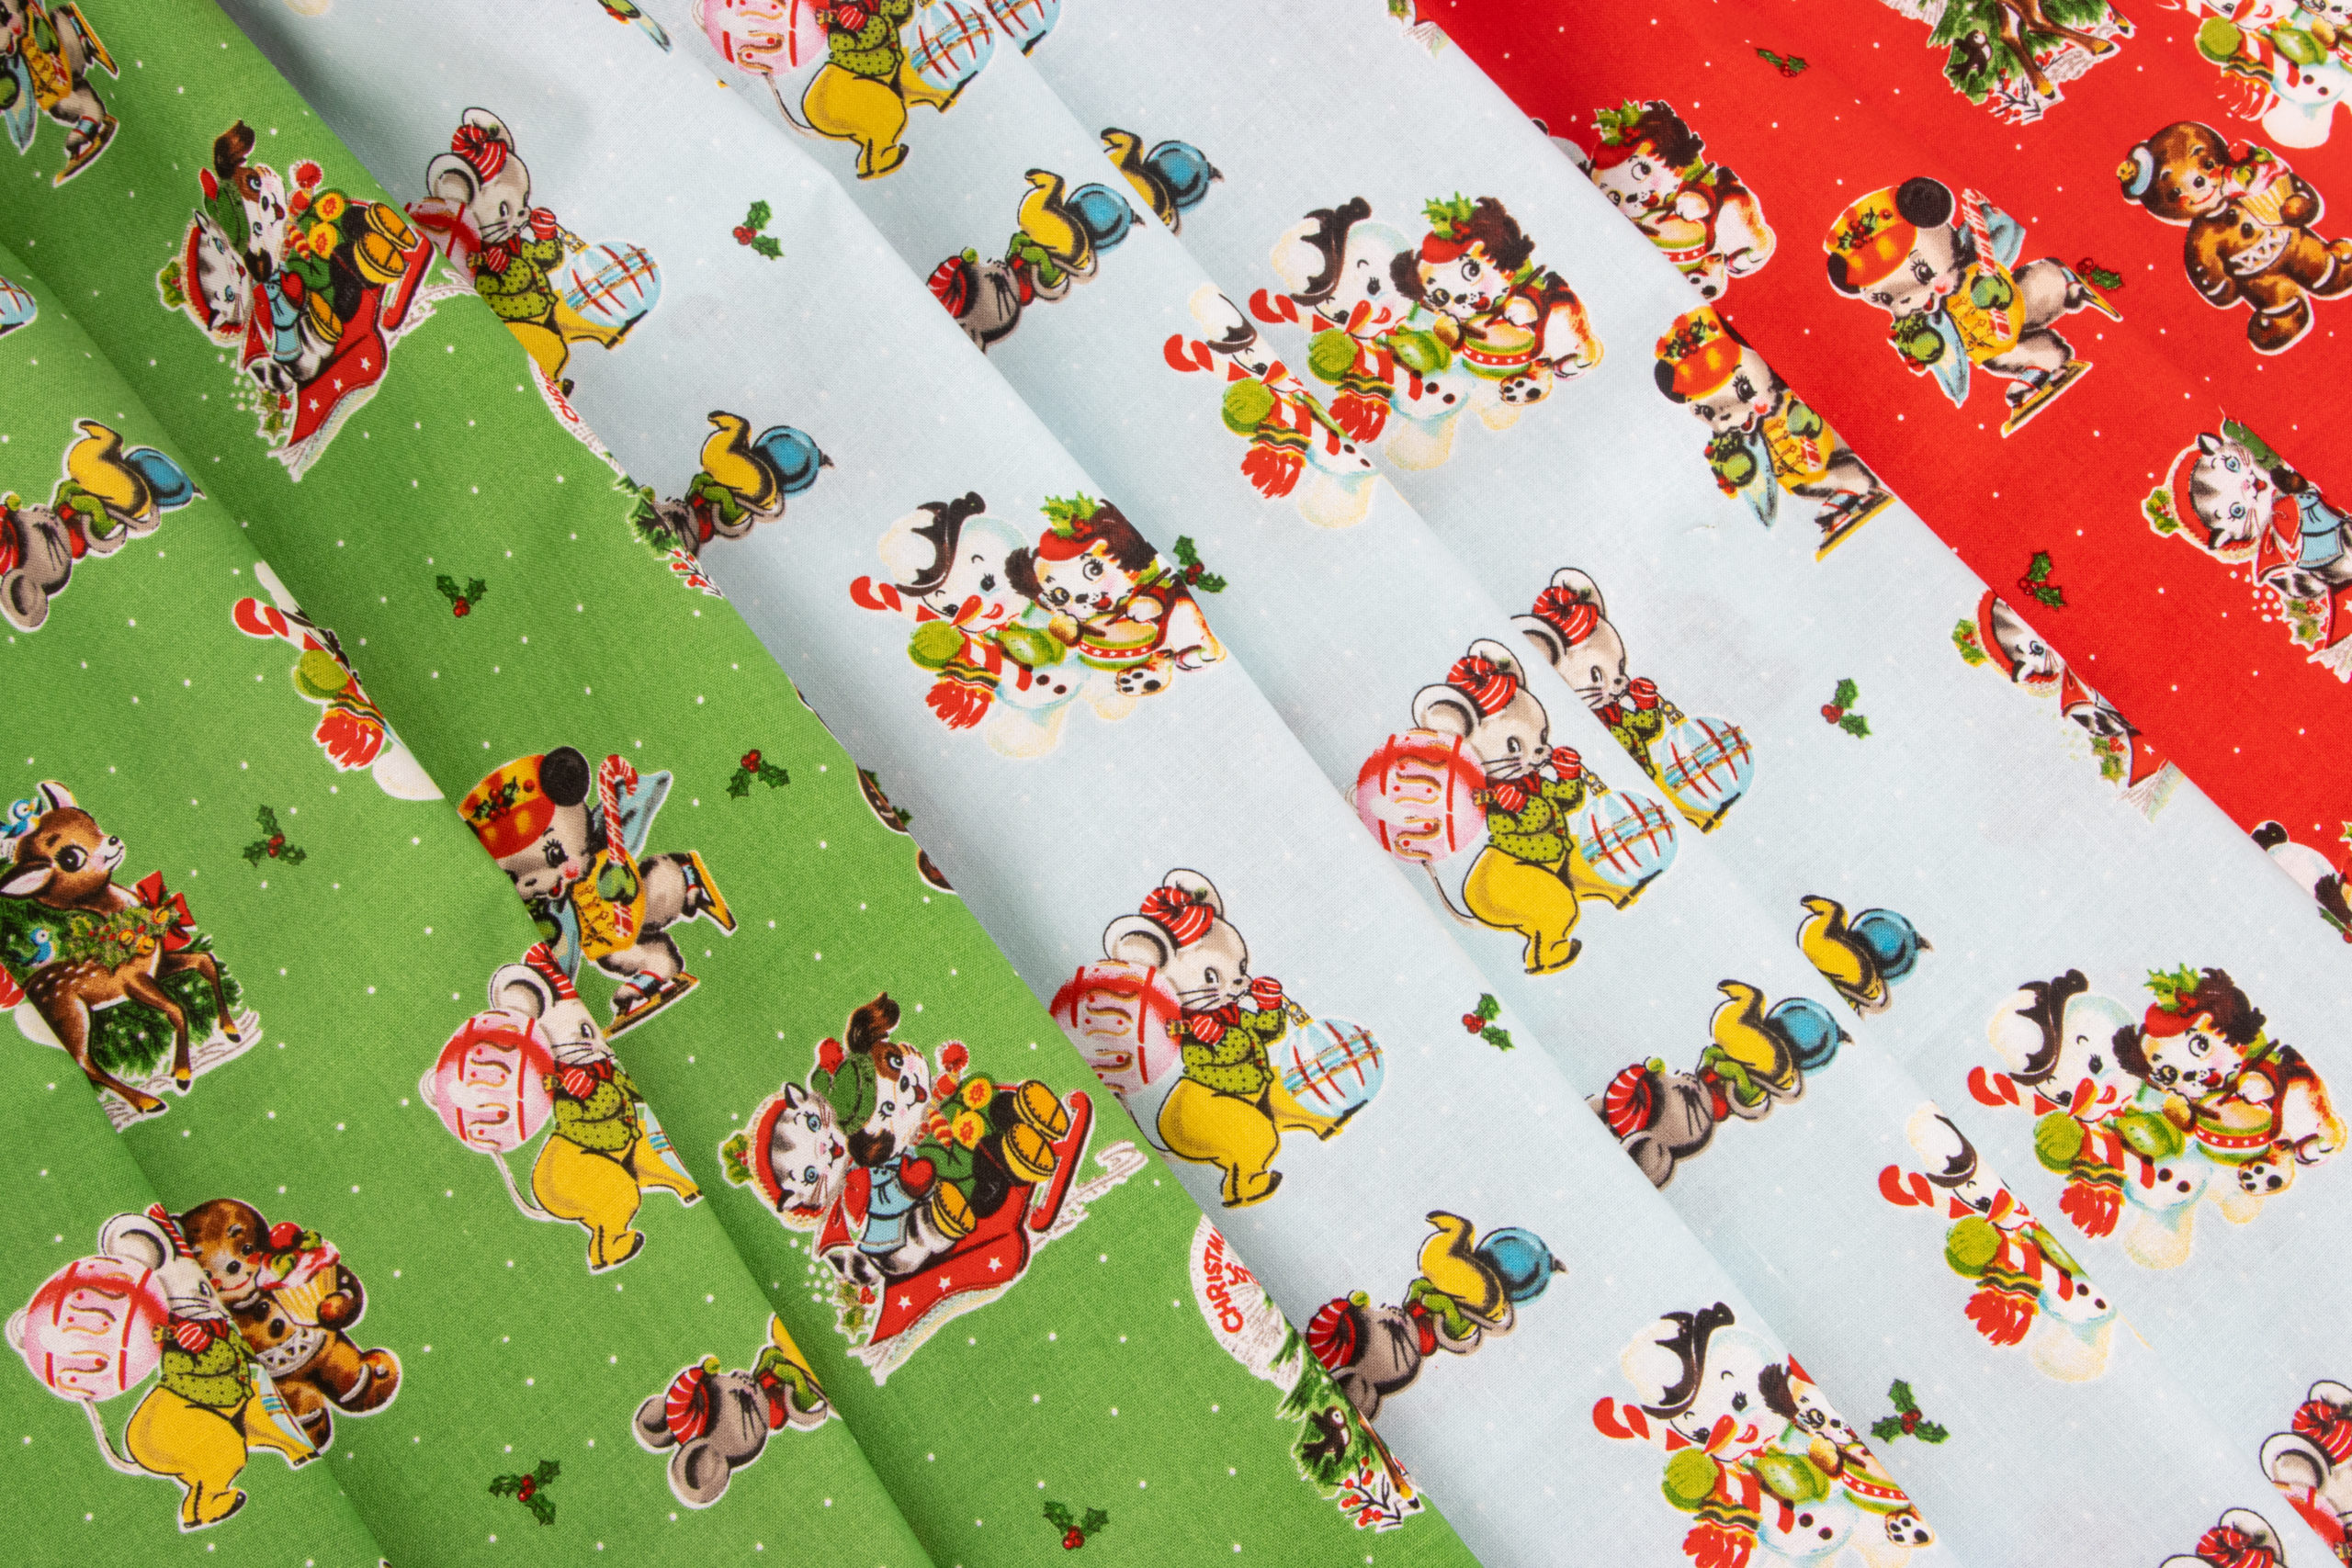
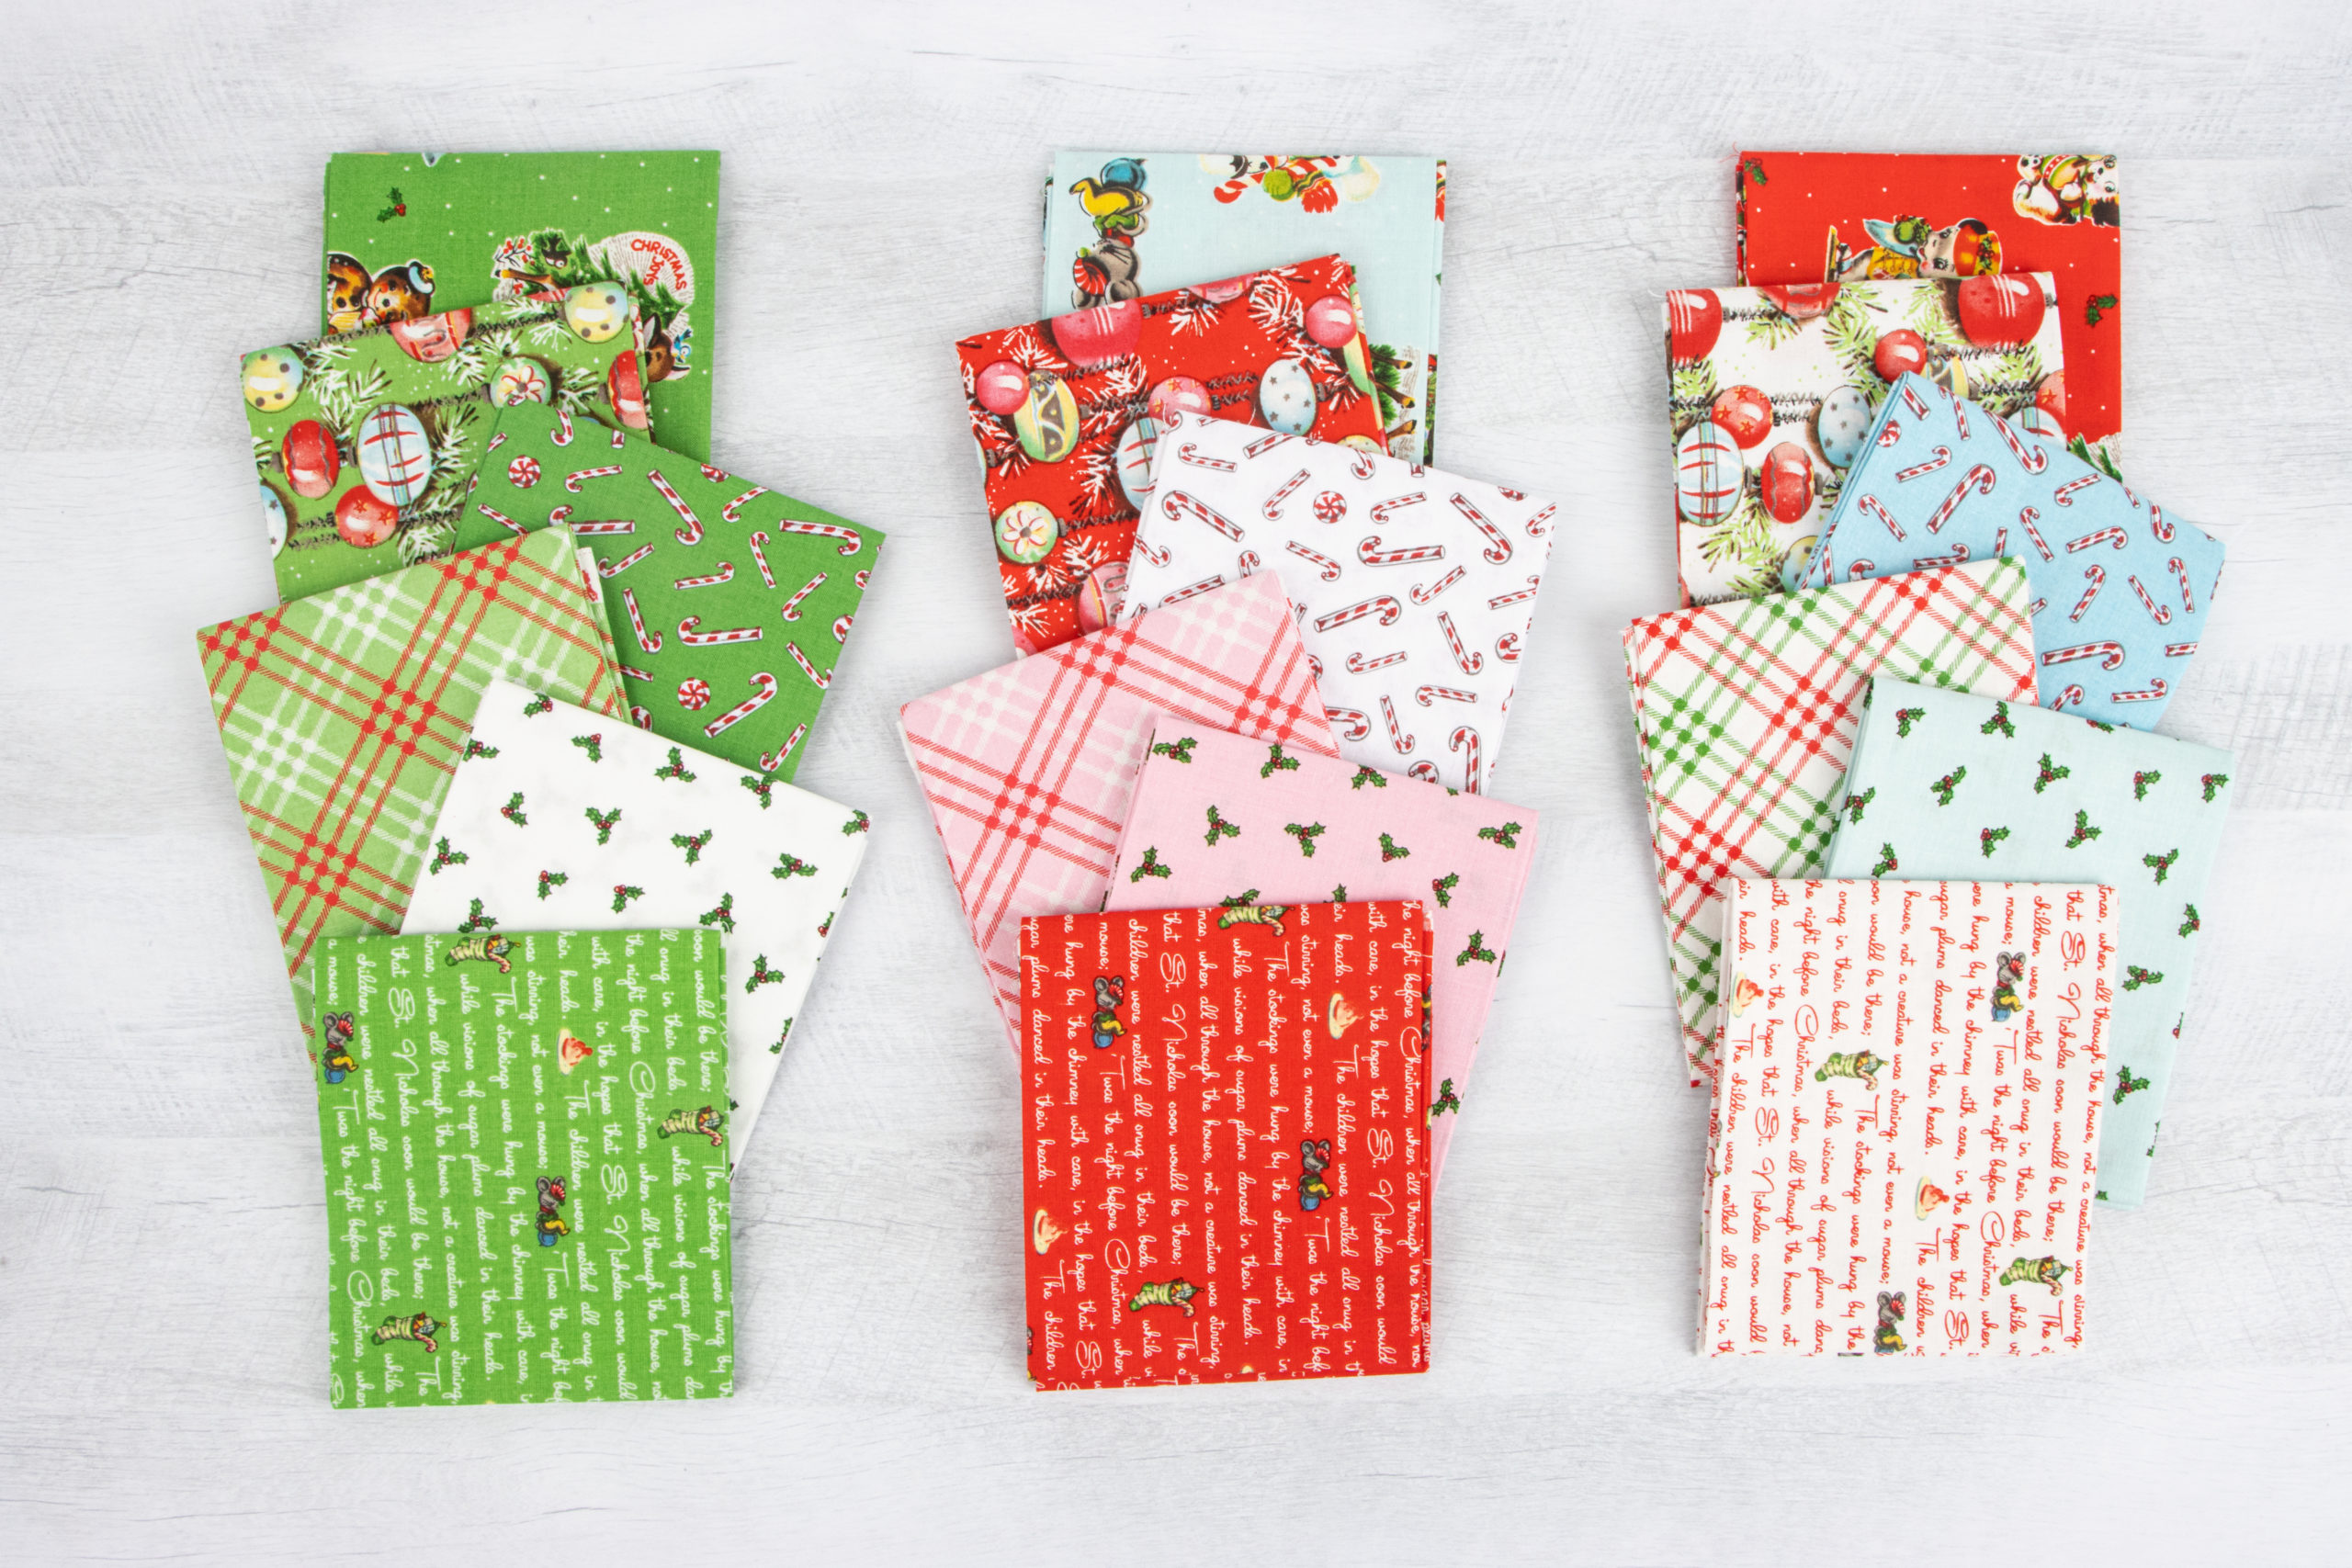
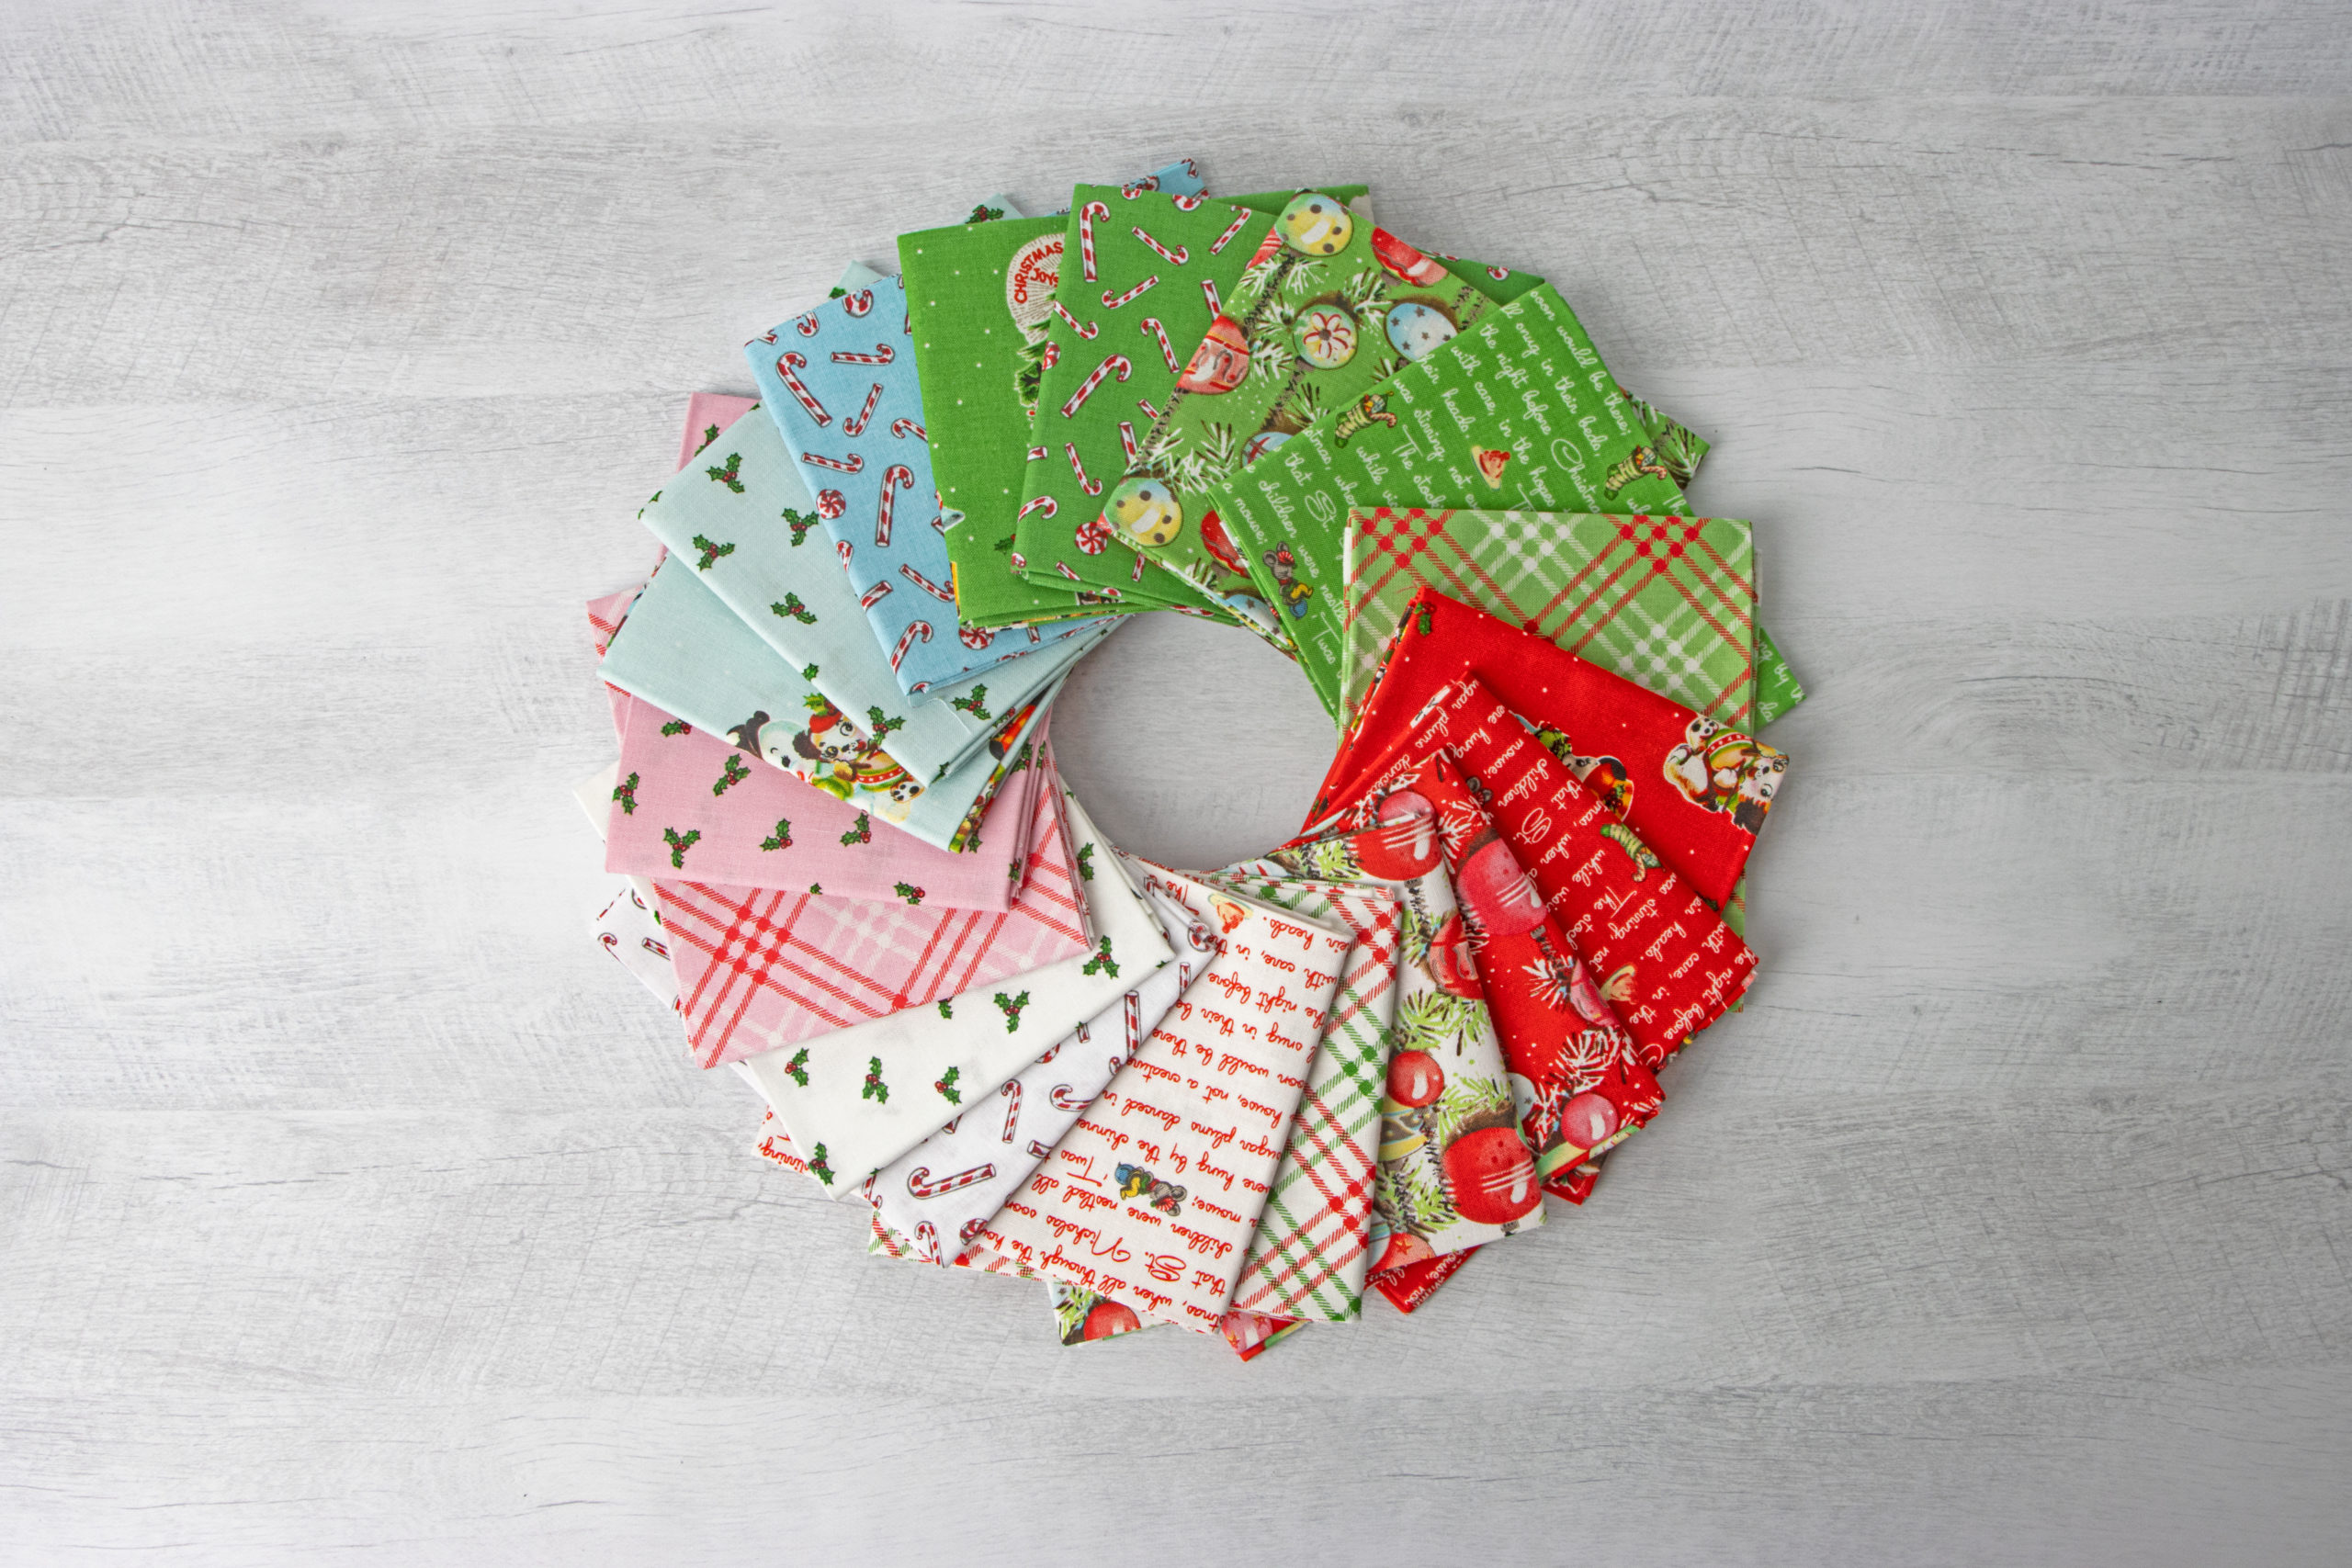
Hi Christmas! I'm ready for you! Hello, it's Karen from Creamcraft Goods. Christmas is my absolute favorite holiday, so I'll take any kind of Christmas fabric anytime of the year. The new collection Christmas Joys by Lindsay Wilkes of The Cottage Mama is so sweet and it's hard to resist the vintage cuteness! Using her adorable retro designs, I thought my Pincushion Station Pattern would work lovely in showcasing her new collection.
I created this Pincushion Station pattern with organization and compact size in mind. There are multiple pockets to hold all your sewing notions - small to medium scissors, small rotary cutter, seam ripper, clips, and of course pins and needles! It is also weighted with crushed walnuts, so it stays put around your sewing area. I also use it as a weight to hold down fabric when I'm cutting. All my essential notions are easily accessible, making sewing more organized and fun! This Pincushion Station also makes great gifts, or even Christmas gifts! Shop the pattern here:
The Pincushion Station is great for fussy cutting your favorite prints to make it extra special. Here, I fussy cut some of the cute Christmas animal images for the top of the pincushion and paired it with the text prints.
This Pincushion Station can hold many things and helps to keep you organized, while still being cute! I added button embellishments and handmade tags to make the pincushion cute and unique.
I hope you enjoyed my Pincushion Station for Christmas Joys. You can shop the pattern here:
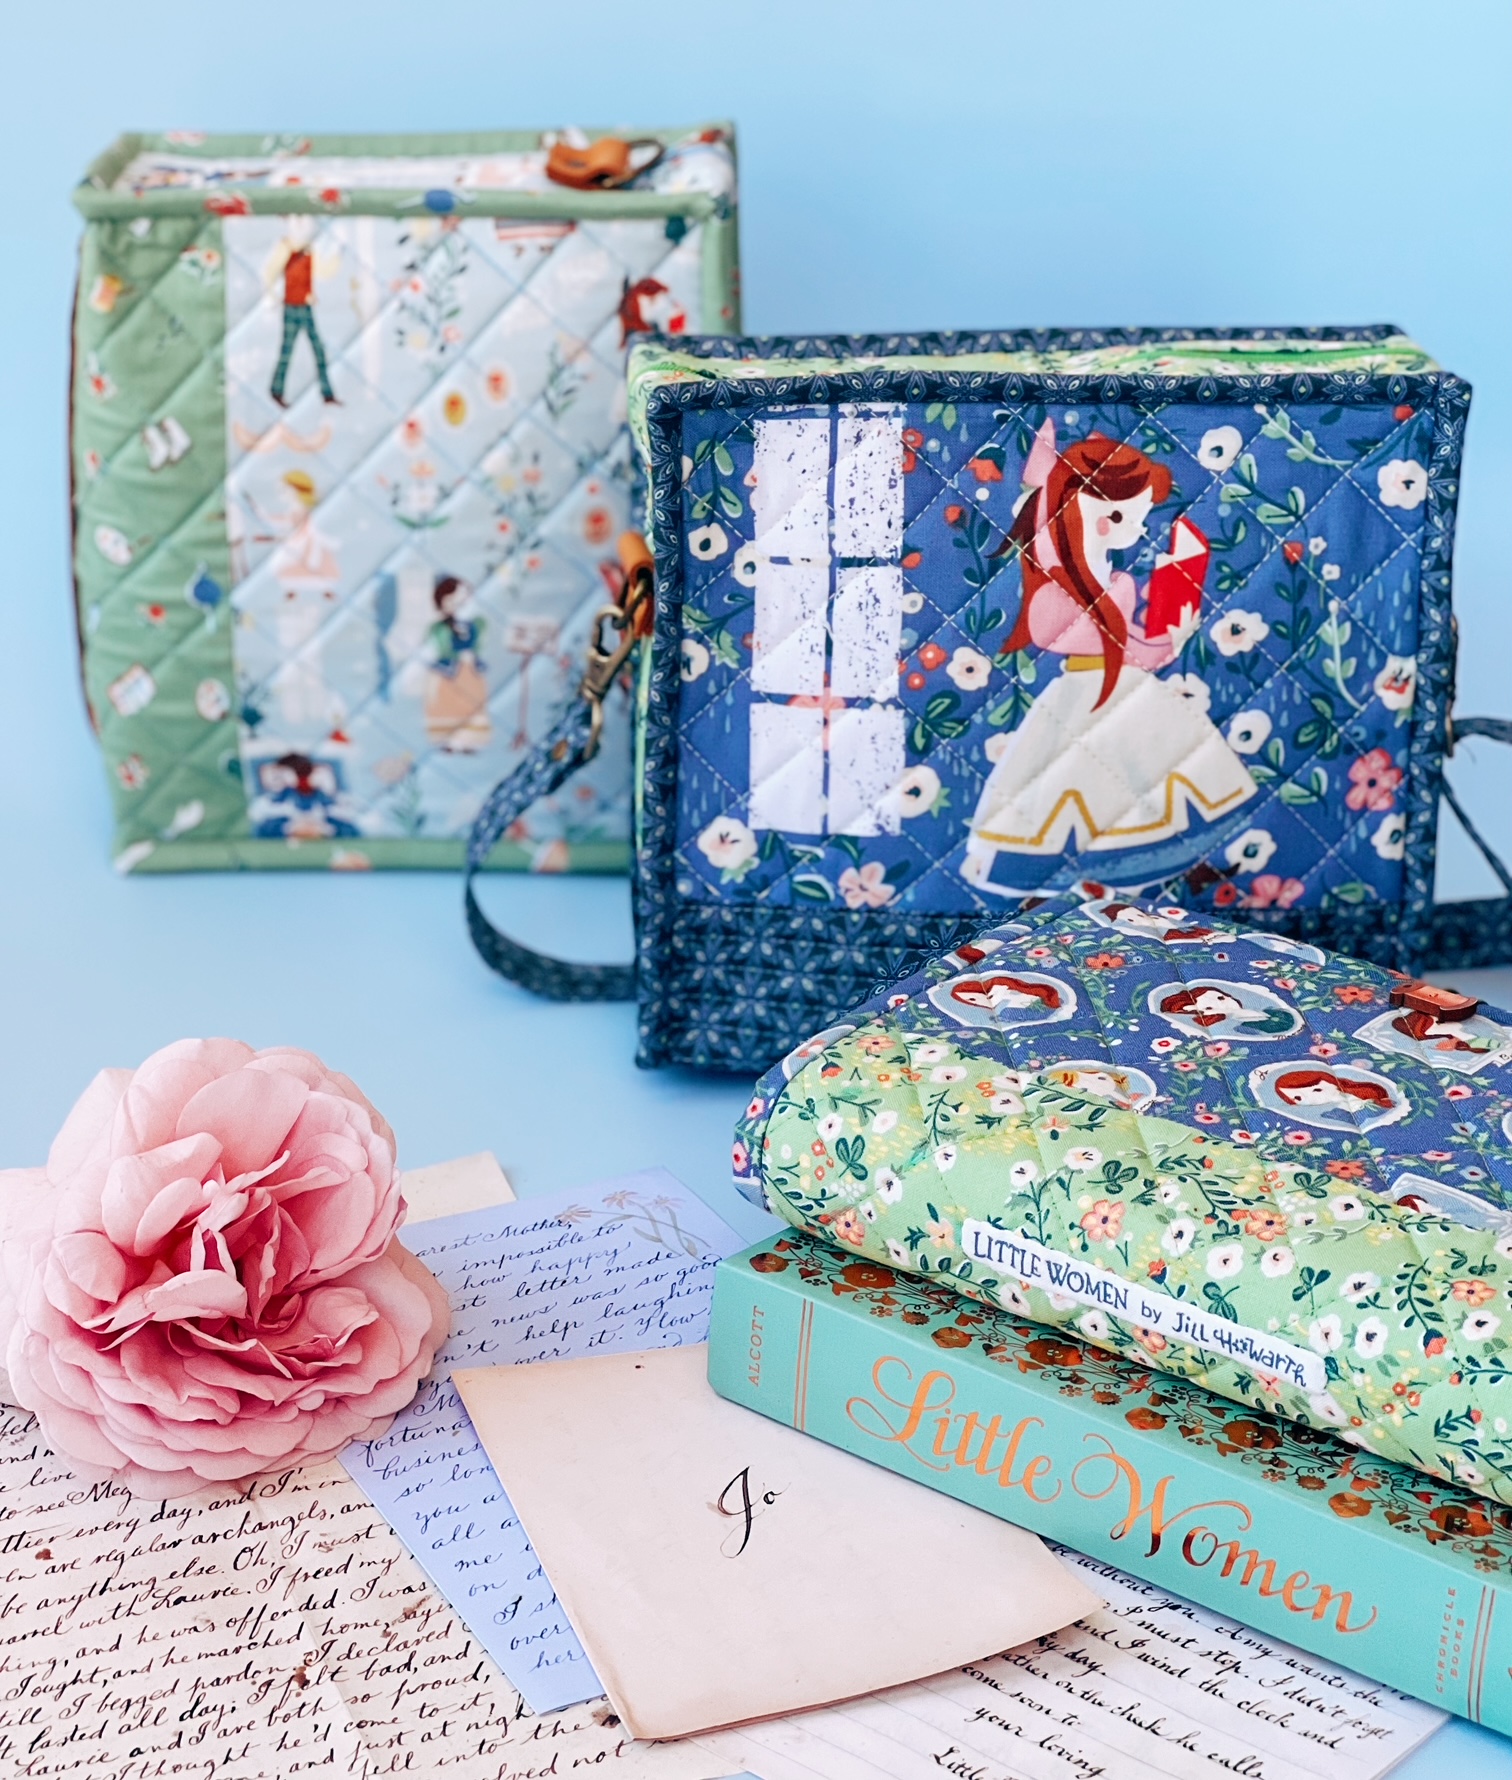
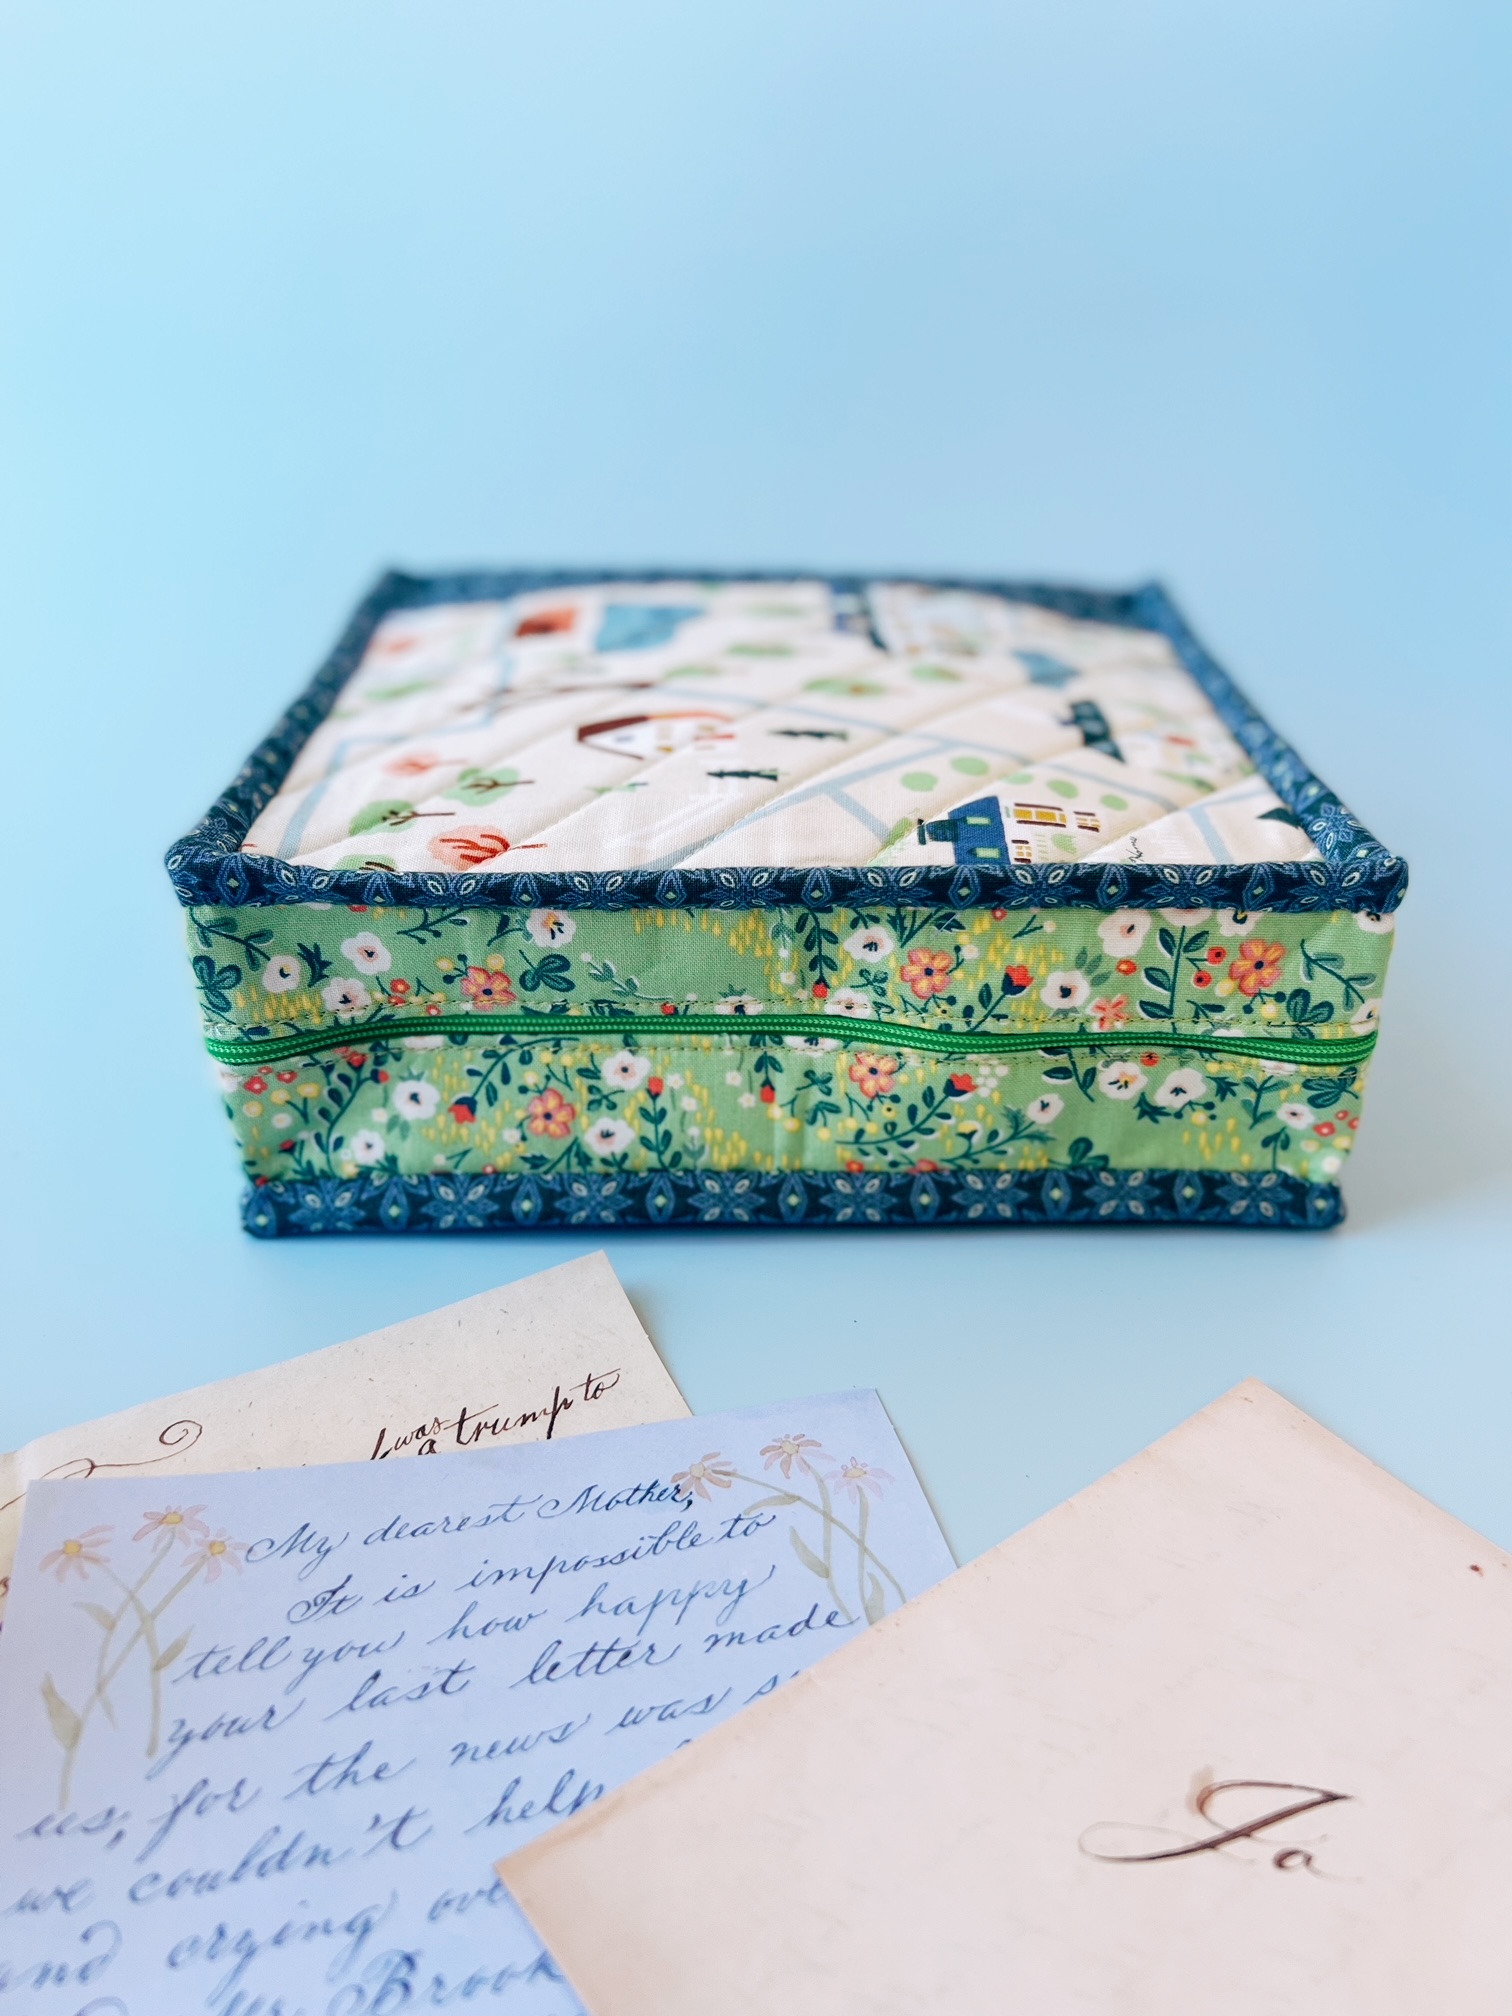
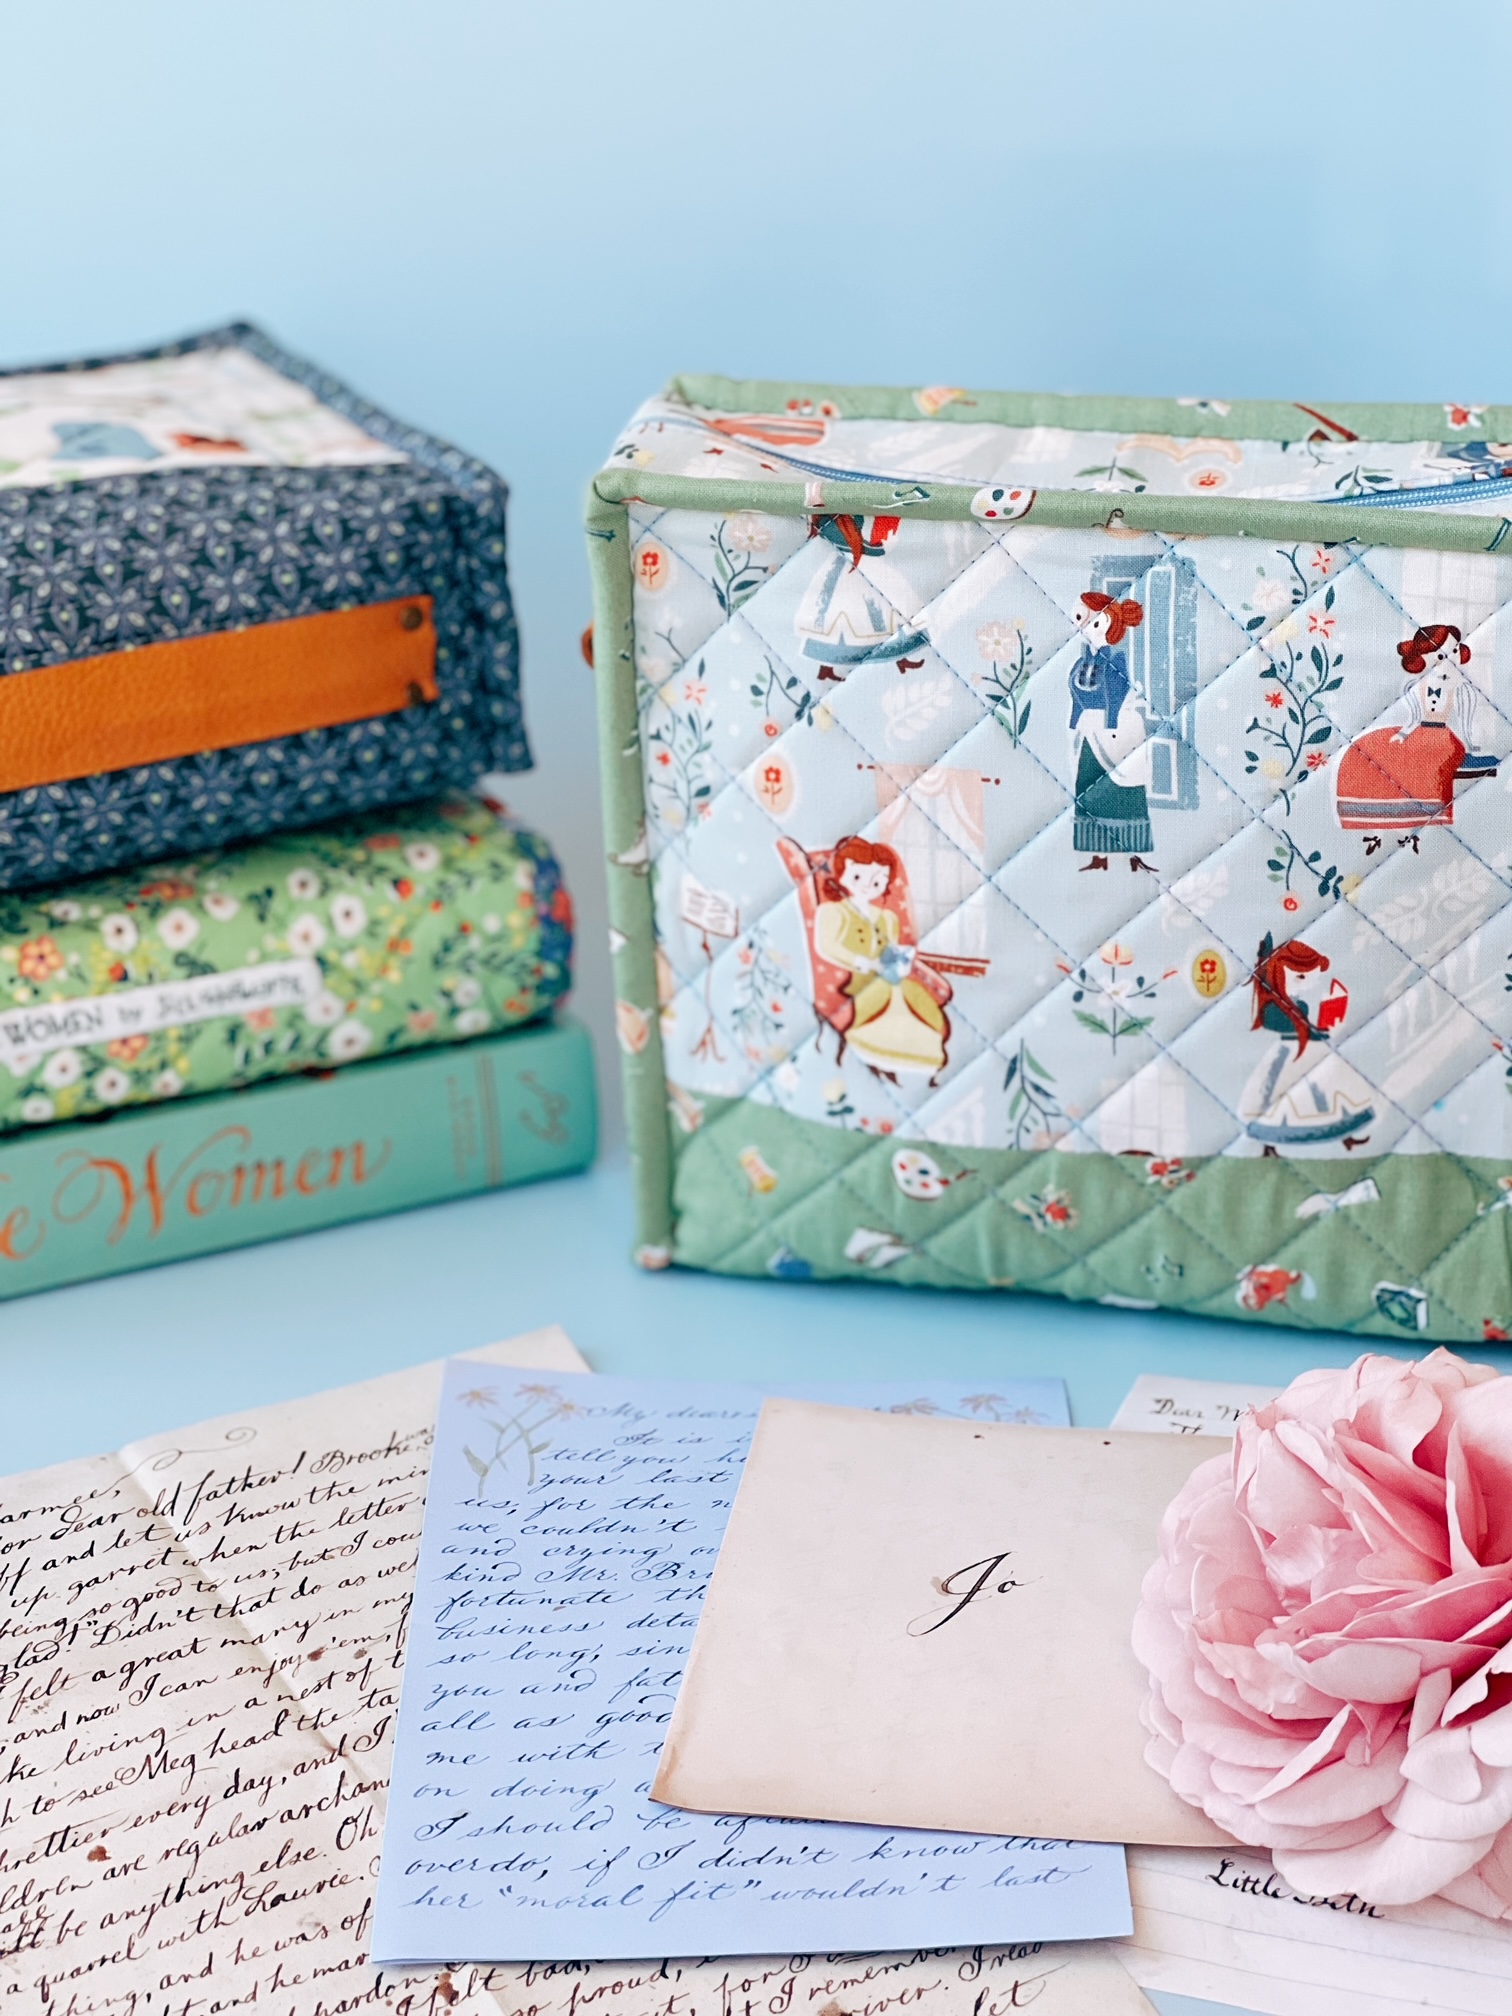
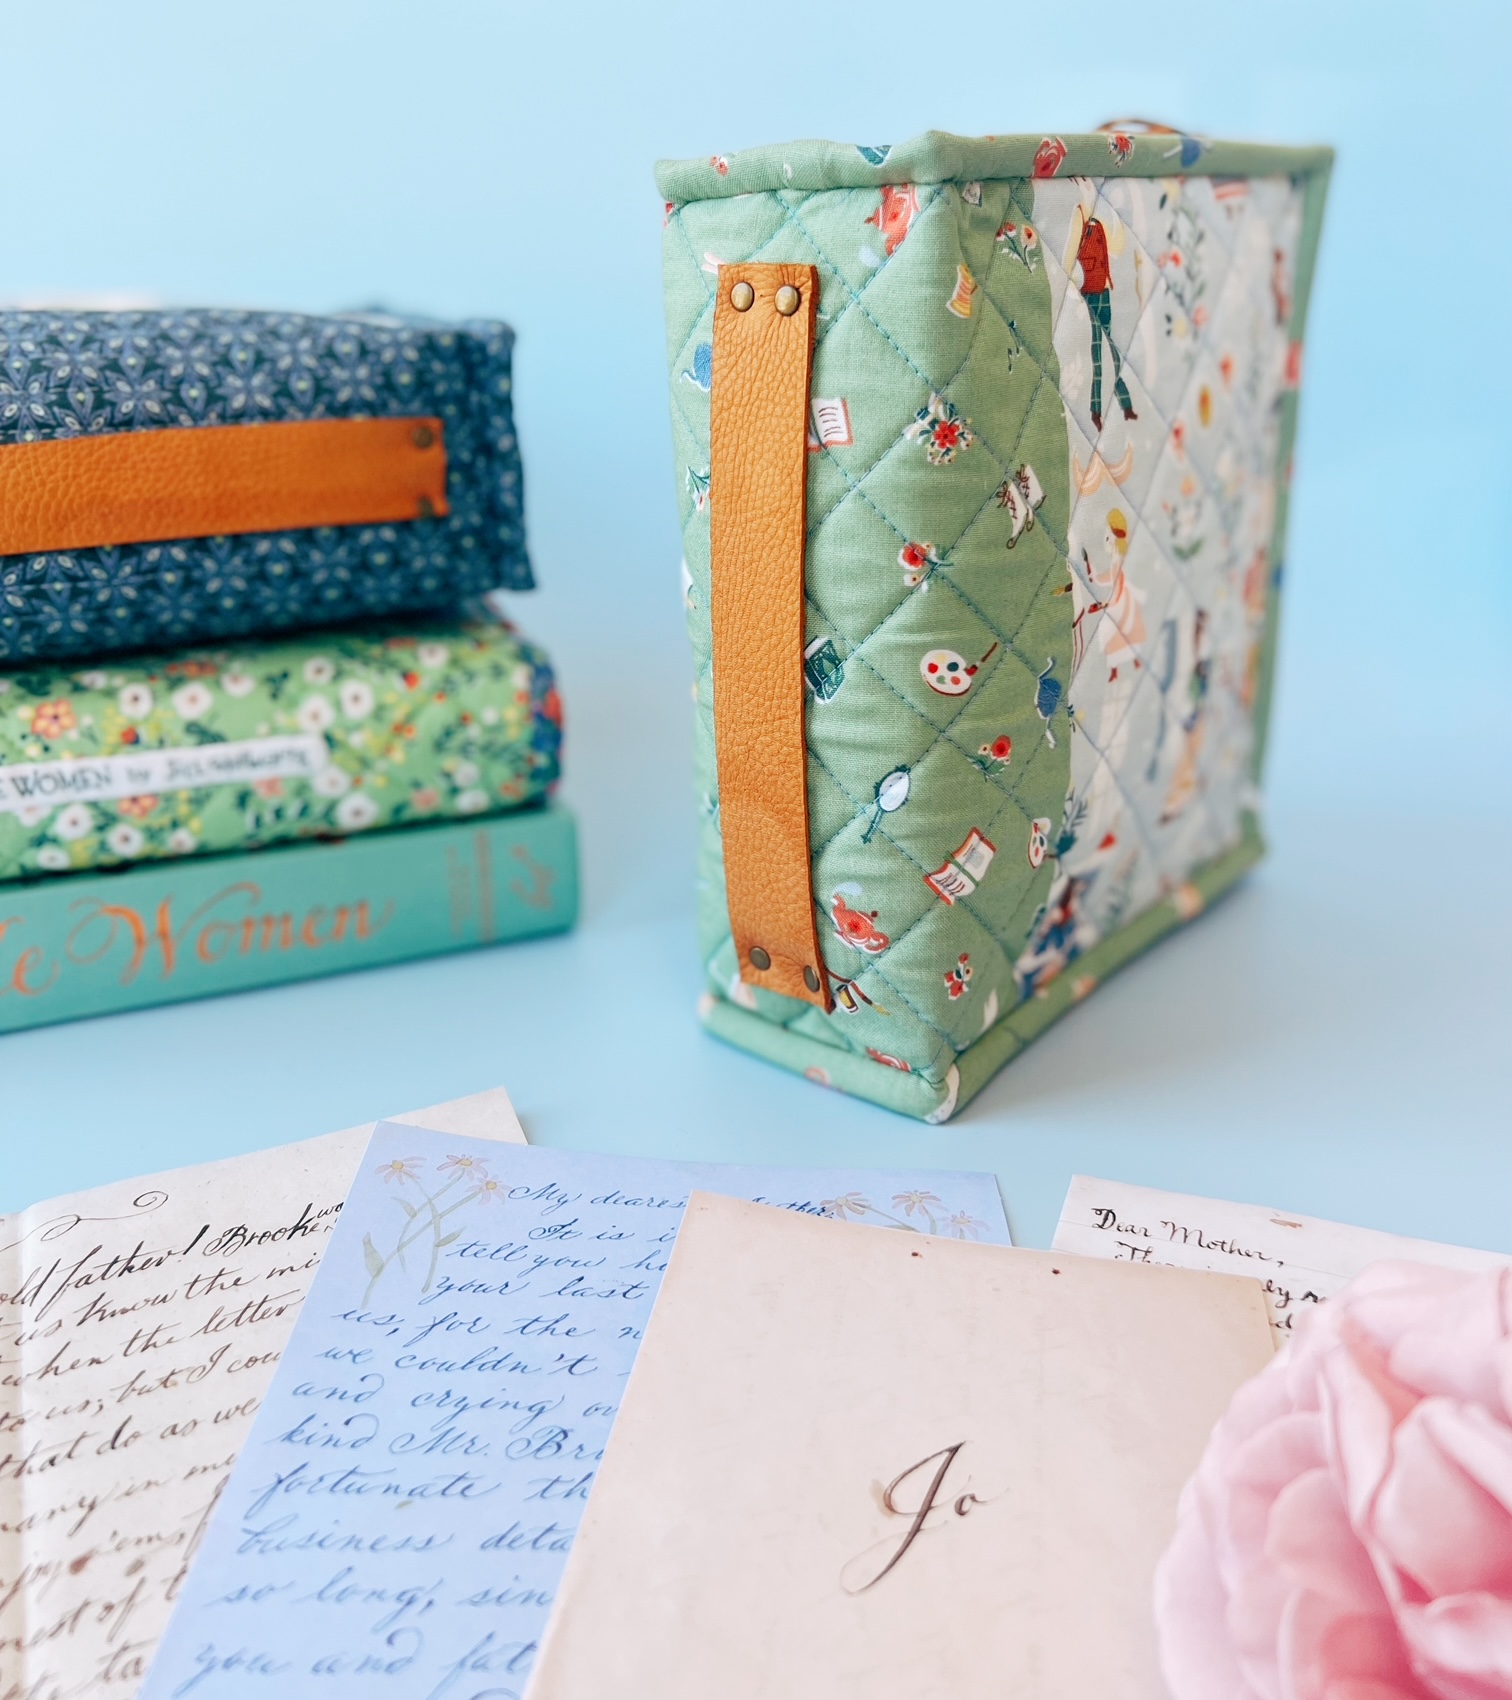
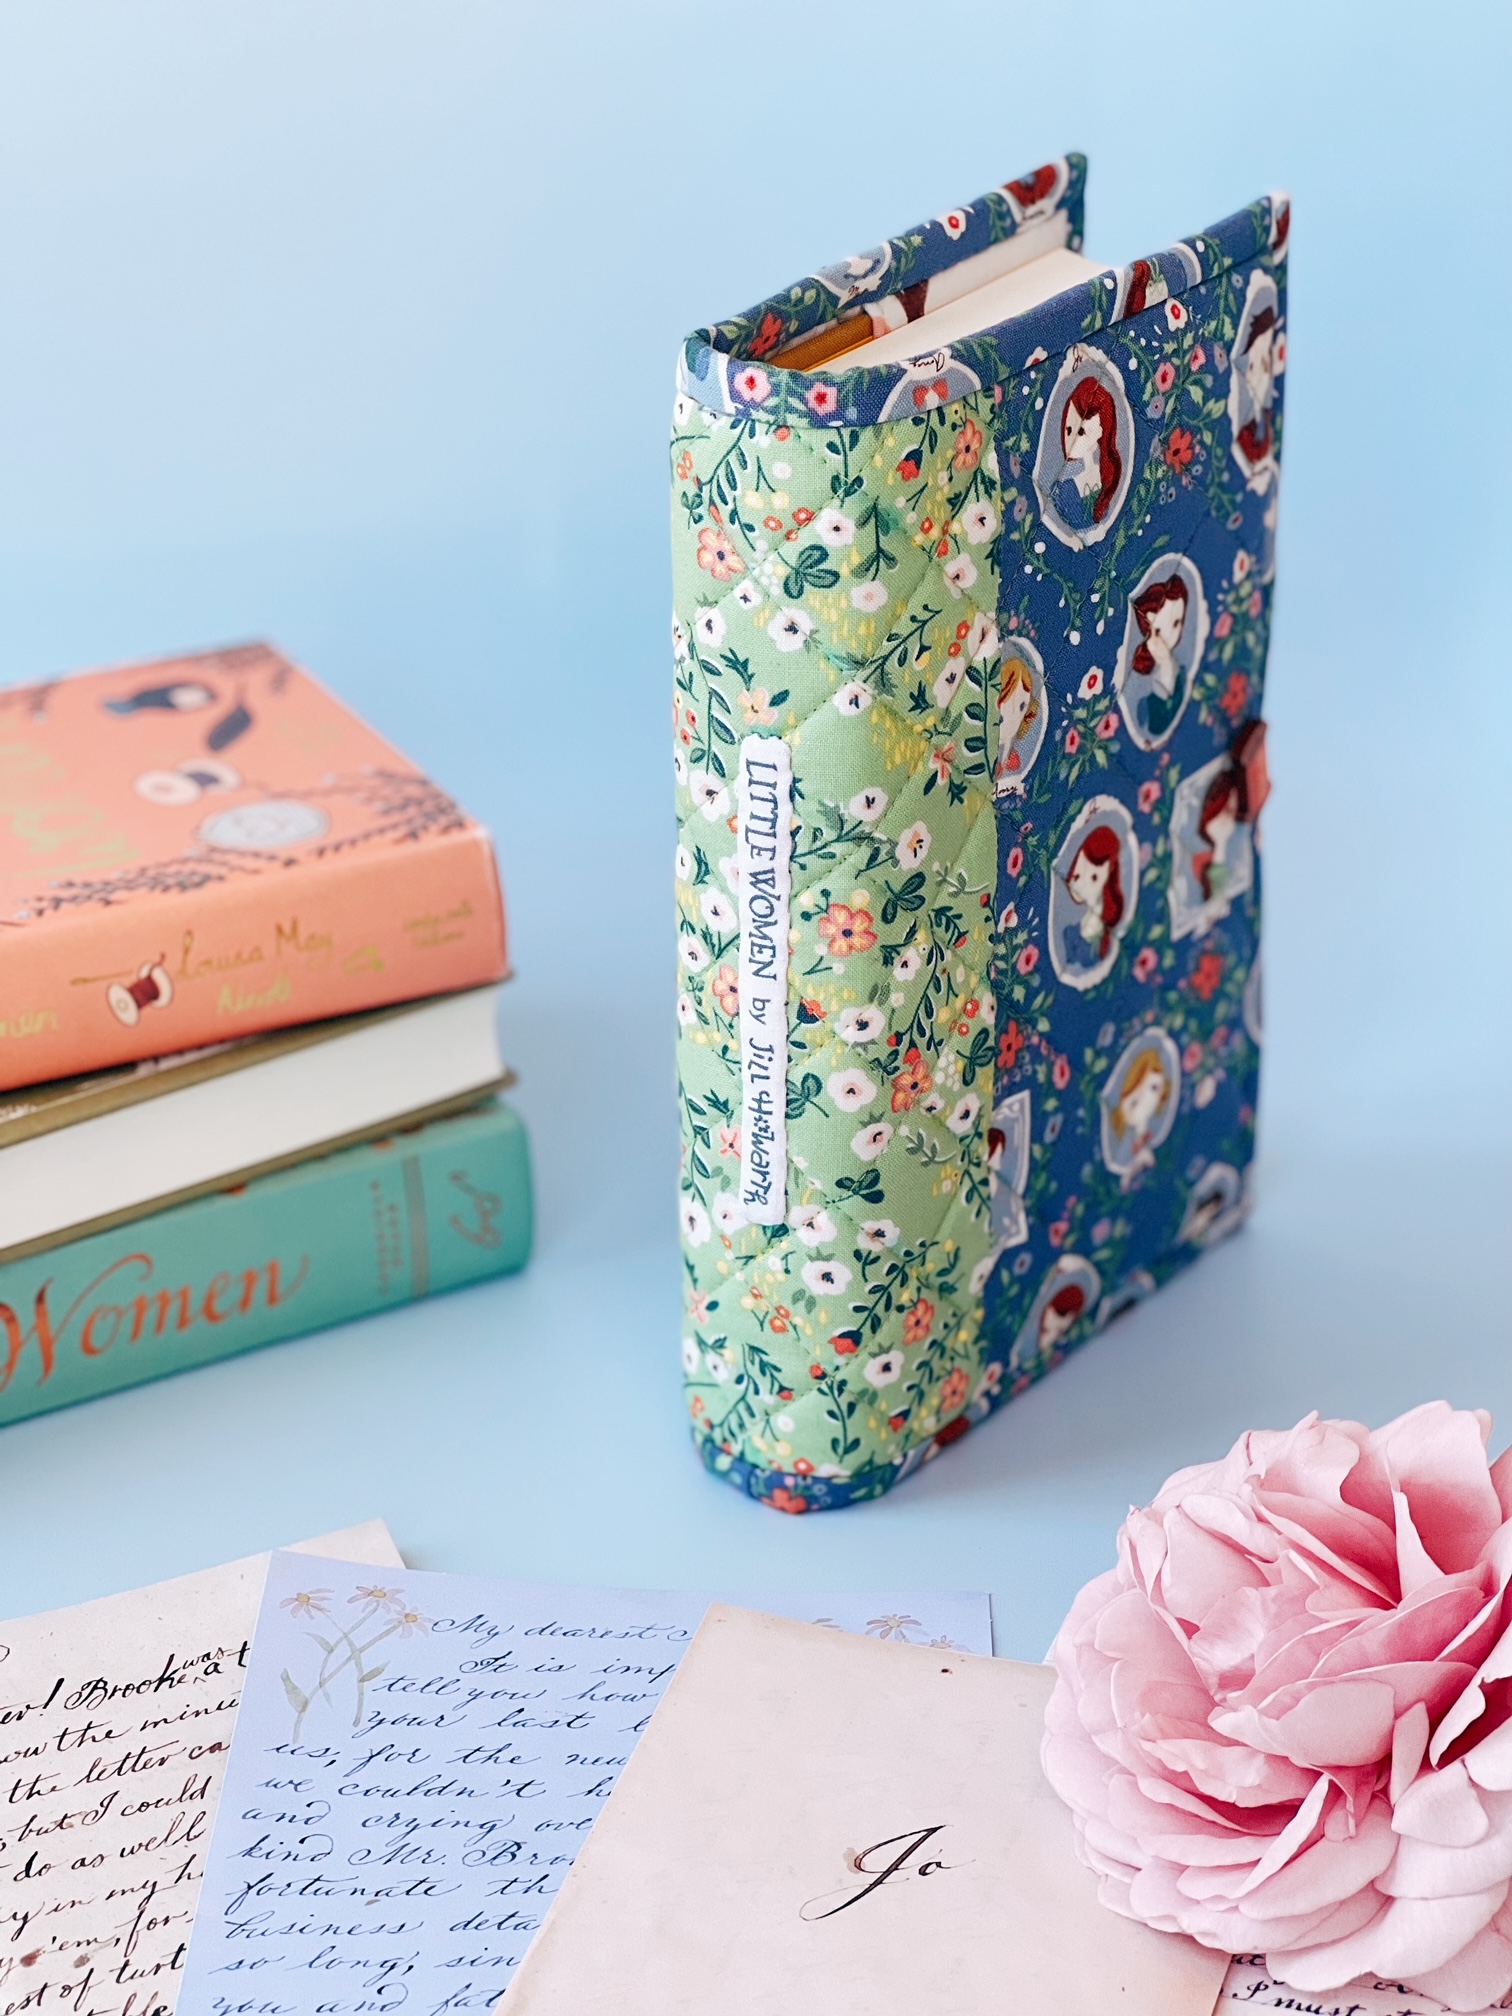
Hi friends! I’m so excited to share my latest project creating with this adorable new fabric line – Little Women by Jill Howarth for Riley Blake Designs! Jill's take on classic stories is always unique, sweet, and just plain cute! She sweetly illustrates the main characters and scenery to perfection, while adding her own creative spin.
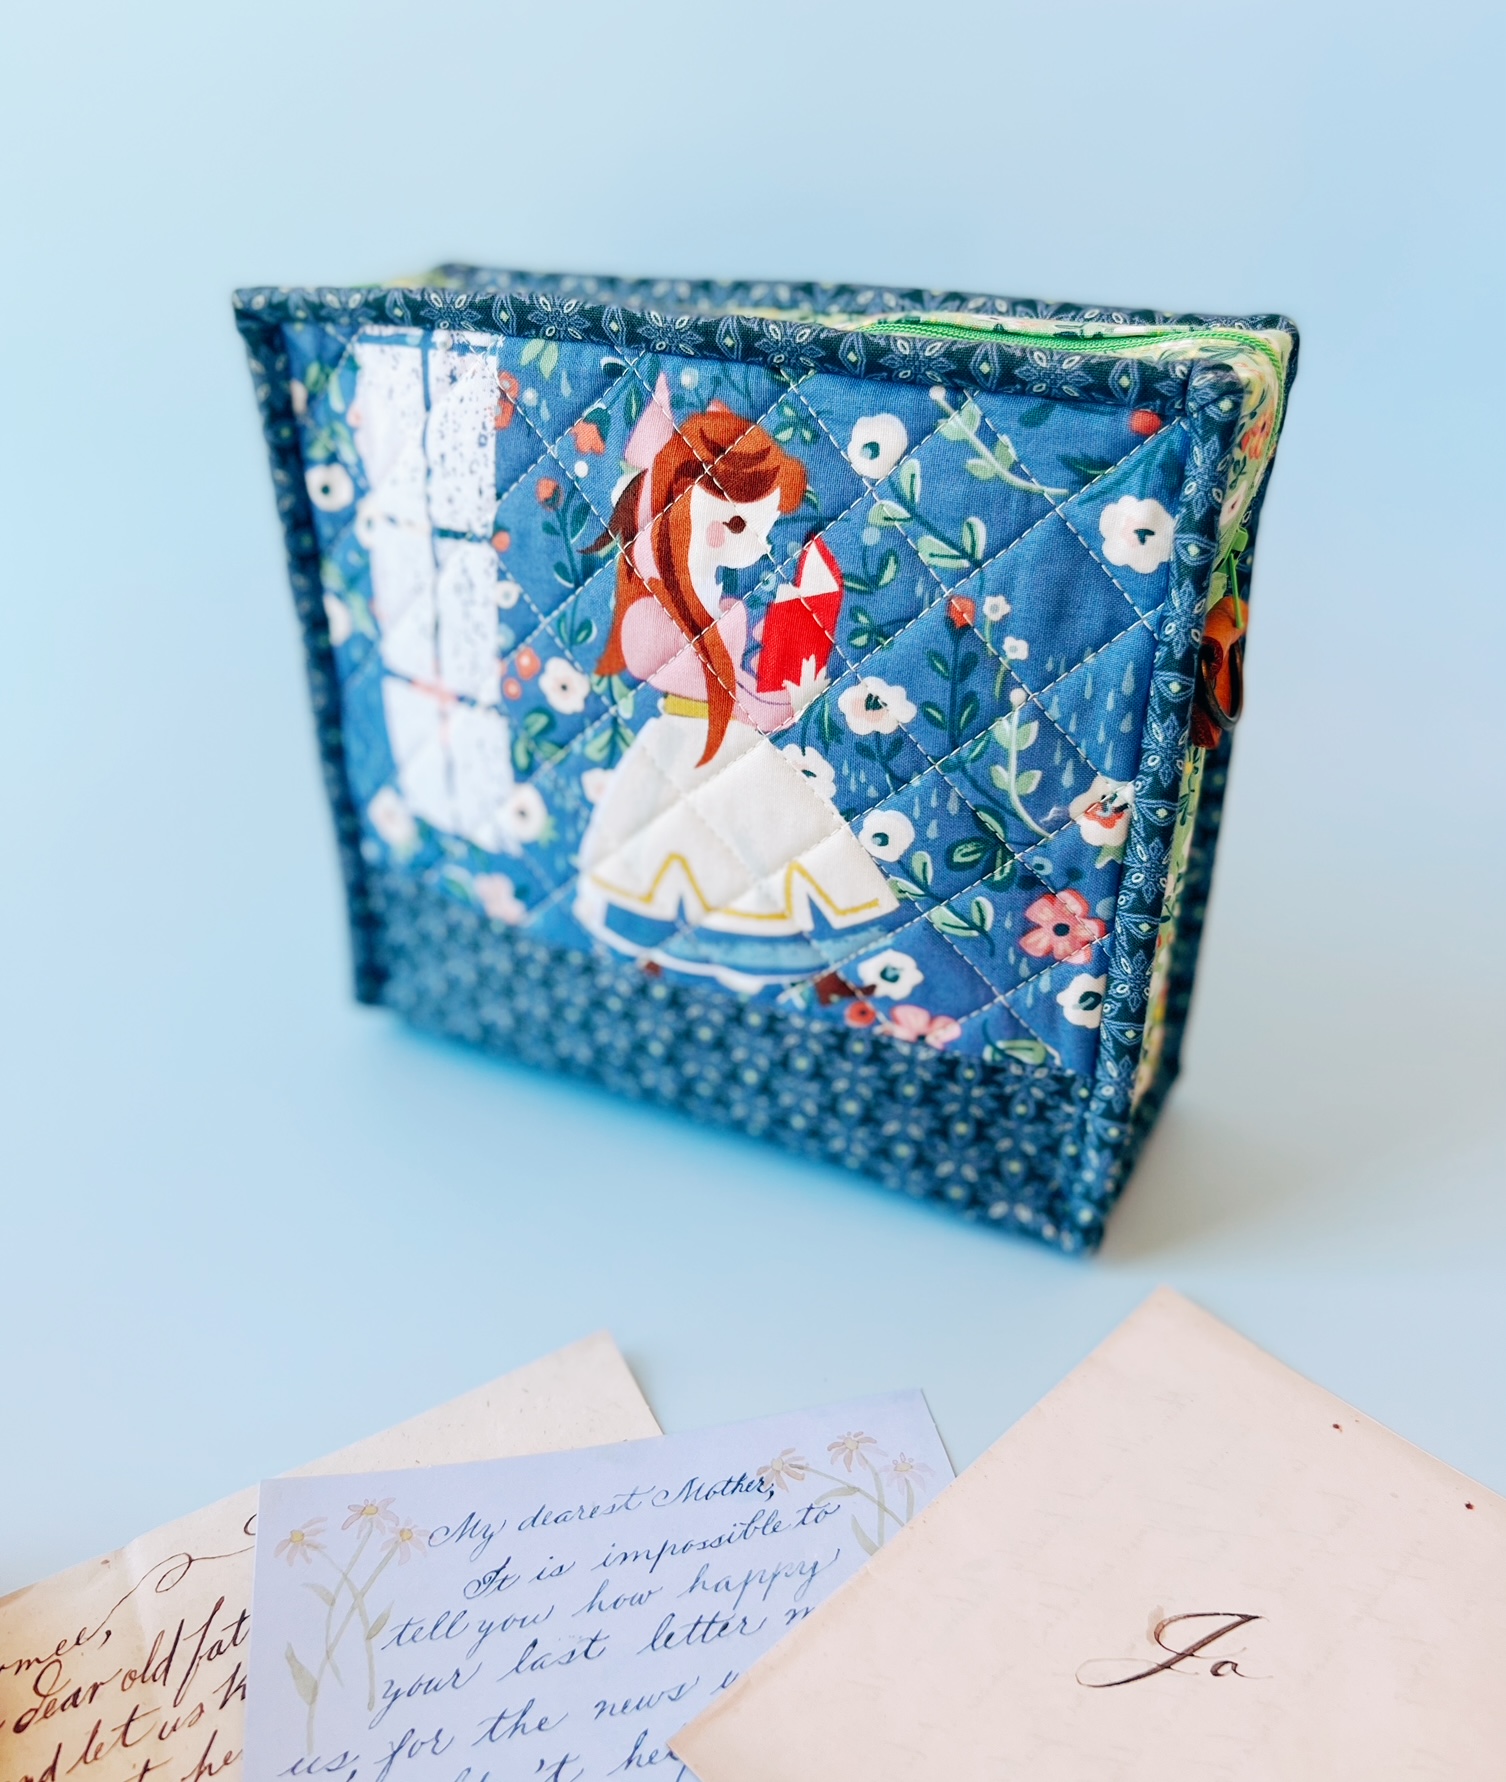
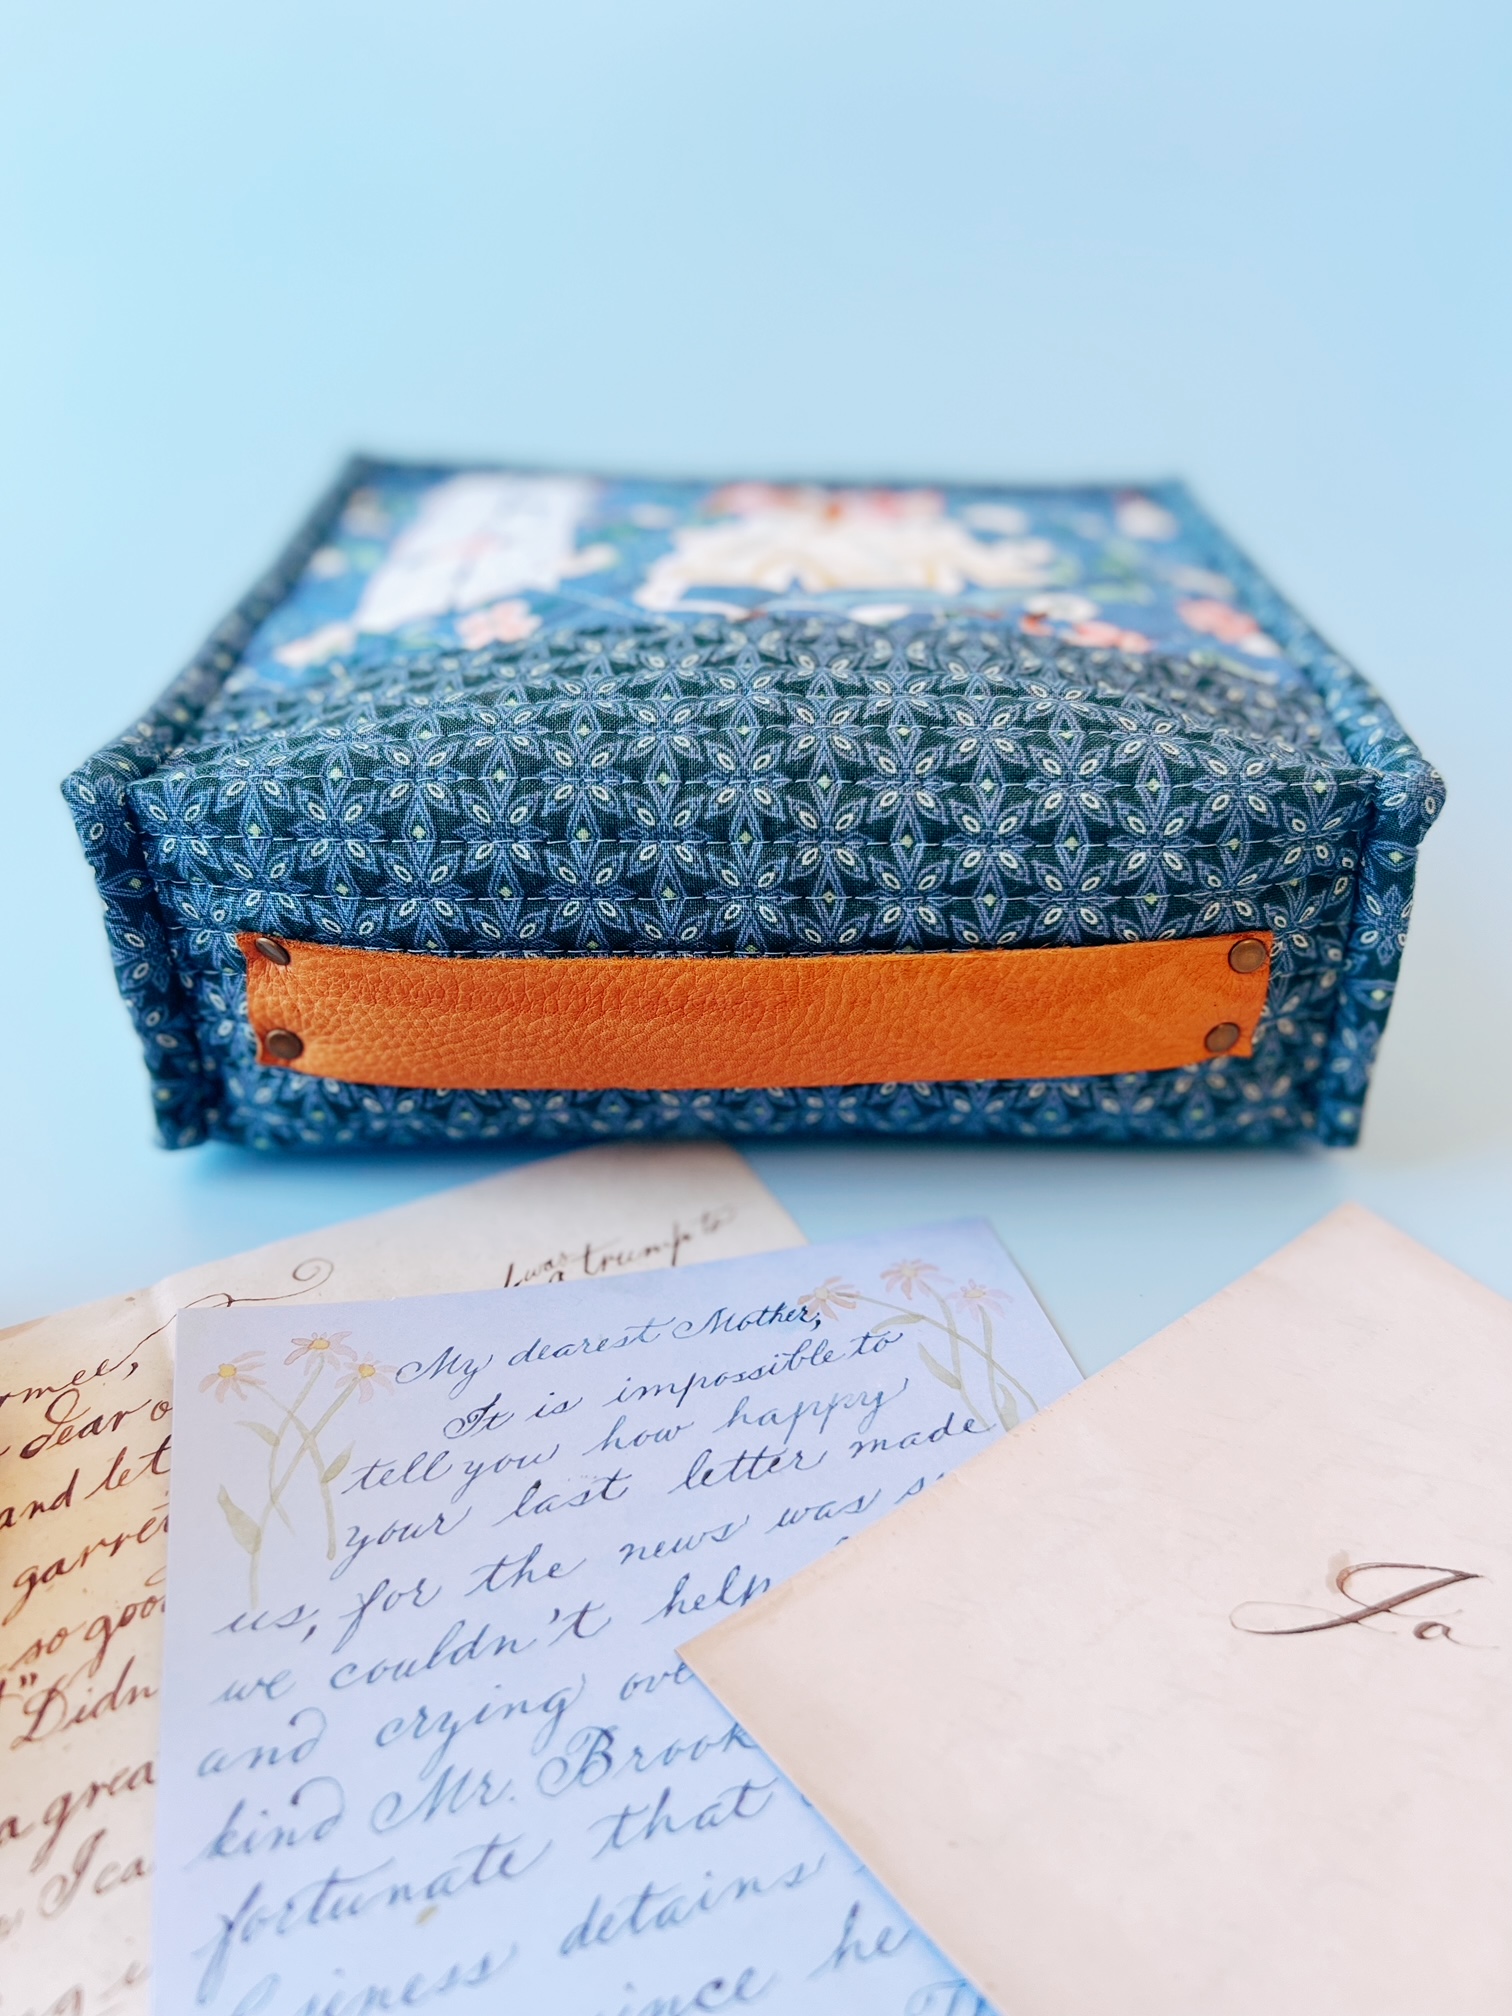
For this project, I wanted to create a something that complemented her story, so what better way than in books! This is my take on a book bag, making it into a Book Bag Purse. I created a book style purse using main character prints and complemented it with Jill’s beautiful floral, pattern, and notion prints. I added leather elements and metal hardware for the handle and it also has a detachable bag strap.
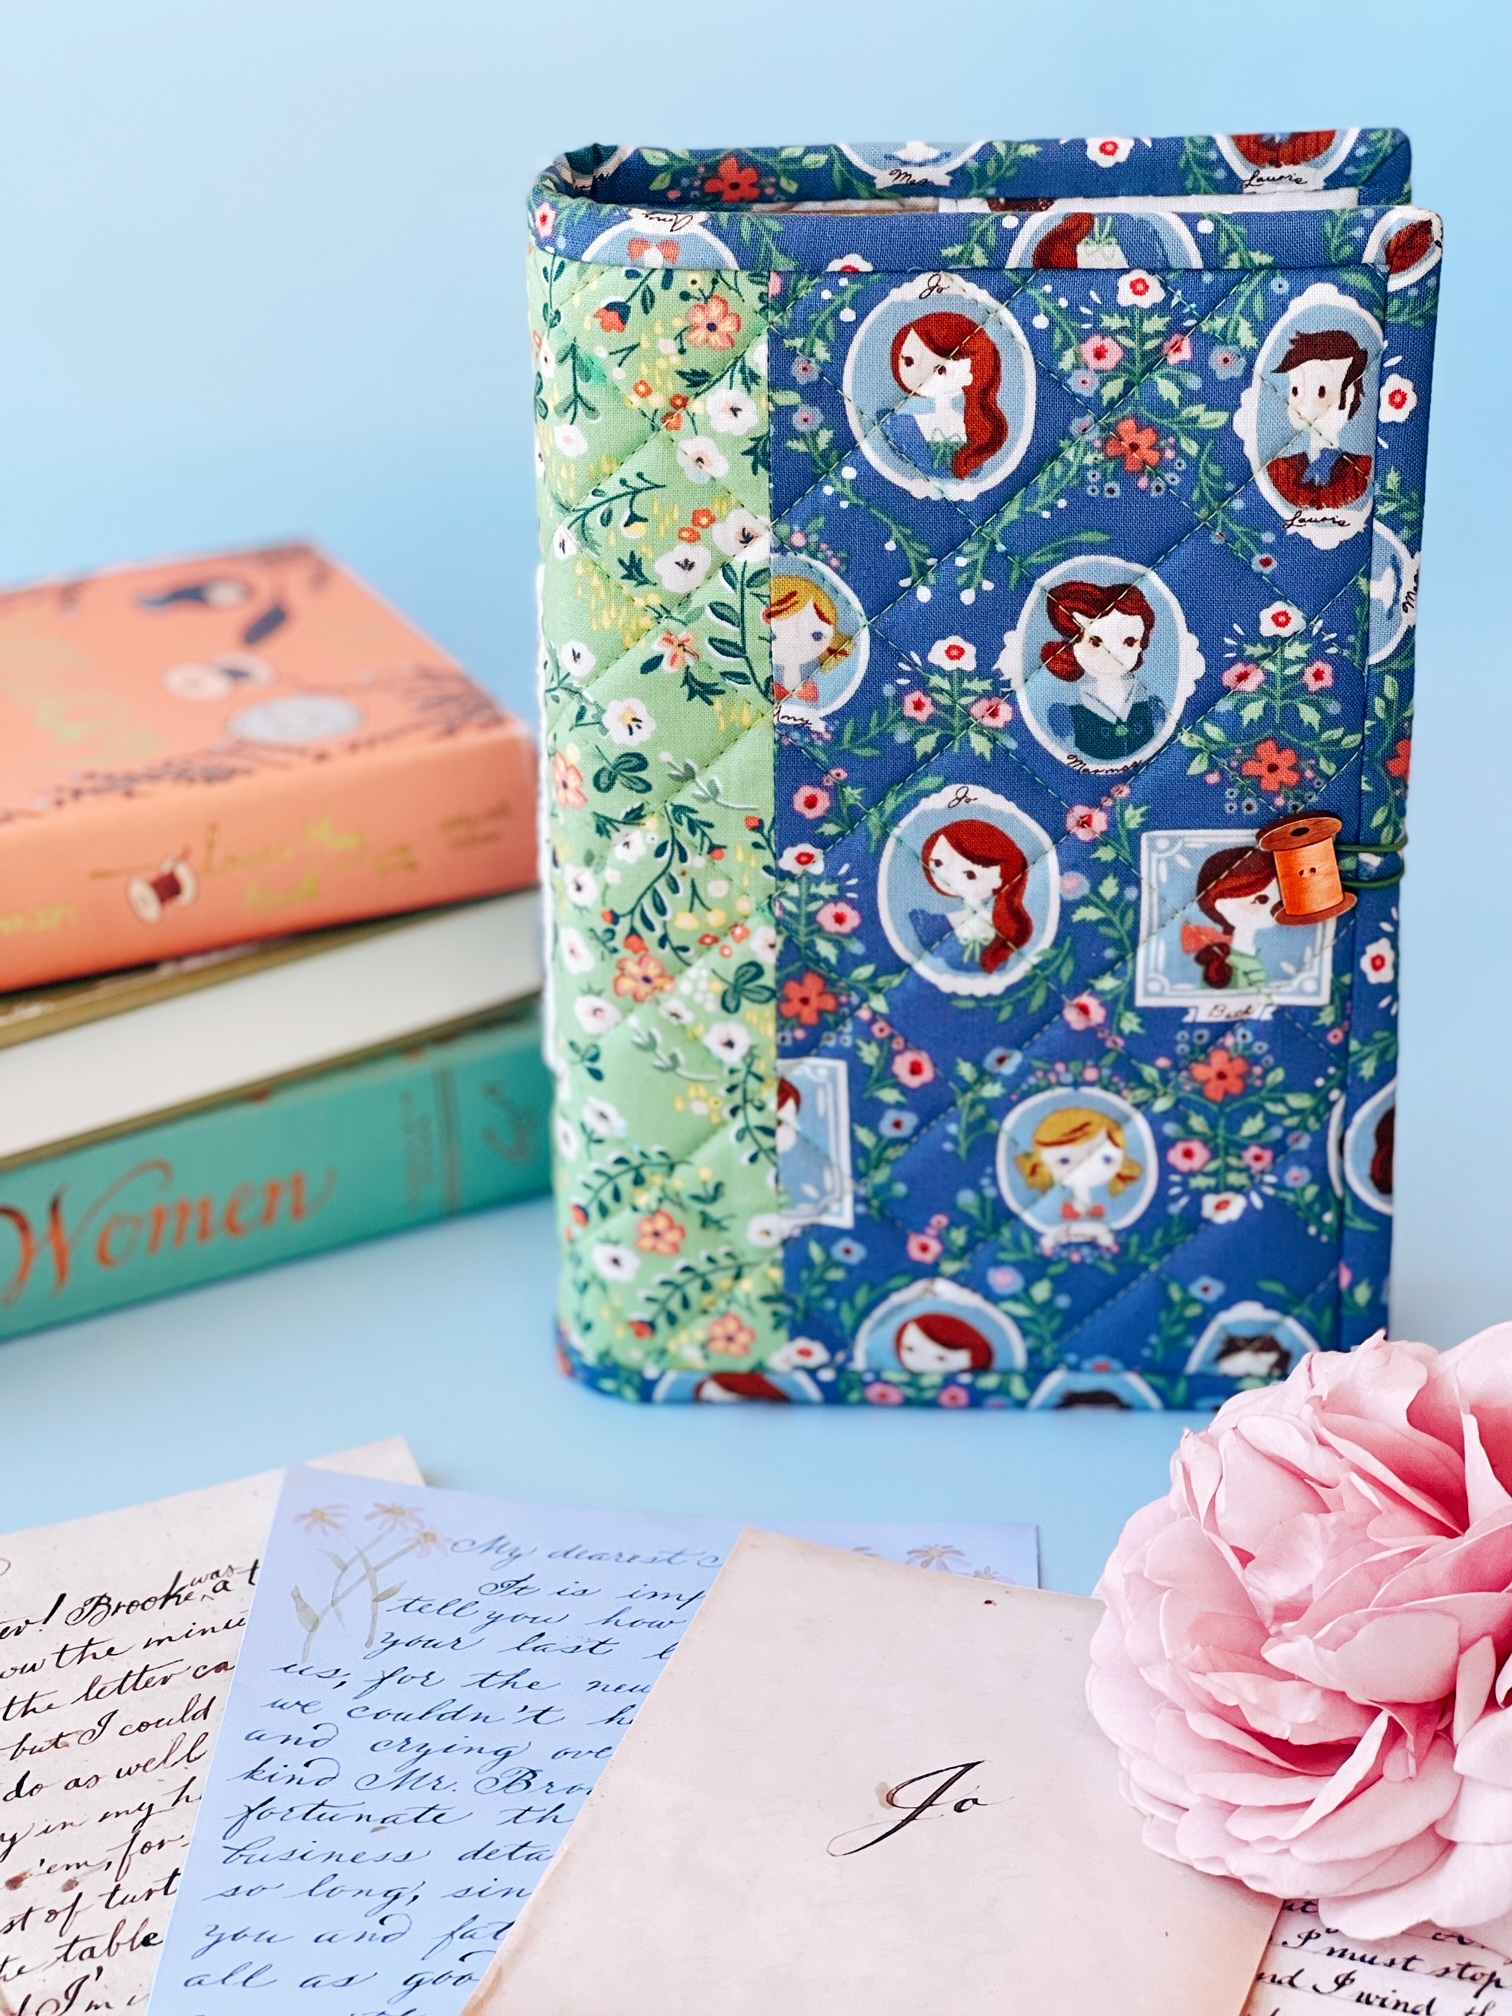
I also made a pretty, useful book cover, which surprise, is a free tutorial down below! I love making book covers for special books I collect or it would even make a beautiful gift to give to one who loves collecting or reading books too.
Book Bag Purse:
Book Bag Purse and Book Cover created with Little Women By Jill Howarth
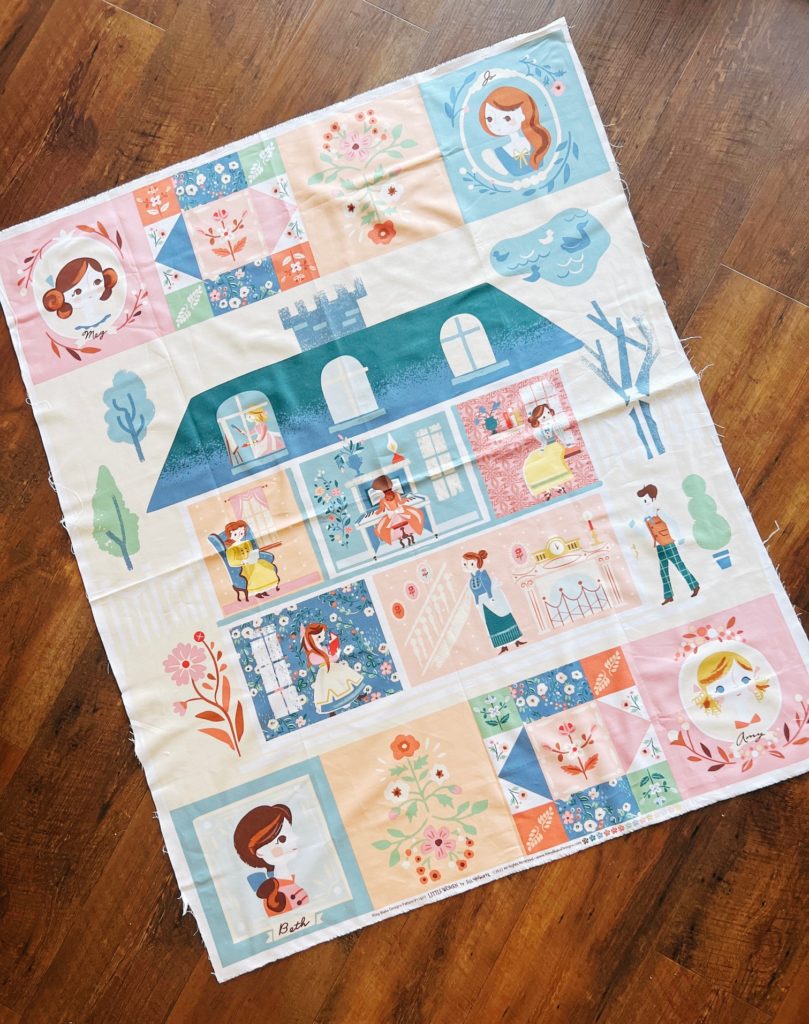
Little Women Panel
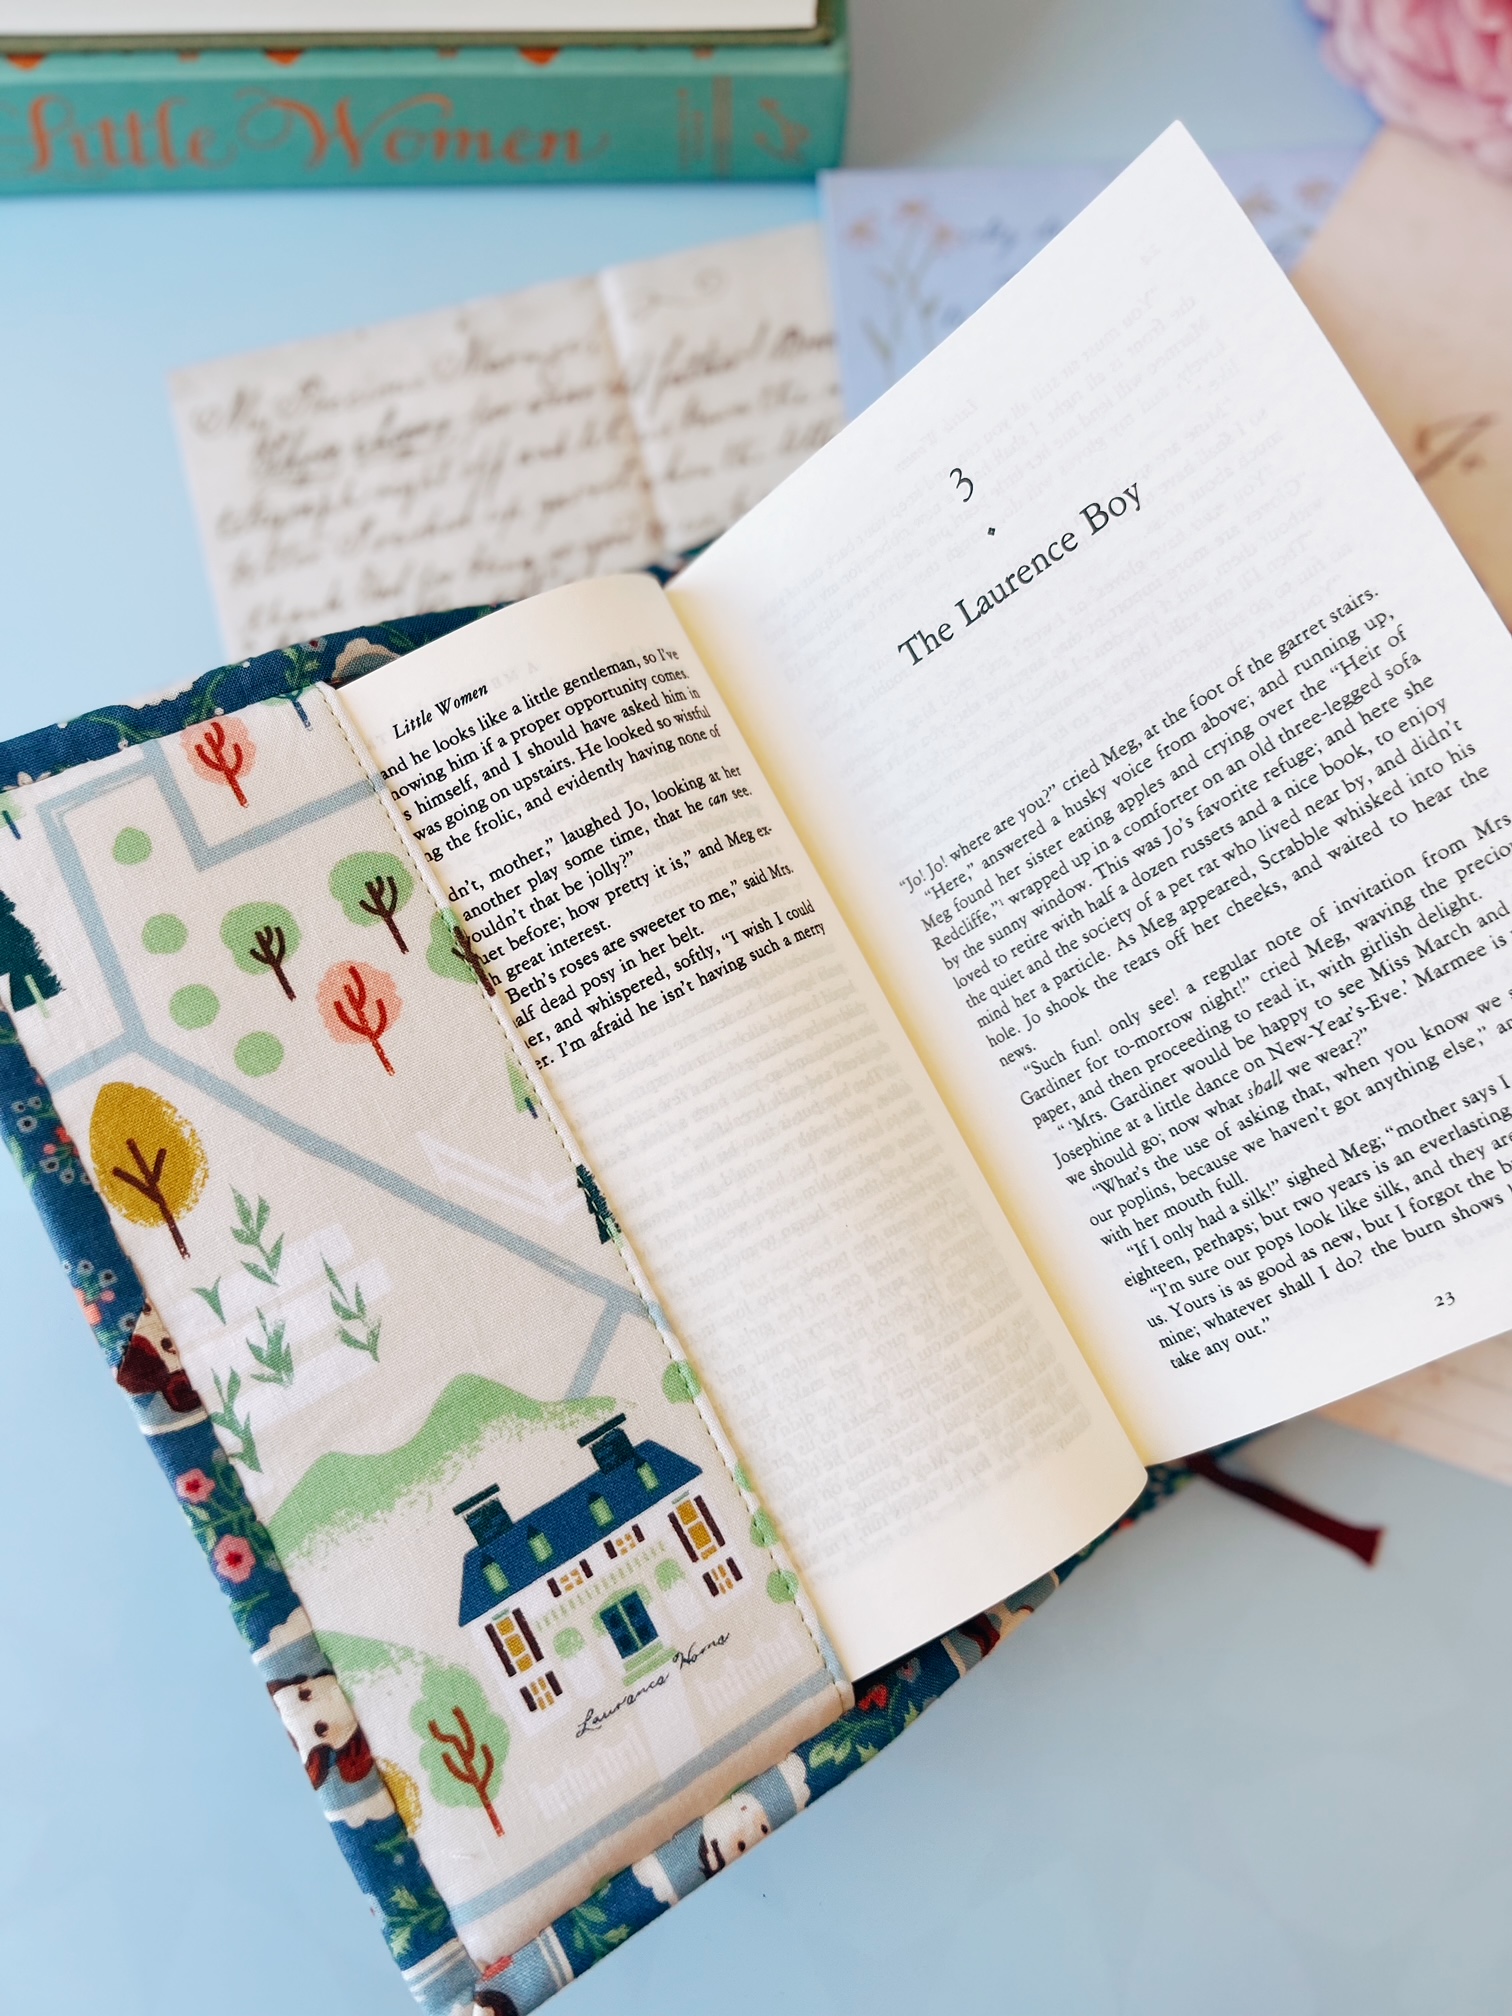
I used the the lovely panel in this collection and fussy cut an image for the book bag cover. You can do so many things with a panel - create a quilt or cut it up to make more projects.
I used leather and metal hardware for the handle and bag strap. I added a zipper to the top of the bag to hold everything together.
It's hard to chose a favorite print in this collection, so I ended up making two bags to showcase the fabric!
Book Cover:
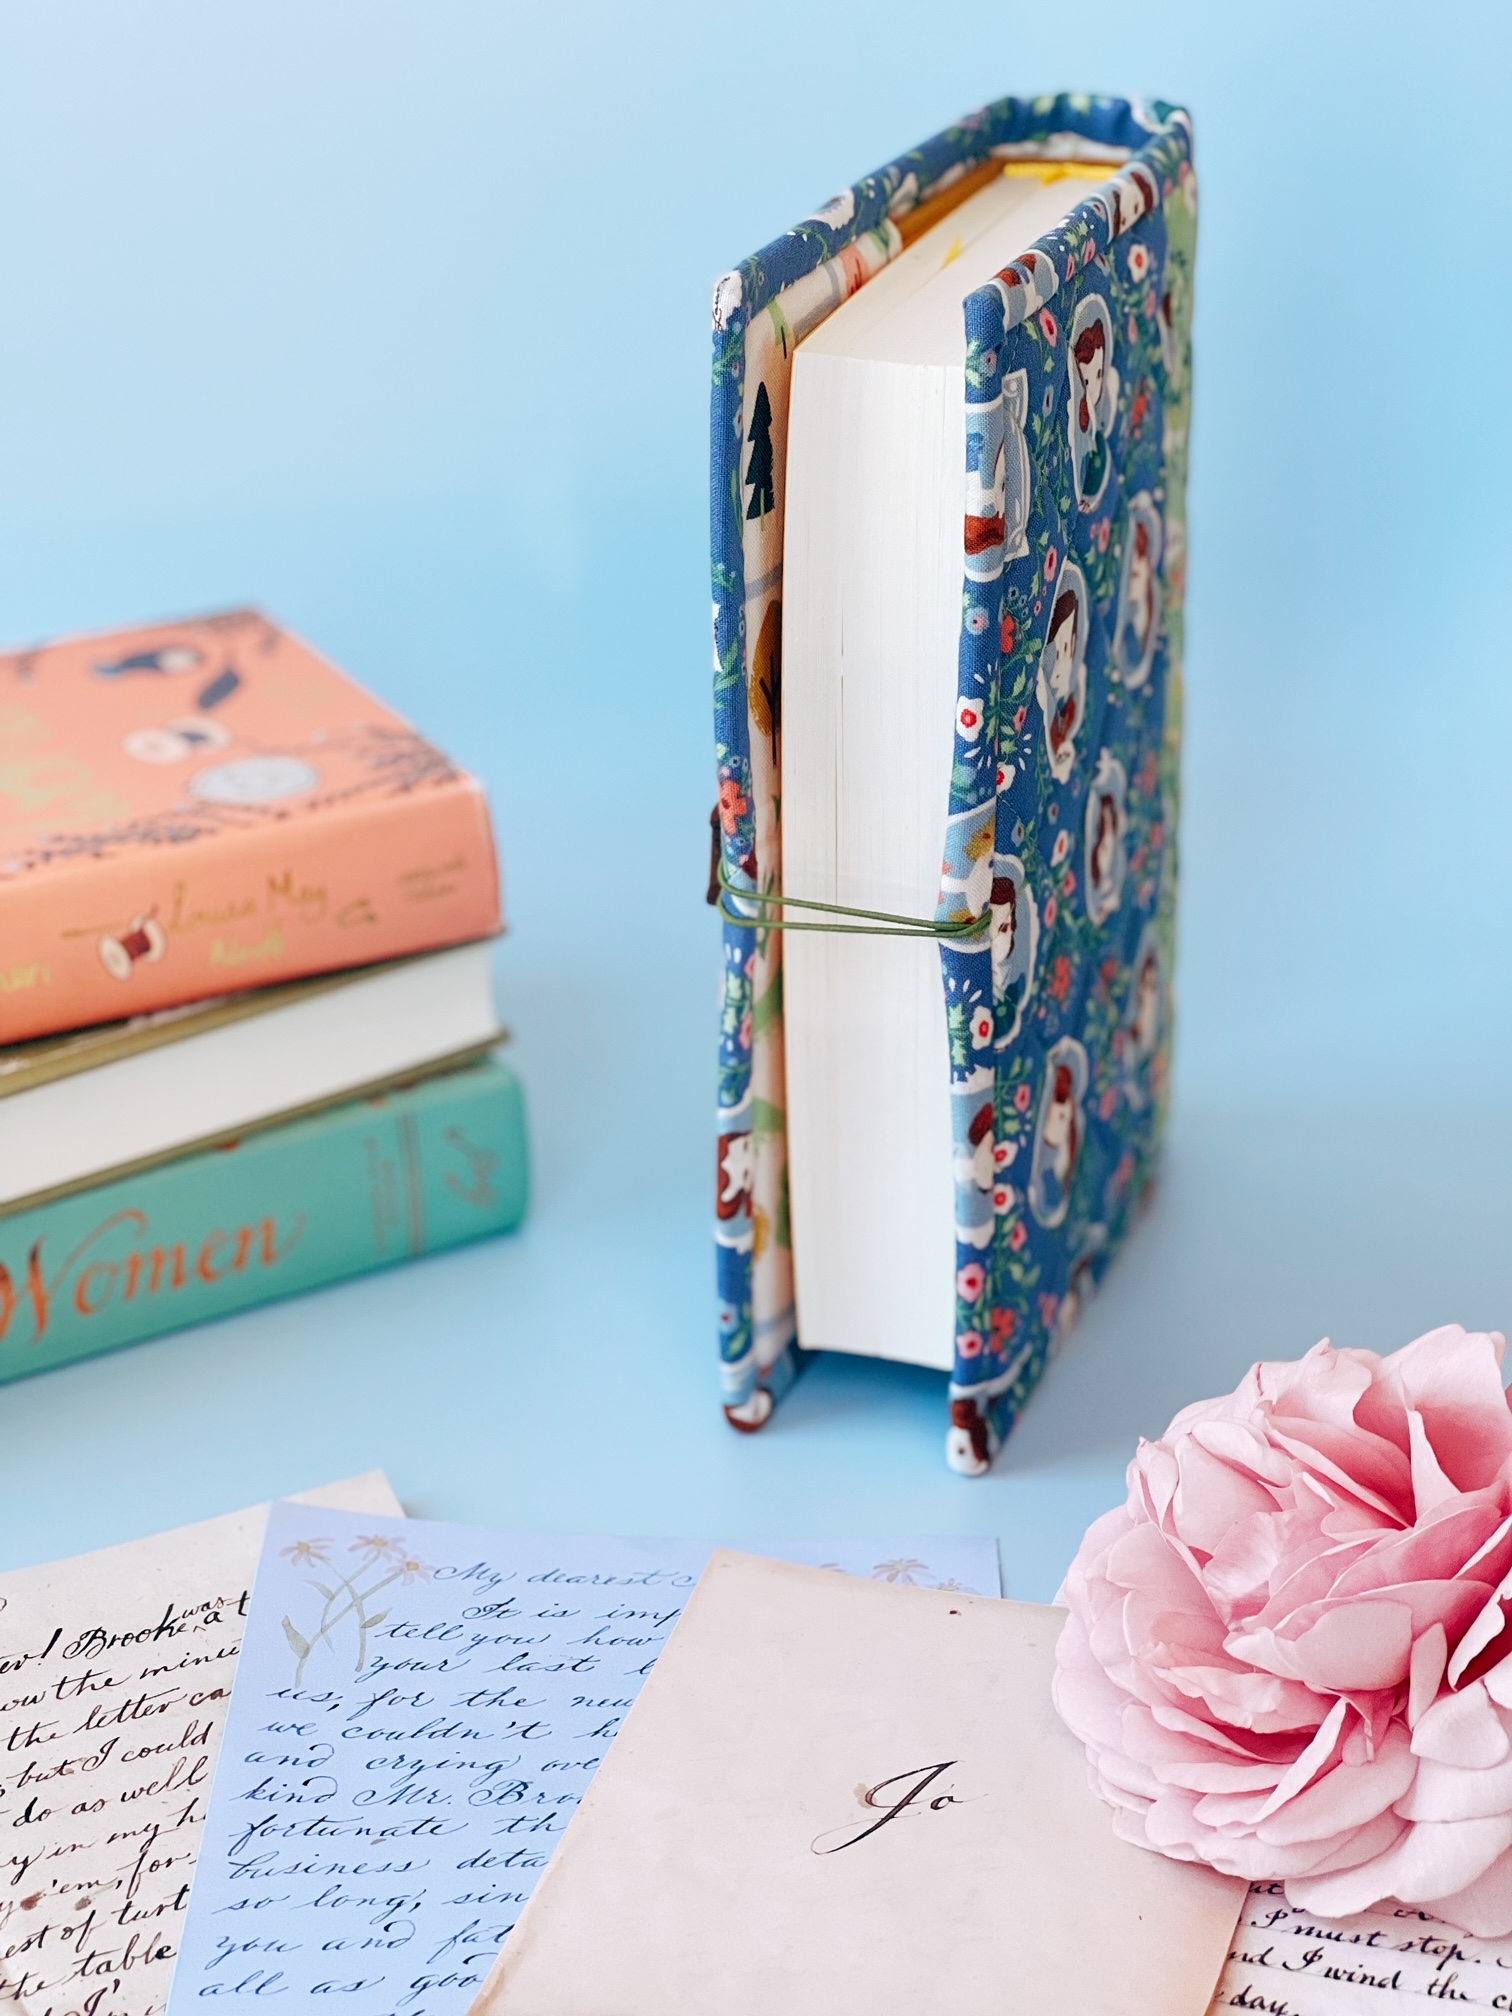
This is the lovely book cover I made using the portraits print from the collection. The book cover fits a 8.25" x 5.5" book. You can easily adjust the sizing to meet your book size needs.
Book Cover Tutorial:
You will need the following materials and tools -
One cotton fat quarter (for the inside and inside pockets), two cotton fat eights (for the front, back, and spine, in different prints), one cotton 1/4" yard for the binding, one fat eighth of fusible interfacing, and one fat quarter of foam interfacing (I used Annie's foam interfacing for this project)
Button embellishment and a 6" piece of elastic
You will need to cut the following:
Cut two 5" x 9 1/2" cotton print (for the front and back cover)
Cut one 4 3/4" x 9 1/2" cotton print (for the spine)
Cut one 13.75" x 9 1/2" foam interfacing (for the body)
Cut one 13.75" x 9 1/2" cotton print (for the inside)
Cut two 6 1/2" x 9" cotton prints and two 6 1/2" x 9" fusible interfacings
Cut one 46" x 2 1/4" for the binding (cut from the 1/4" yard of fabric, if cutting from a fat quarter, you can just two pieces to make a 46" x 2 1/4" binding strip and trim accordingly)
seam allowance. Finished size of the book cover is 13" x 9" open laying flat
Steps:
Step 1:
Attach the front and back cover pieces (5" x 9 1/2"
cotton prints) to the spine piece
(4 3/4" x 9 1/2" cotton print). With right side facing
out, lay the spine piece down. Next, with wrong side facing out, lay
the back cover on top of the spine. Sew along the leftside seam. Open and press
the seam open. Repeat for the right side, with wrong side facing out, lay
the front cover piece on top of the spine (right side of spine should be
facing out), and sew along the right-side seam. Open and press the
seam.
Pieces sewn together
Step 2:
Attach the foam interfacing to the back of the cover piece. With right side facing out, attach the 13.75" x 9 1/2" inner cotton piece to the backside of the 13.75" x 9 1/2" foam interfacing. It should look like a sandwich with cover on top, interfacing in the middle and inner piece on the bottom. You can add pins to secure the edges and quilt as desired. Once you are done quilting the piece trim to 13" x 9", making sure the front and back covers are even in size.
Sandwich the interfacing between the front cover and inner piece
It should look like this once quilted
Step 3:
Take the 6" elastic piece and fold in half. Attach the raw edges of the elastic to the back of the cover (this should be the left side of the piece), centering on the left middle side. Baste in place.
Add elastic to the left middle side
Step 4:
To create the two inner pockets (these hold the book in place),
starting with the left pocket, take a 6 1/2" x 9" cotton
print and adhere to a 6 1/2" x 9" fusible interfacing to
the backside of the cotton. Fold the piece in half lengthwise and sew a
seam close to the folded right edge. Repeat for the left side pocket
(the folded seam should be on the right side of this pocket, see pictures
below).
Left and right side pockets
Attach each side pocket piece the the inside of the cover. Starting with the left side, align the raw edges of the pocket to the left side covers raw edge. Clip in place and baste. Repeat for the right side.
Align the left and right sides onto the inside cover
At this point, I like to baste around all the edges. This just ensures a cleaner edge when attaching the binding. You can also add any extra embellishments to spine if desired.
Add optional embellishments to the spine
Step 5:
To make and attach the binding, take the 46" x 2 1/4" binding and fold in half lengthwise. Press all the way to the length of the binding with an iron to create the folded edge. Now, attach the binding. Starting with the left side of the cover, open the binding, and fold the right edge of the binding inward by 1/4" and press. Attach this to the bottom middle edge of the front cover and secure with a few clips in place. Sew a seam 1" from the right of the bindings folded seam, creating an 1" opening (making sure to backstitch, this will be the space to insert the tail end of the binding into).
Fold in bindings right edge by 1/4" and press with an iron
Attach the binding to the left side (back ) of the cover
Once you get to the first corner, create a mitered corner. Stop 1/4" before the corner, lift your sewing foot up and turn the fabric to a 45 degree angle and sew to the edge (I also backstitch). Now, take the piece off of the sewing machine. Take the binding and fold it up and finger press along the 45 degree seam. Next, fold the binding downwards, matching the folded seams to to the top of the corner edge. Clip in place and continue to sew a seam along the raw edge down to the next corner, continuing this same method to miter each of the remaining corners (see pictures below).
45 degree seam
Press the binding up along the 45 degree seam
Turn the binding downward, matching the folded seam to the top edge corner, clip in place and continue to sew a seam along the raw edge
Fold the binding over and hand sew or machine sew the binding down. Once you get to the end of the binding, stop about 1" from the end (take any clips out you have in place). Trim down the binding to fit into the beginning 1" opening you left in the beginning and insert the tail into the opening and clip back into place. Continue sewing the rest of the binding in place.
Trim tail and insert into opening
Insert tail and continue to sew binding down
Step 6:
Attach the button to front of the cover (this should be the right side), centering the button on the middle right side edge making sure the elastic fits accordingly around the button.
Add the button to the right side of the cover
You are now done!
Finished Book Cover
I hope you enjoyed this tutorial. I would love to see your finished Book Covers. Please use the hashtag #creamcraftgoodsbook on Instagram. Little Women by Jill Howarth is arriving in stores now, so check your favorite fabric/quilt shop to see if they carry it.

.JPG)
.JPG)
.JPG)
.JPG)


