
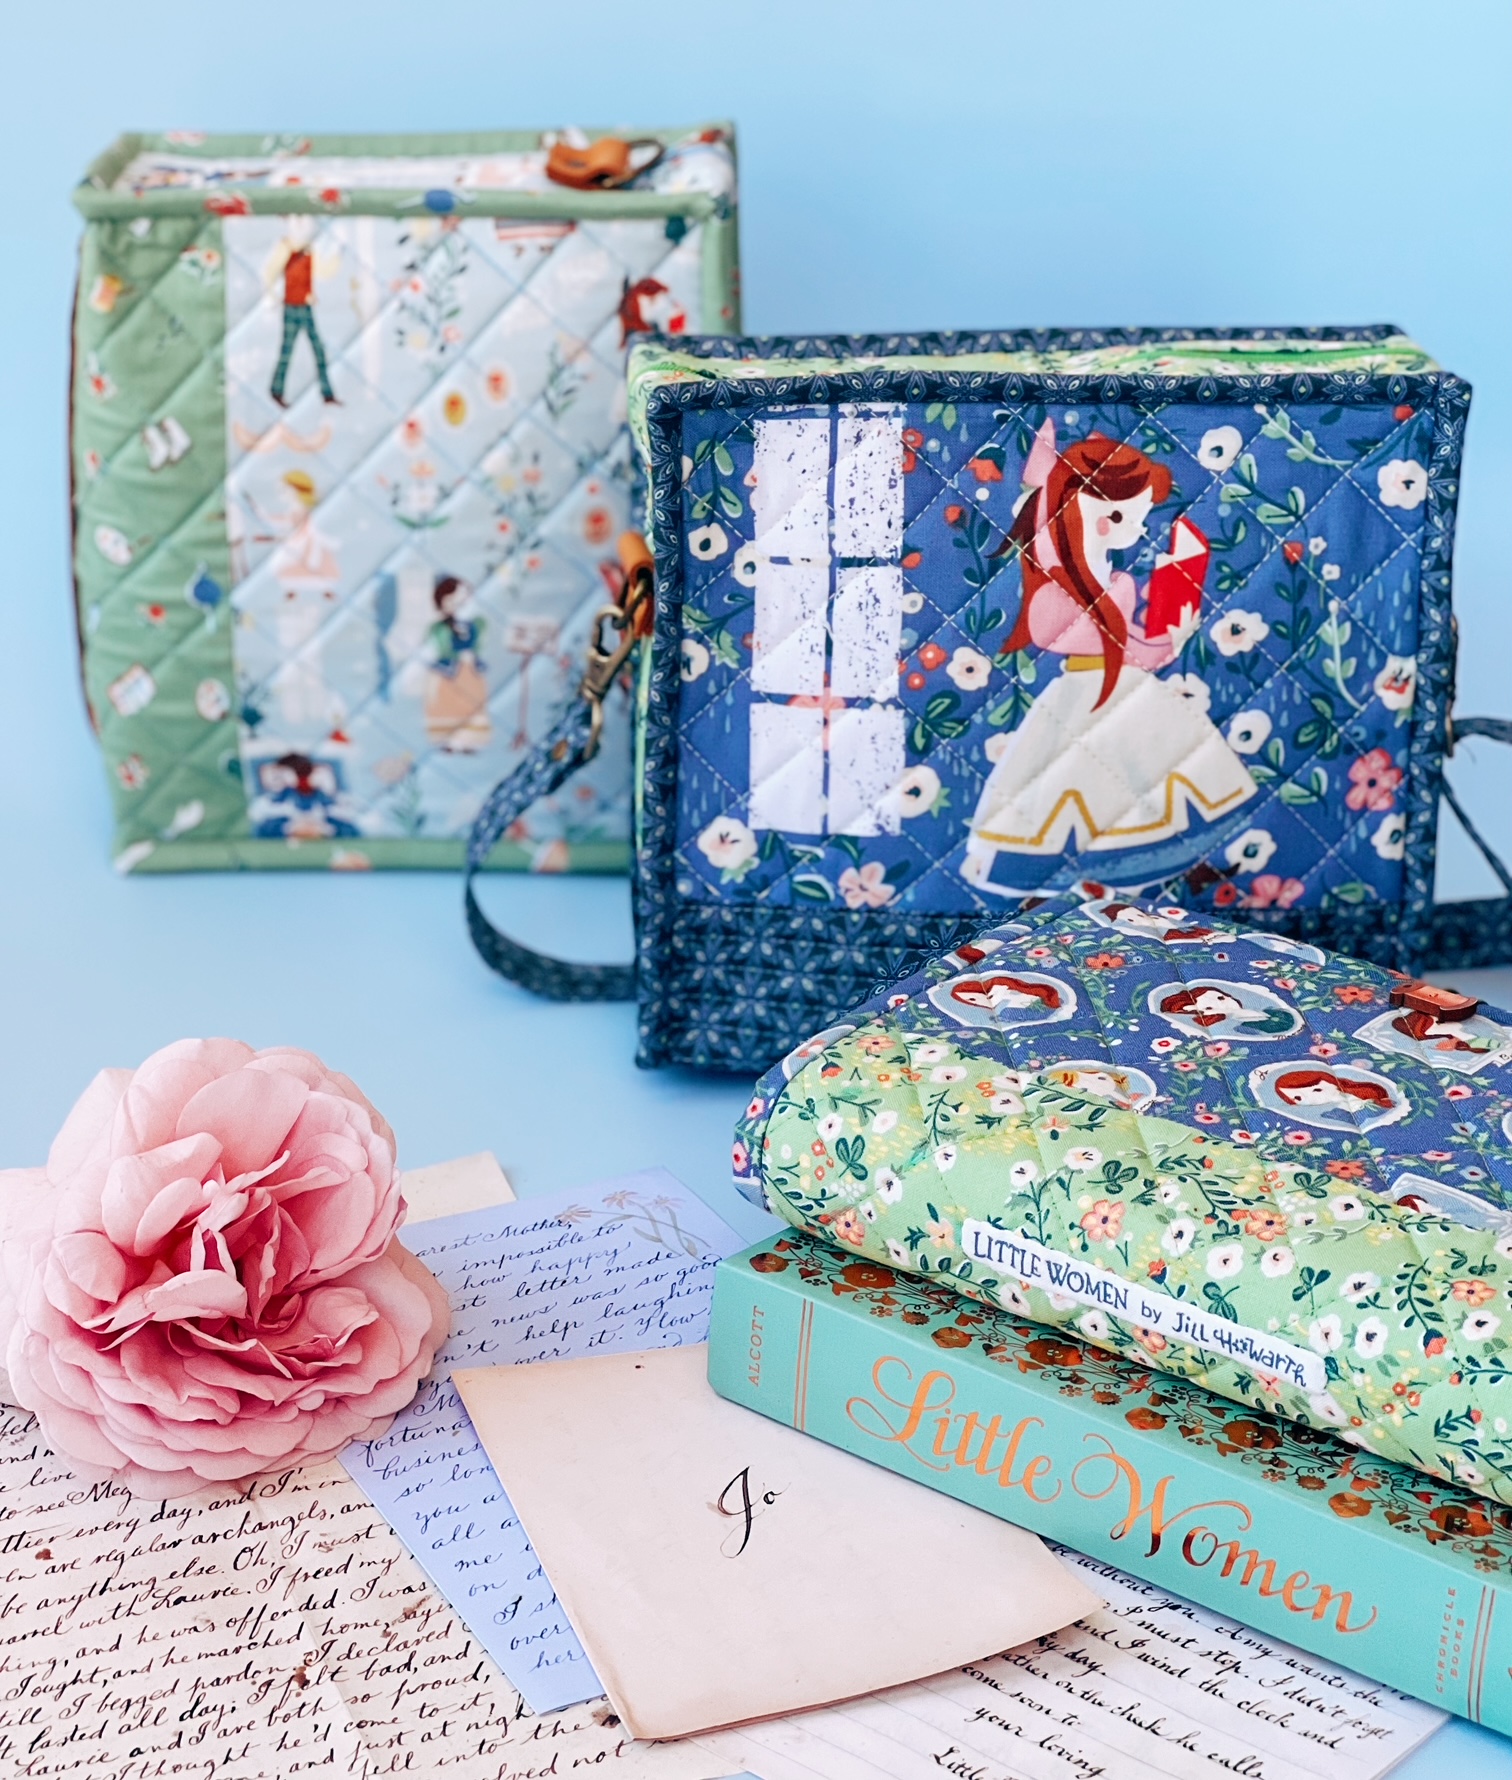
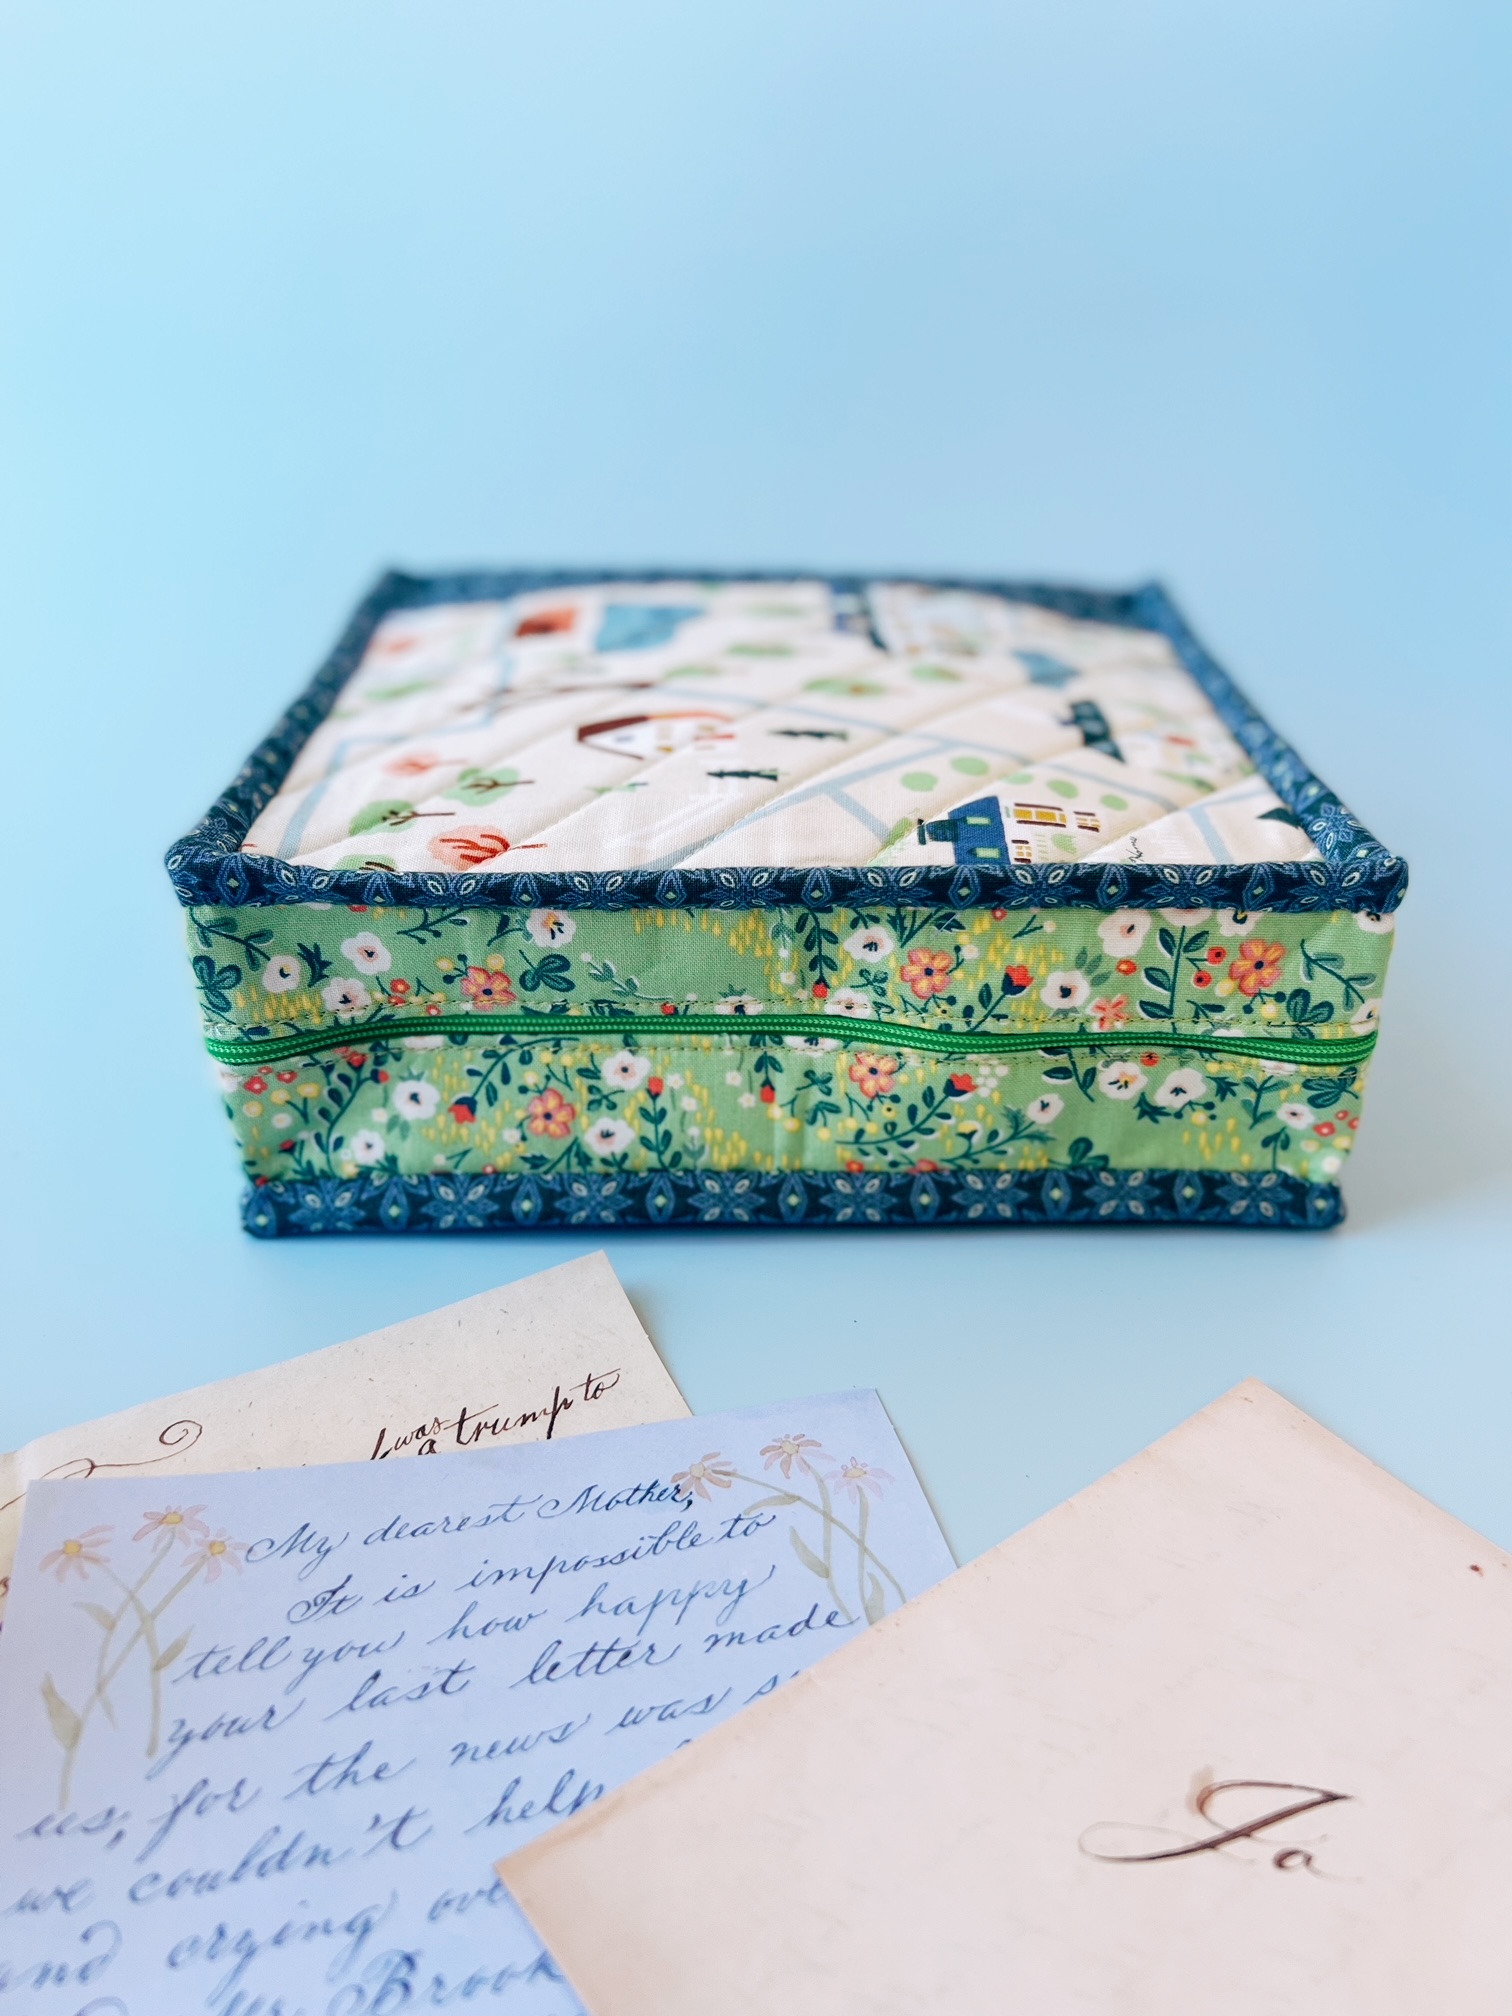
Hi friends! I’m so excited to share my latest project creating with this adorable new fabric line – Little Women by Jill Howarth for Riley Blake Designs! Jill's take on classic stories is always unique, sweet, and just plain cute! She sweetly illustrates the main characters and scenery to perfection, while adding her own creative spin.
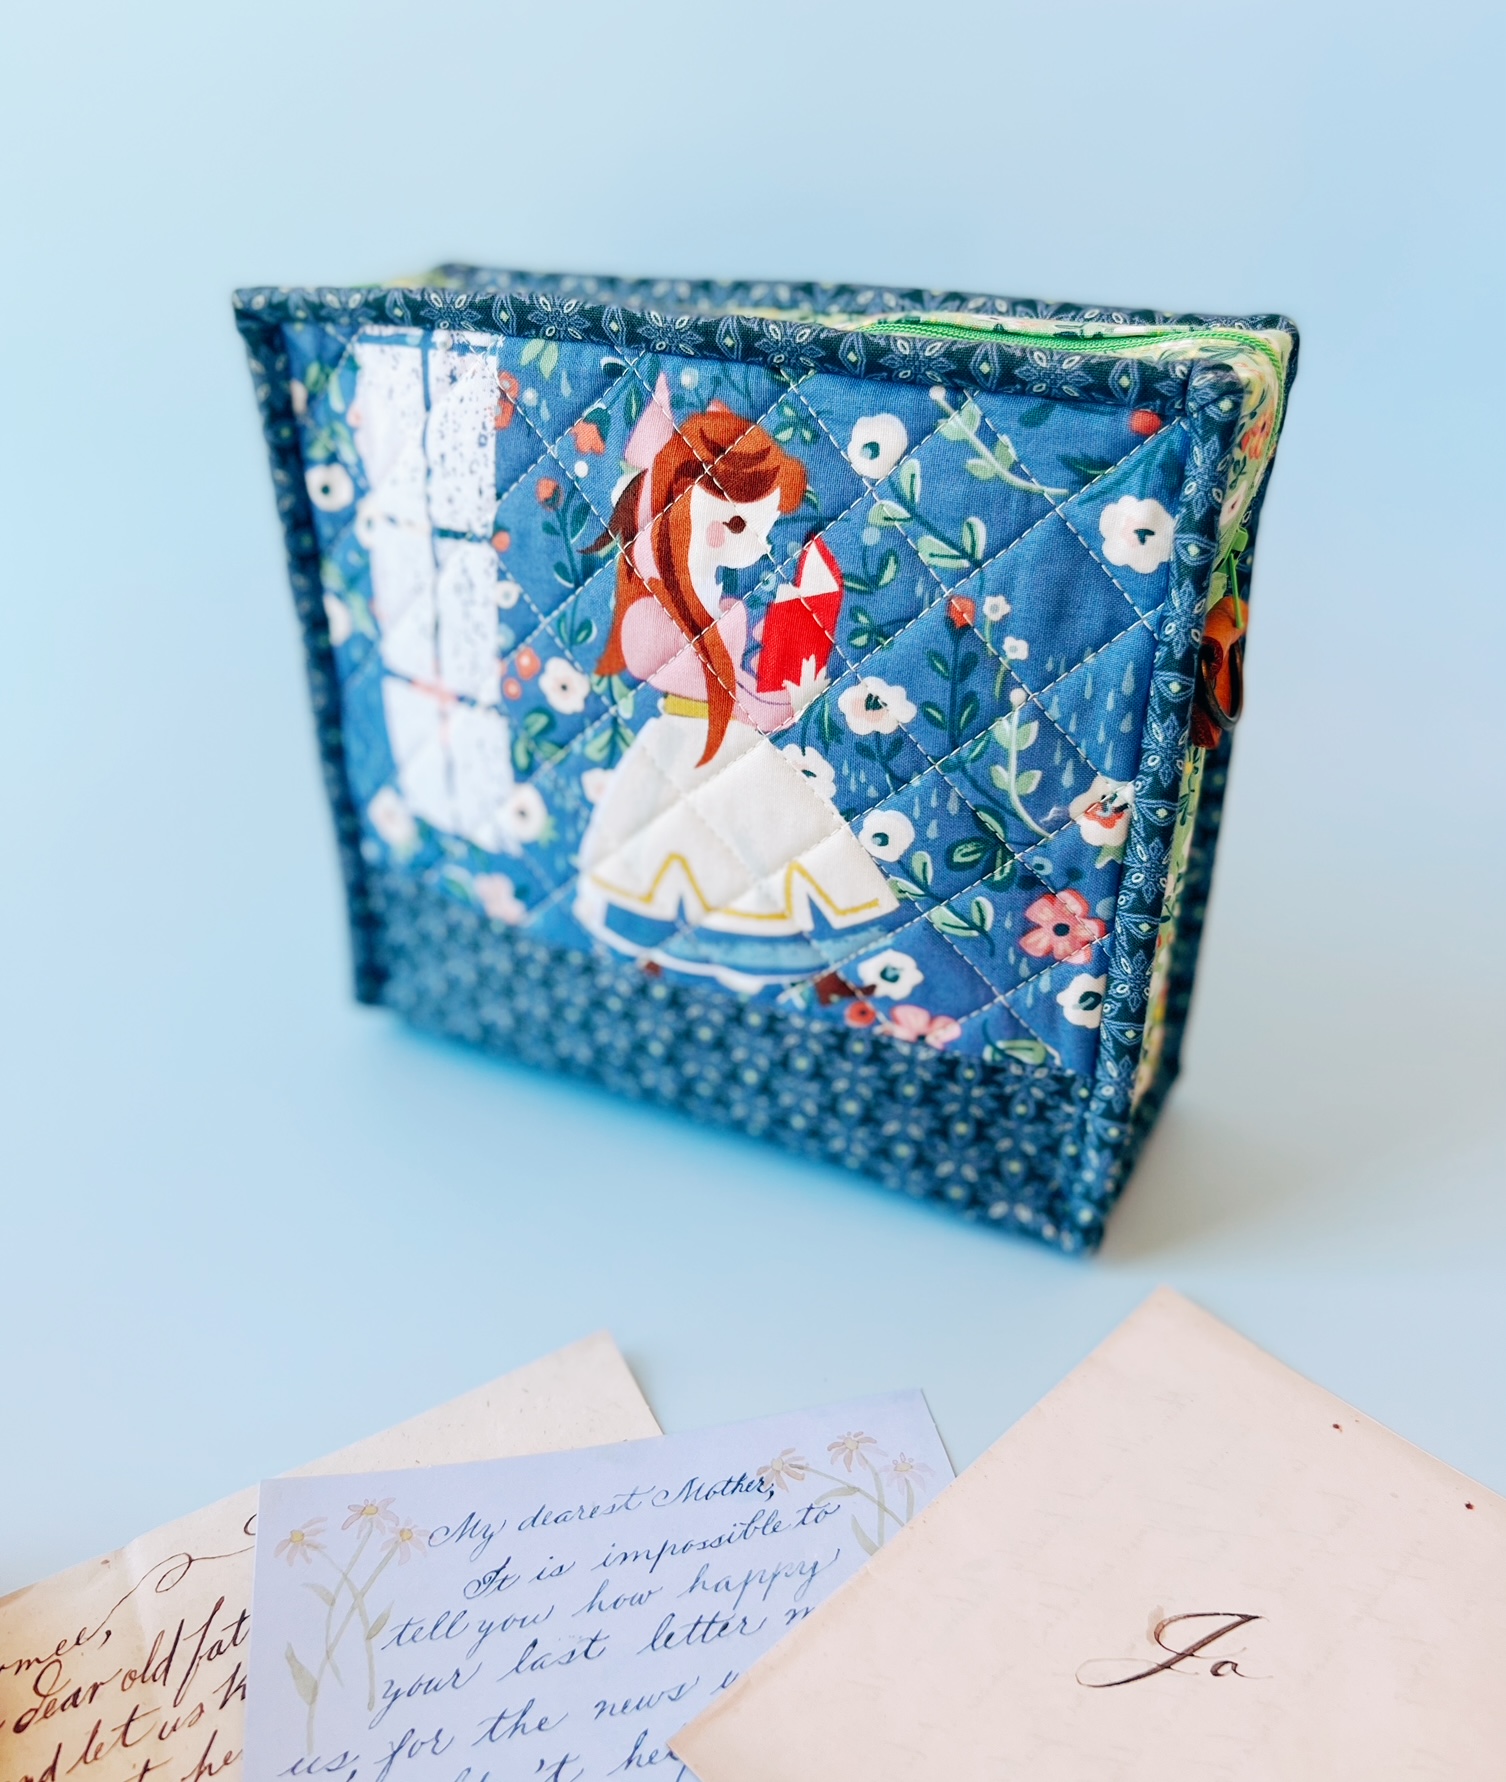
For this project, I wanted to create a something that complemented her story, so what better way than in books! This is my take on a book bag, making it into a Book Bag Purse. I created a book style purse using main character prints and complemented it with Jill’s beautiful floral, pattern, and notion prints. I added leather elements and metal hardware for the handle and it also has a detachable bag strap.
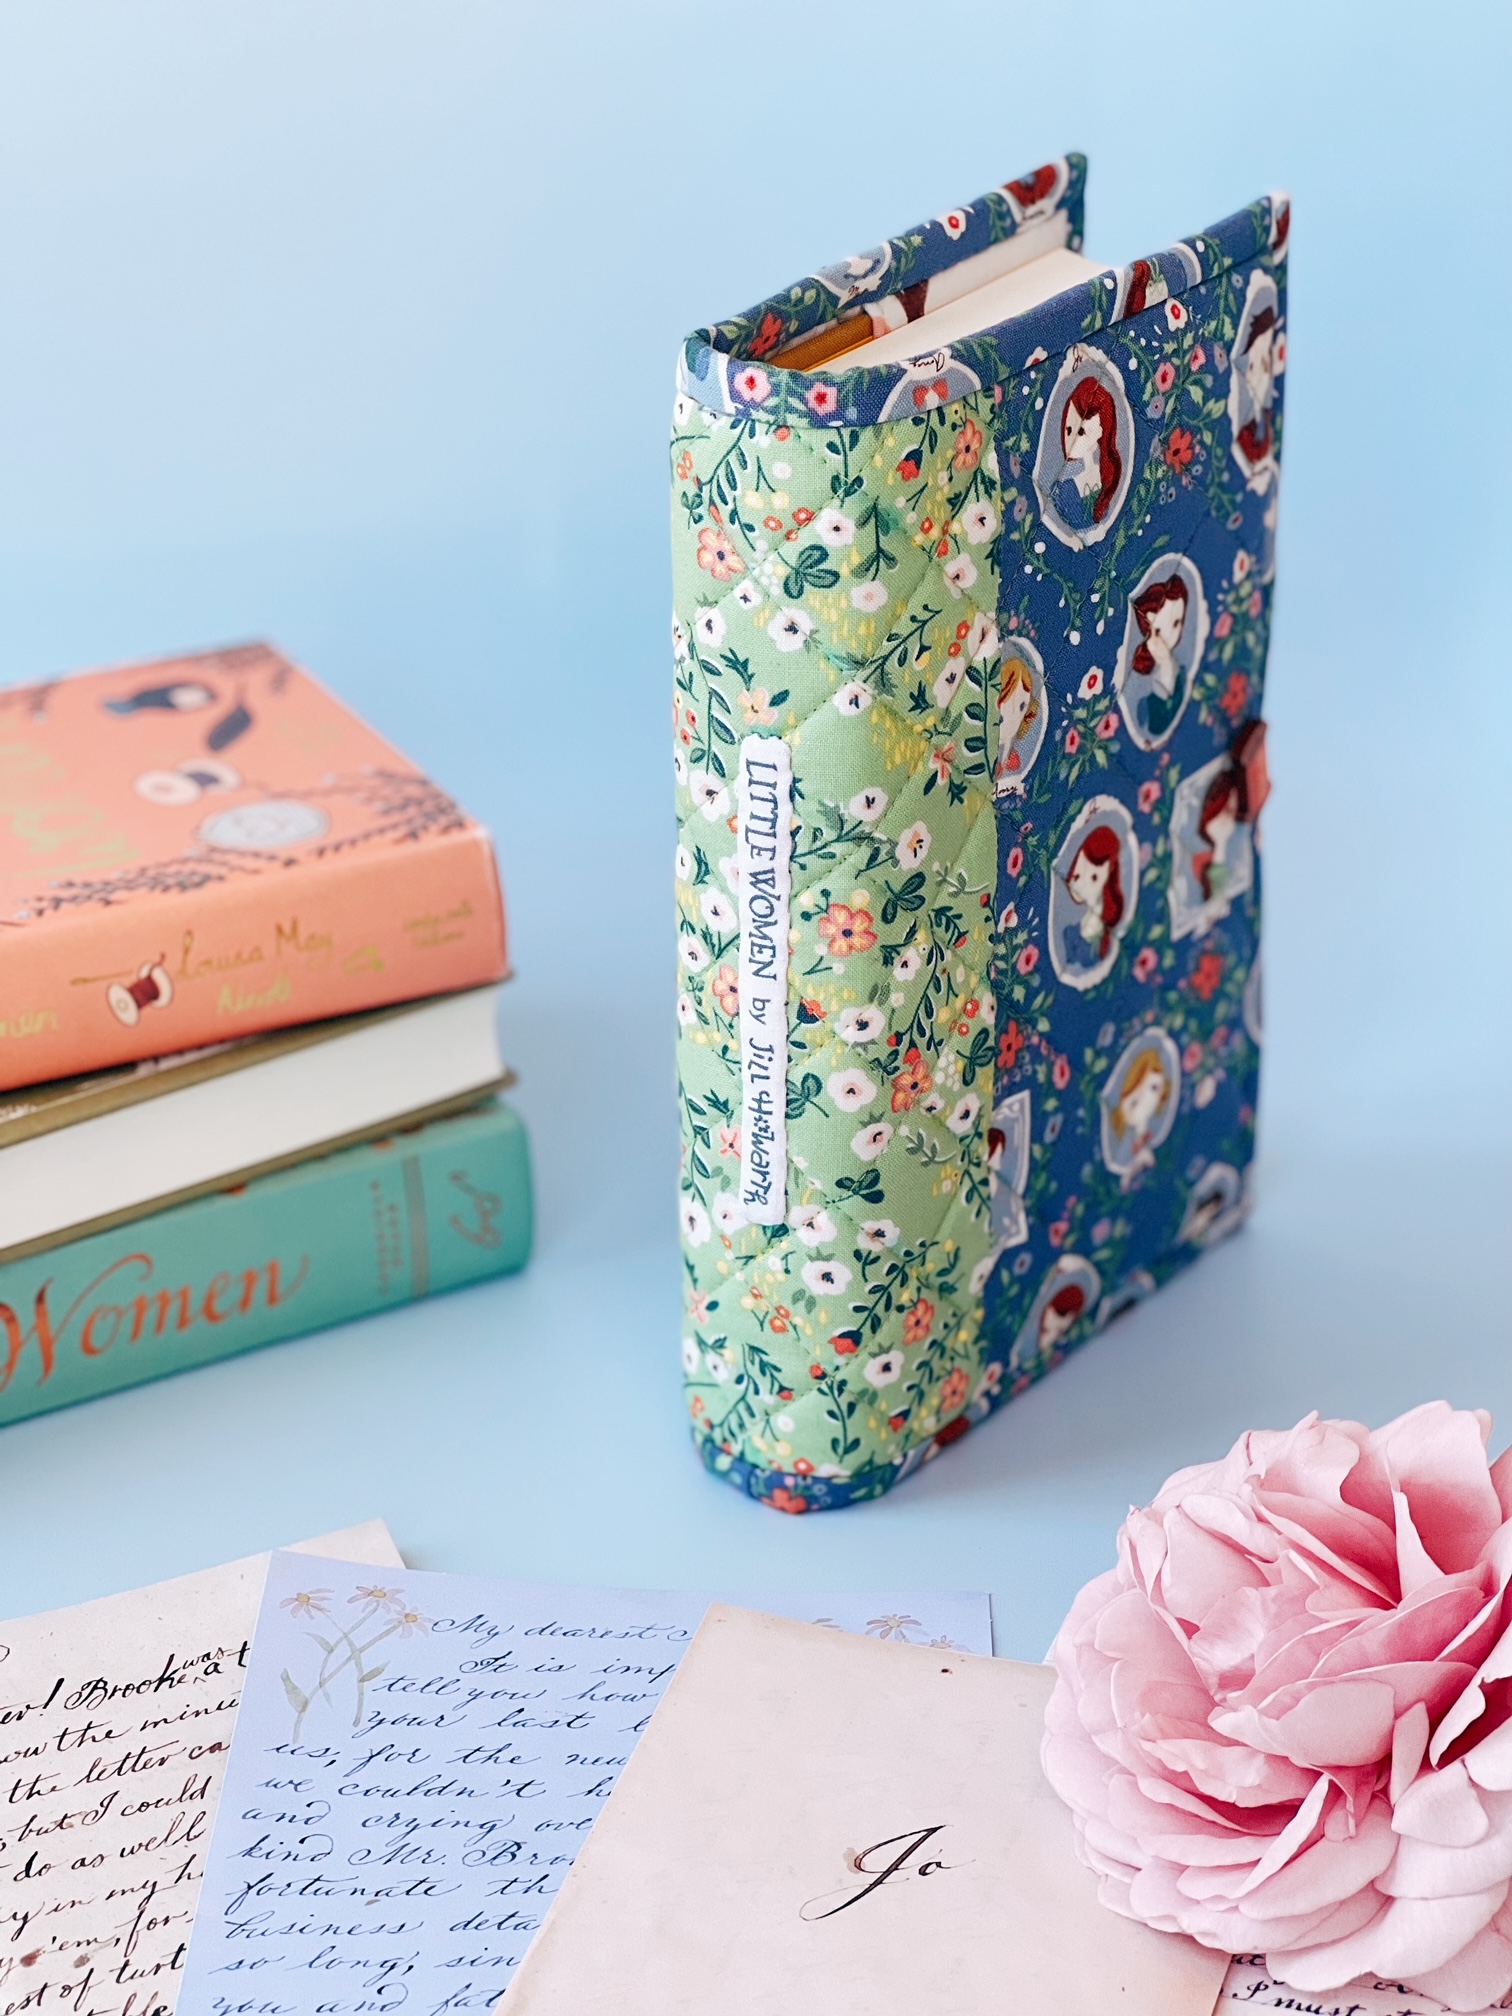
I also made a pretty, useful book cover, which surprise, is a free tutorial down below! I love making book covers for special books I collect or it would even make a beautiful gift to give to one who loves collecting or reading books too.
Book Bag Purse:
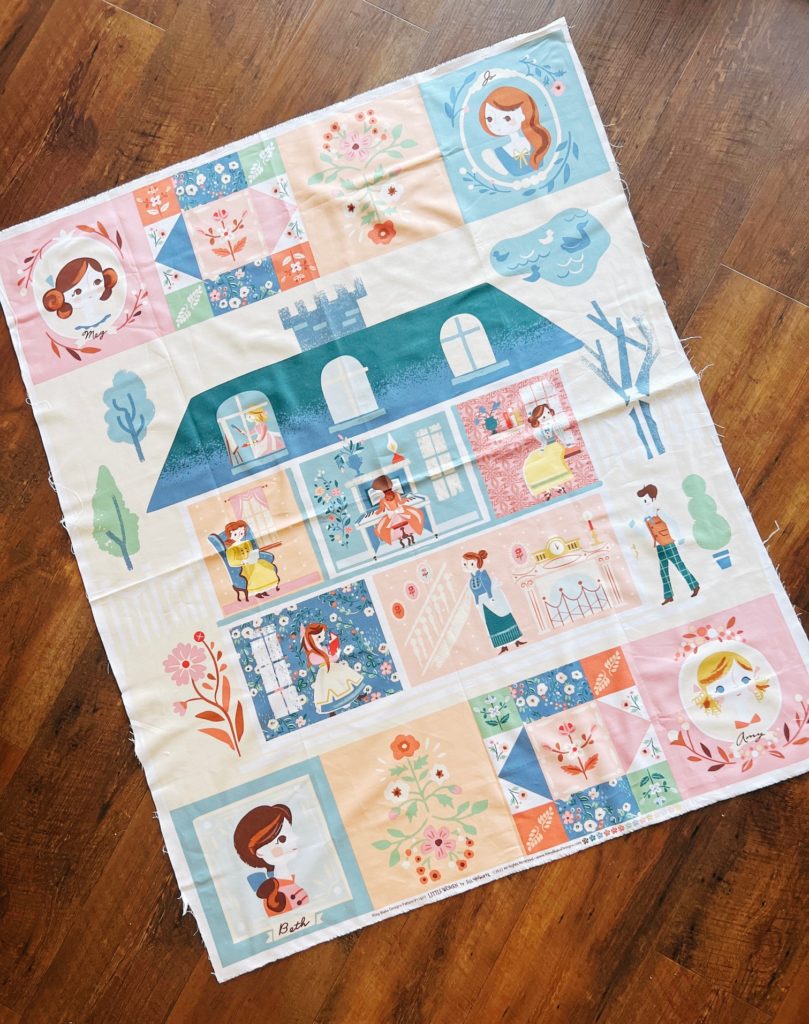
I used the the lovely panel in this collection and fussy cut an image for the book bag cover. You can do so many things with a panel - create a quilt or cut it up to make more projects.
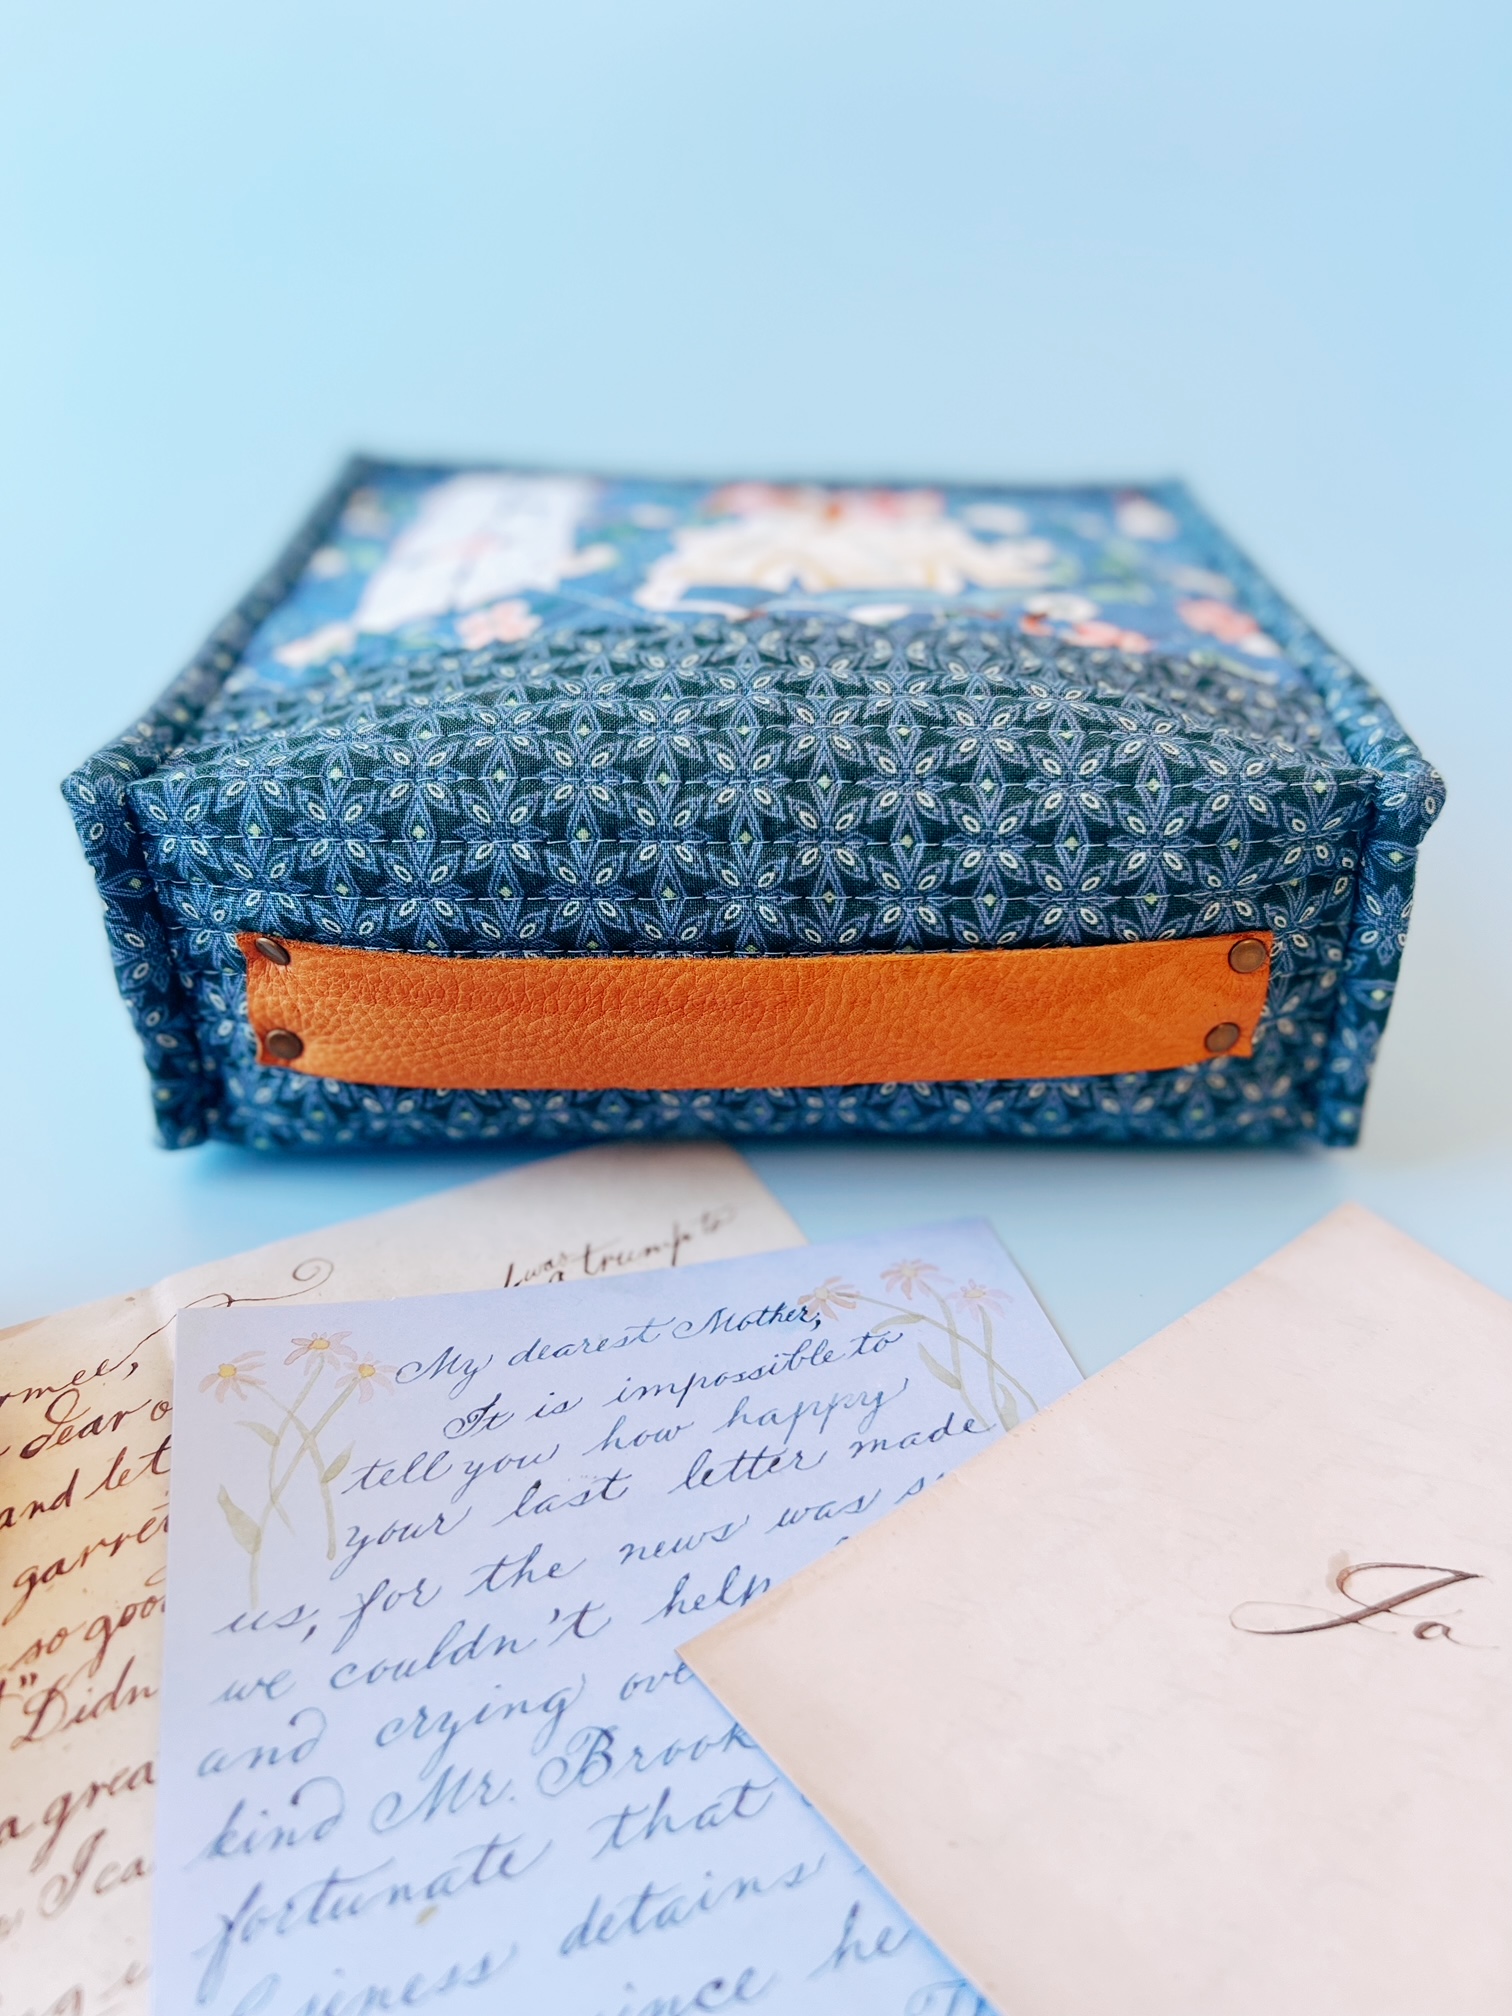

I used leather and metal hardware for the handle and bag strap. I added a zipper to the top of the bag to hold everything together.
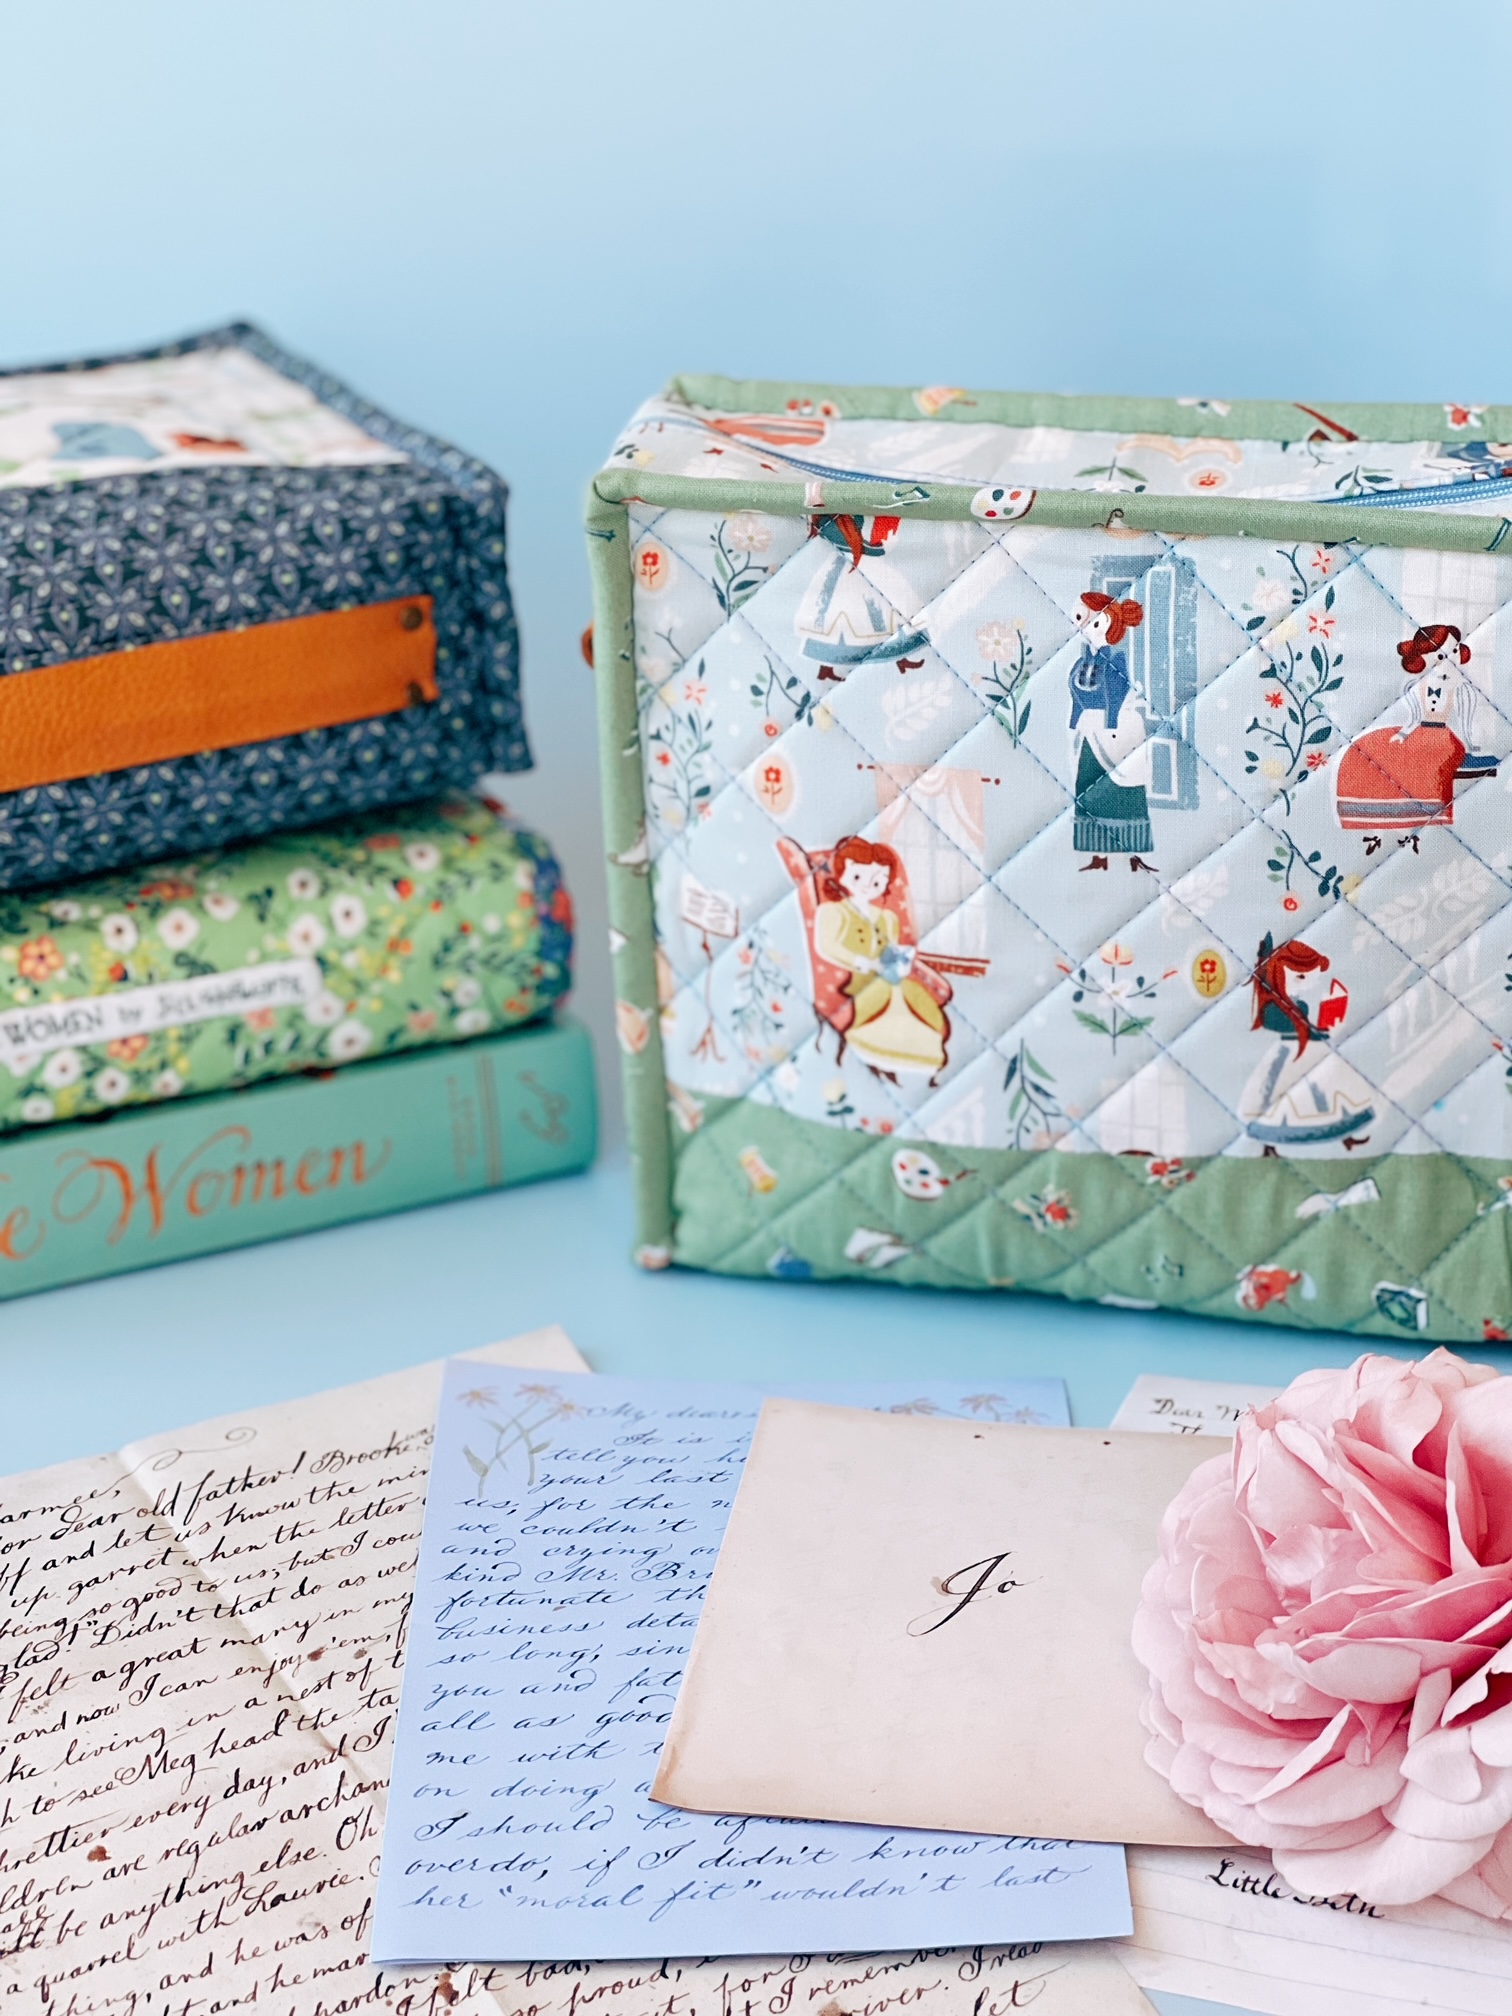
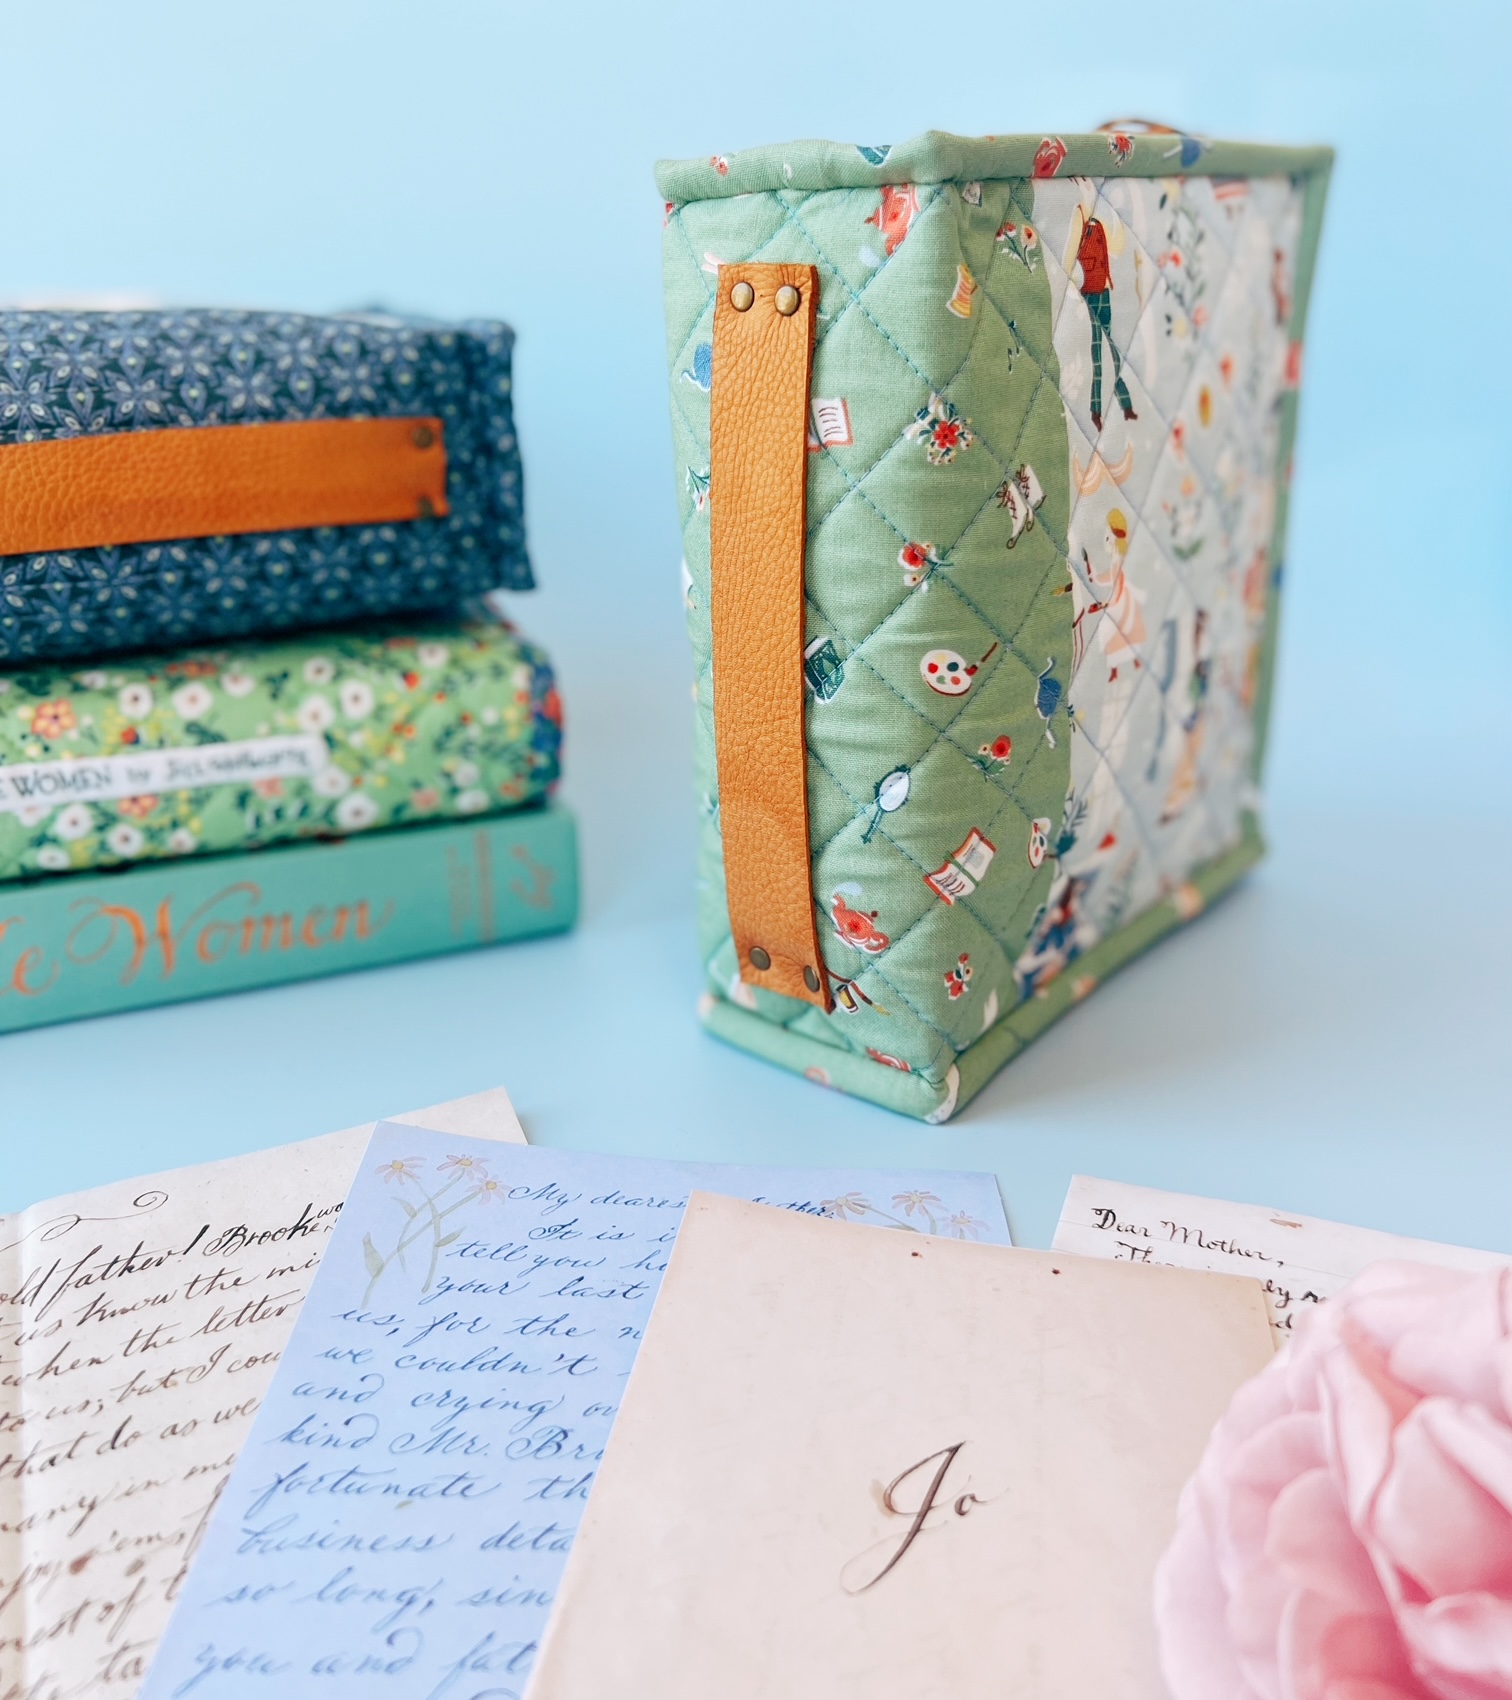
It's hard to chose a favorite print in this collection, so I ended up making two bags to showcase the fabric!
Book Cover:
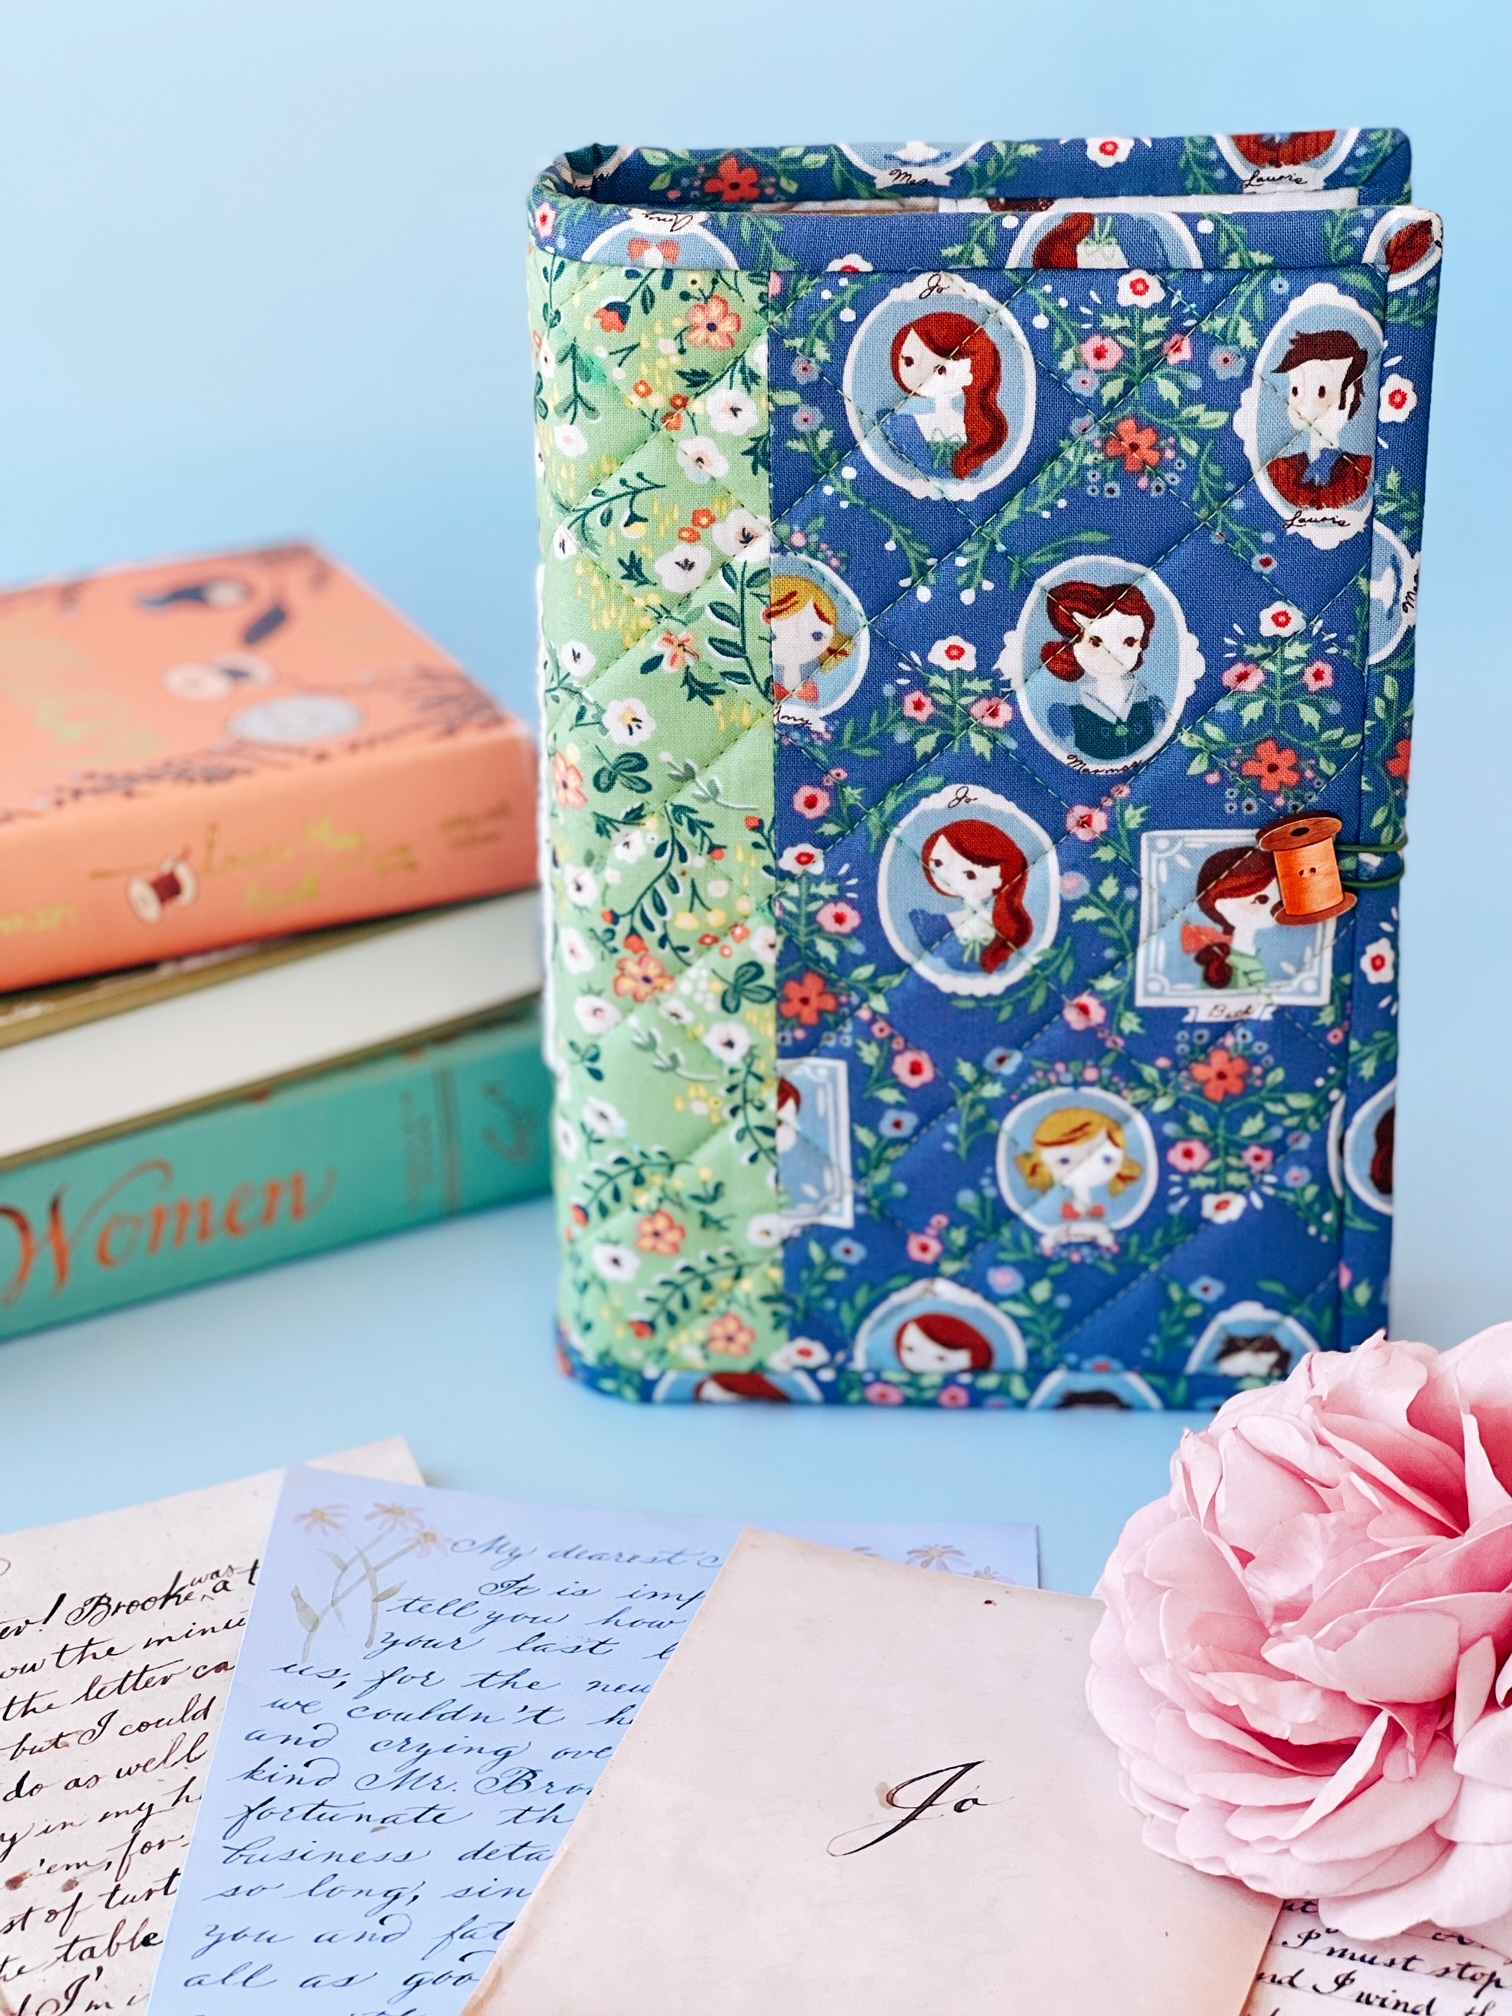
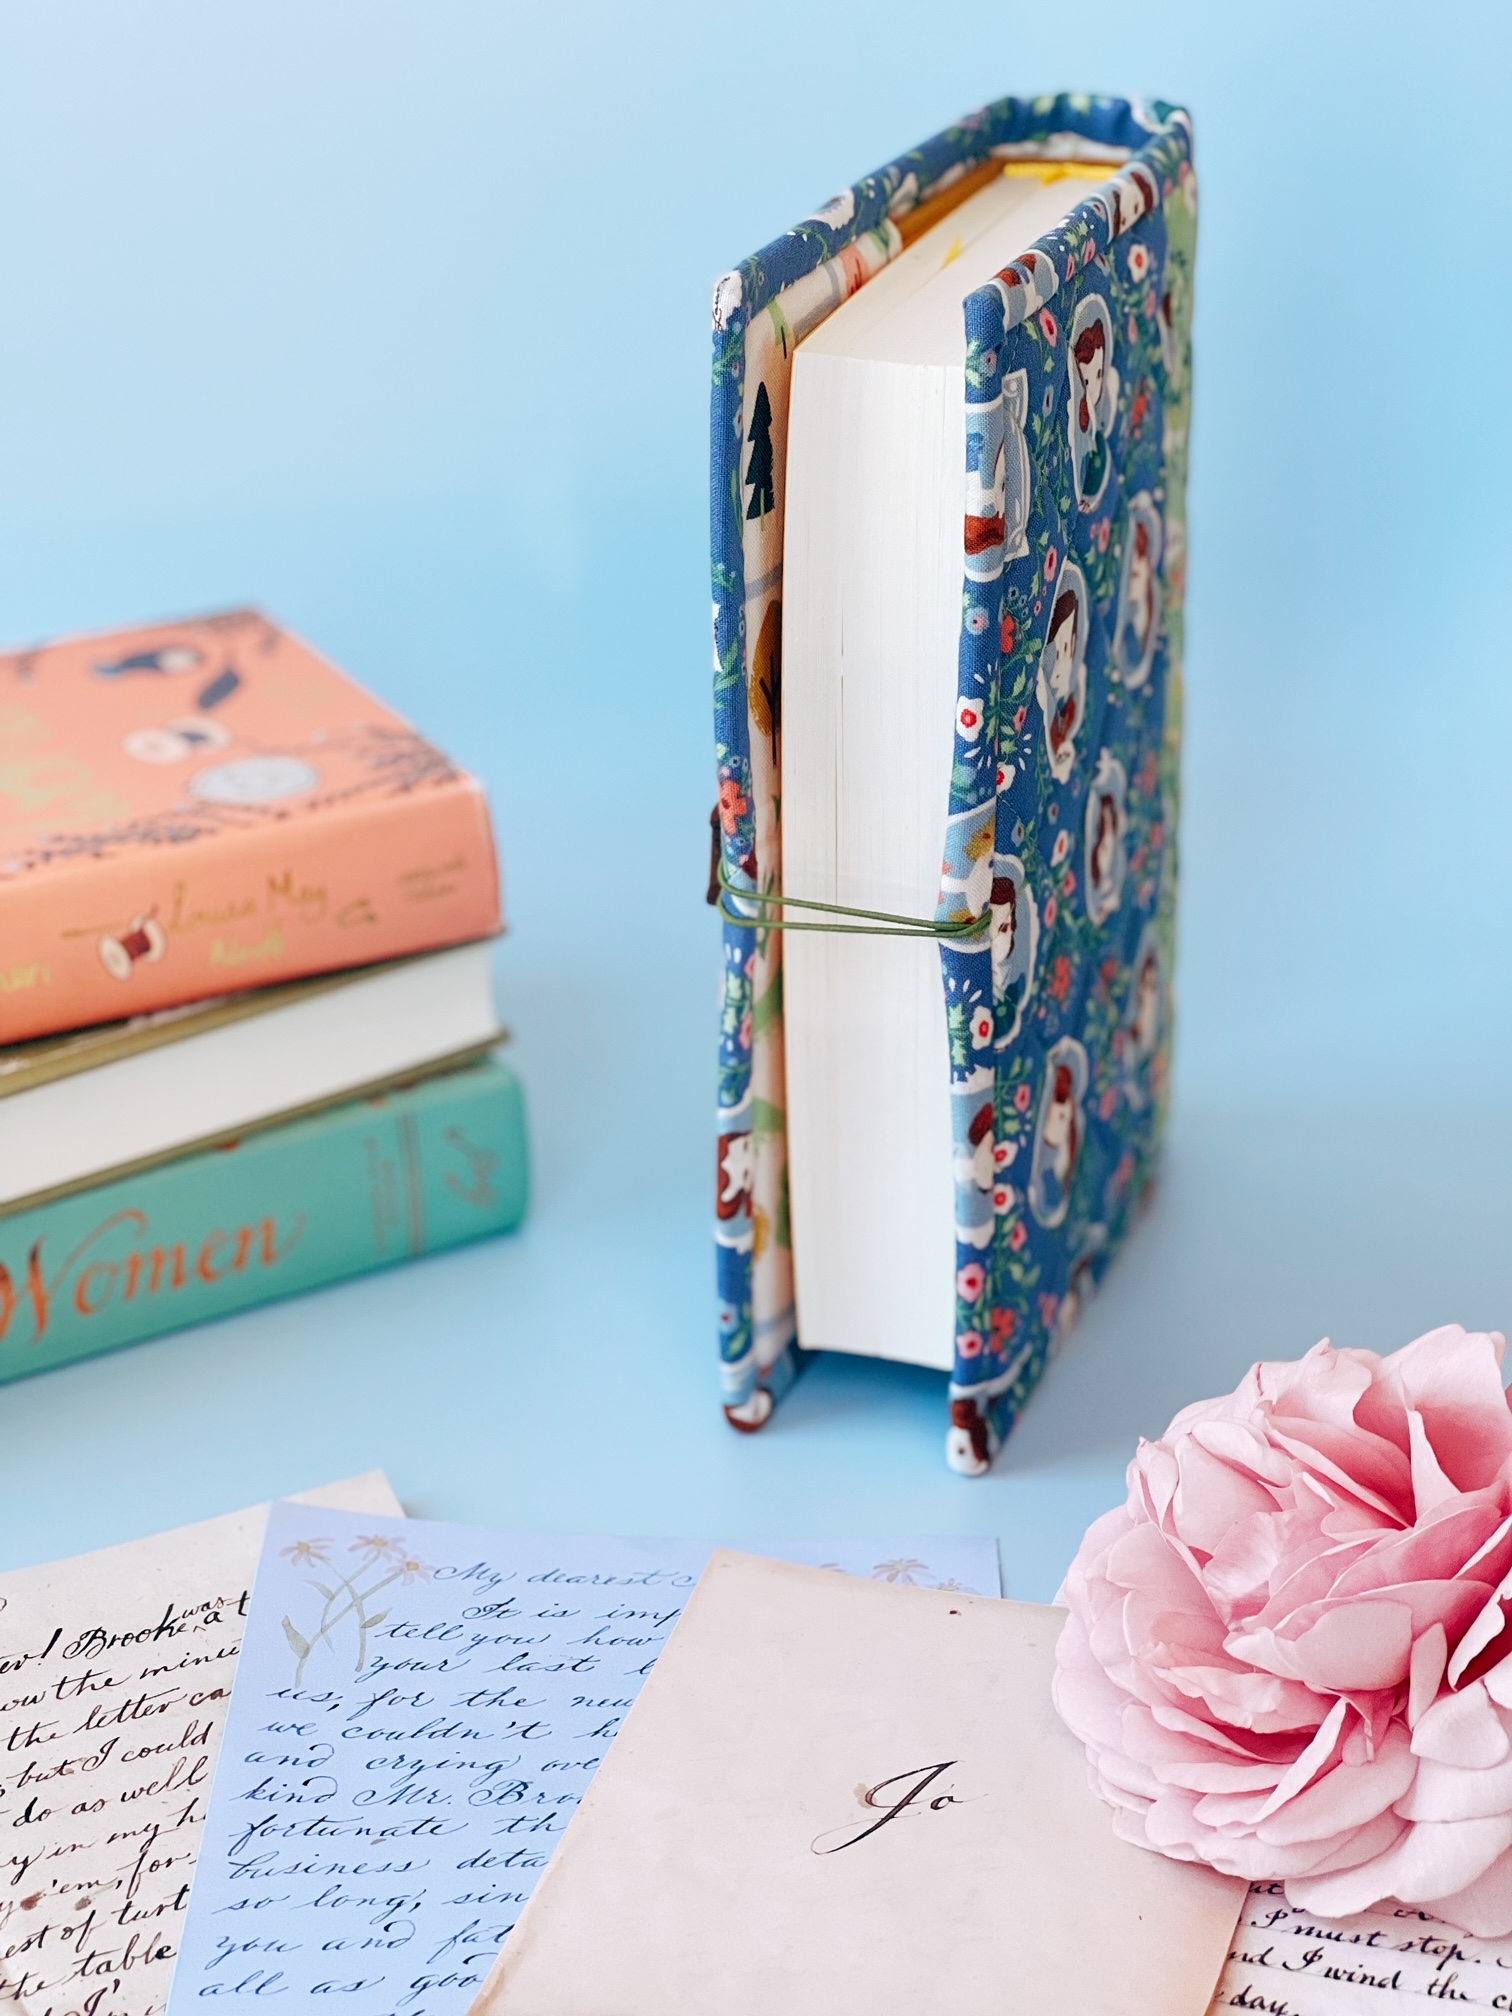
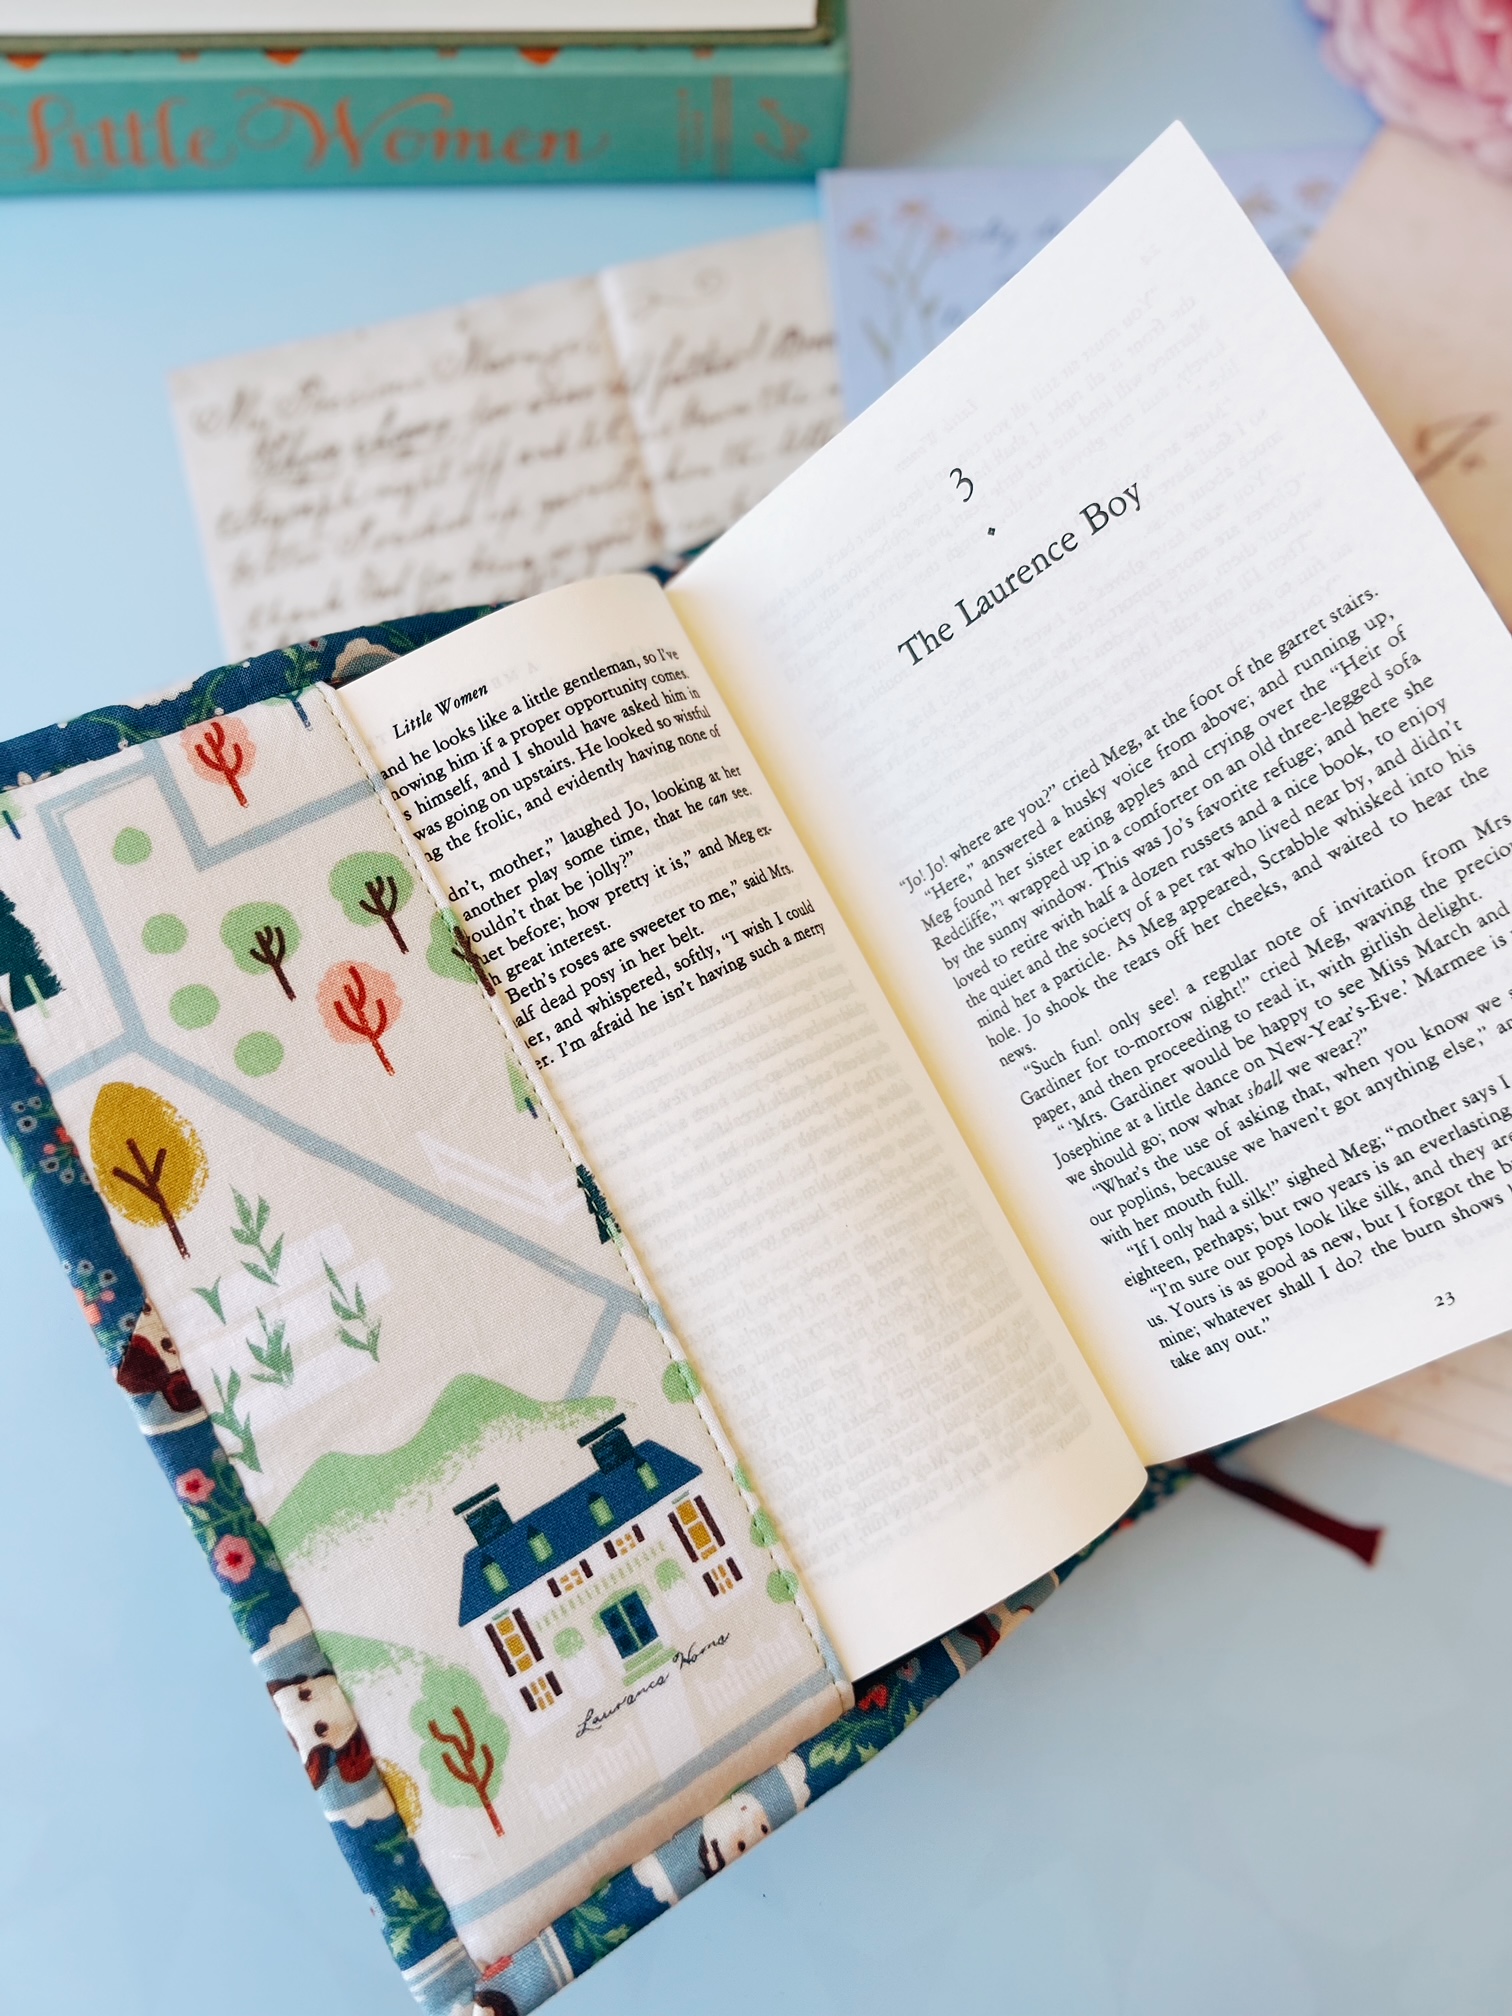
This is the lovely book cover I made using the portraits print from the collection. The book cover fits a 8.25" x 5.5" book. You can easily adjust the sizing to meet your book size needs.

Book Cover Tutorial:
You will need the following materials and tools -
- One cotton fat quarter (for the inside and inside pockets), two cotton fat eights (for the front, back, and spine, in different prints), one cotton 1/4" yard for the binding, one fat eighth of fusible interfacing, and one fat quarter of foam interfacing (I used Annie's foam interfacing for this project)
- Button embellishment and a 6" piece of elastic
- Cut two 5" x 9 1/2" cotton print (for the front and back cover)
- Cut one 4 3/4" x 9 1/2" cotton print (for the spine)
- Cut one 13.75" x 9 1/2" foam interfacing (for the body)
- Cut one 13.75" x 9 1/2" cotton print (for the inside)
- Cut two 6 1/2" x 9" cotton prints and two 6 1/2" x 9" fusible interfacings
- Cut one 46" x 2 1/4" for the binding (cut from the 1/4" yard of fabric, if cutting from a fat quarter, you can just two pieces to make a 46" x 2 1/4" binding strip and trim accordingly)

 |
| Pieces sewn together |
Step 2:
 |
| Sandwich the interfacing between the front cover and inner piece |
 |
| It should look like this once quilted |
 |
| Add elastic to the left middle side |

 |
| Left and right side pockets |
 |
| Align the left and right sides onto the inside cover |
At this point, I like to baste around all the edges. This just ensures a cleaner edge when attaching the binding. You can also add any extra embellishments to spine if desired.
 |
| Add optional embellishments to the spine |
Step 5:
 |
| Fold in bindings right edge by 1/4" and press with an iron |
 |
| Attach the binding to the left side (back ) of the cover |
Once you get to the first corner, create a mitered corner. Stop 1/4" before the corner, lift your sewing foot up and turn the fabric to a 45 degree angle and sew to the edge (I also backstitch). Now, take the piece off of the sewing machine. Take the binding and fold it up and finger press along the 45 degree seam. Next, fold the binding downwards, matching the folded seams to to the top of the corner edge. Clip in place and continue to sew a seam along the raw edge down to the next corner, continuing this same method to miter each of the remaining corners (see pictures below).
 |
| 45 degree seam |
 |
| Press the binding up along the 45 degree seam |
 |
| Turn the binding downward, matching the folded seam to the top edge corner, clip in place and continue to sew a seam along the raw edge |

 |
| Trim tail and insert into opening |
 |
| Insert tail and continue to sew binding down |
Step 6:
 |
| Add the button to the right side of the cover |
You are now done!
 |
| Finished Book Cover |